


How to build a simple raised garden bed for beginner vegetable growers?

Starting your own vegetable garden can be incredibly rewarding, and a raised garden bed is often the perfect entry point for beginners. They offer numerous advantages over traditional in-ground gardens, making the process simpler, more manageable, and more successful. This guide will walk you through building a basic, yet highly effective, raised garden bed that will have you growing fresh produce in no time.
Benefits of a Raised Garden Bed
Raised garden beds provide an ideal environment for growing vegetables, especially for those new to gardening. They allow for superior drainage, preventing waterlogging that can harm plant roots. You gain complete control over your soil composition, enabling you to create the perfect nutrient-rich blend specific to your plants’ needs. Additionally, raised beds warm up faster in spring, extending your growing season, and their elevated height reduces bending and kneeling, making gardening more accessible and enjoyable.

Gather Your Materials
For a standard 4×8 foot raised bed that is 11 inches deep, you will need:
- Two 2x6x8 foot untreated lumber boards
- Two 2x6x4 foot untreated lumber boards
- One 2x2x8 foot untreated lumber board (for corner braces, cut into four 11-inch pieces)
- 3-inch exterior wood screws (approximately 20-24)
- Hardware cloth or landscape fabric (optional, for weed suppression and critter control)
- A large quantity of good quality raised bed soil mix (approximately 15-20 cubic feet for an 11-inch deep 4×8 bed)
Tools You’ll Need
Having the right tools makes the job much easier and safer:
- Measuring tape
- Pencil or marker
- Circular saw or handsaw (if cutting lumber yourself)
- Power drill with Phillips head bit
- Level
- Safety glasses
- Gloves

Step-by-Step Construction Guide
1. Choose Your Location
Select a spot in your yard that receives at least 6-8 hours of direct sunlight per day. This is crucial for most vegetables. Ensure the area is relatively level and has good drainage.
2. Measure and Cut Your Lumber
If your lumber isn’t pre-cut, cut your 2×6 boards to the desired lengths (two 8-foot pieces and two 4-foot pieces for a 4×8 bed). Cut the 2×2 board into four 11-inch pieces to serve as internal corner supports.
3. Assemble the Frame
Lay out your four 2×6 boards on a flat surface to form a rectangle. The shorter 4-foot boards will fit between the longer 8-foot boards. Make sure all corners are flush. Using your drill, drive two 3-inch screws through the end of each long board into the end of the shorter board at each corner, securing them together.
4. Add Corner Supports (Recommended)
Once the basic frame is together, stand the 2x2x11 inch pieces inside each corner, flush with the top edge of the 2x6s. Drive screws from the outside of the 2×6 boards into the 2×2 supports. This significantly strengthens the bed structure and prevents bowing.

5. Prepare the Base
Once the frame is assembled and in its final location, you can line the bottom. If you have issues with weeds or burrowing pests, lay down a layer of hardware cloth (secured with staples) followed by landscape fabric. If neither is a concern, you can skip this step or just use landscape fabric to prevent weeds from growing up into your bed.
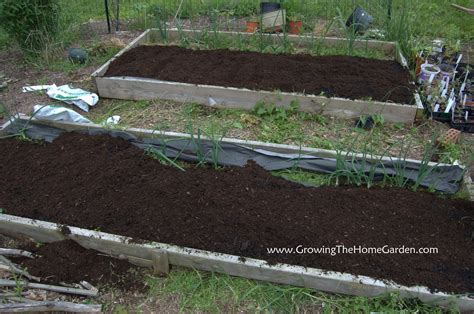
6. Fill Your Bed
This is where the magic happens! A common recommendation for filling raised beds is the “Hugelkultur” method (using logs, branches, and organic matter at the bottom), but for beginners, a simpler approach works just as well. Fill your bed with a high-quality raised bed soil mix. These mixes are specifically formulated for optimal drainage and nutrient retention. Avoid using dense garden soil from your yard as it compacts easily in a raised bed.
7. Plant Your Vegetables
Once your bed is full, it’s time to plant! Research the specific needs of the vegetables you wish to grow regarding spacing, sunlight, and water. Follow recommended planting distances to ensure each plant has enough room to thrive. Water thoroughly after planting.
Tips for Success
- Water Consistently: Raised beds can dry out faster than in-ground gardens. Check soil moisture daily, especially during hot weather.
- Mulch: Apply a layer of organic mulch (like straw or wood chips) around your plants to help retain moisture, suppress weeds, and regulate soil temperature.
- Fertilize: Even with good soil, your plants will benefit from regular feeding. Use an organic liquid fertilizer or incorporate compost throughout the growing season.
- Observe: Pay attention to your plants. Look for signs of pests, diseases, or nutrient deficiencies early on to address them before they become major problems.

Conclusion
Building a simple raised garden bed is an empowering DIY project that lays the foundation for a flourishing vegetable garden. With minimal effort and a few basic materials, you can create a productive space that yields fresh, healthy produce for seasons to come. Enjoy the process of growing your own food, and happy gardening!


