


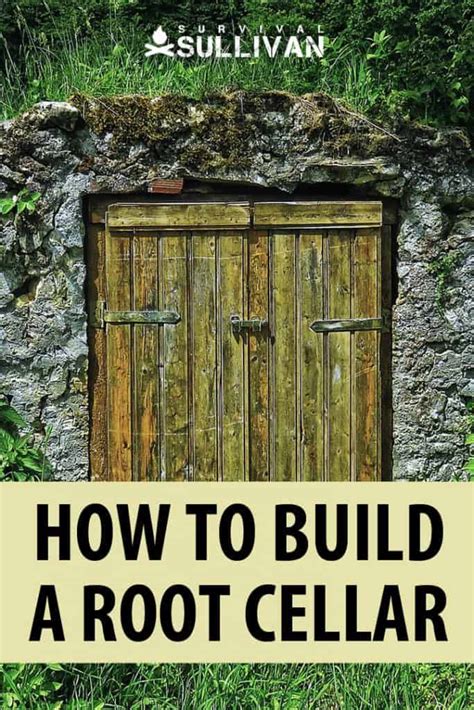
How to build a simple root cellar or cool storage for garden harvest without electricity?
Embracing Off-Grid Food Preservation
For gardeners looking to extend the bounty of their harvest without relying on modern refrigeration, building a simple root cellar or cool storage system is an excellent, sustainable solution. These traditional methods harness natural conditions – cool temperatures, stable humidity, and good ventilation – to keep vegetables and fruits fresh for months, all without a single watt of electricity. It’s an empowering DIY project that connects you to age-old practices of self-sufficiency.
A root cellar isn’t necessarily a subterranean room; it can be any space that consistently maintains a cool, humid, and dark environment. Understanding these core principles is key to designing a successful storage solution for your specific needs and climate.
Understanding the Basics of Cool Storage
The success of a root cellar hinges on three main environmental factors:
- Temperature: Ideally, between 32°F and 50°F (0°C to 10°C). This range significantly slows down the ripening and decay process.
- Humidity: Most root crops prefer high humidity (85-95%) to prevent moisture loss and shriveling.
- Ventilation: Proper airflow prevents the buildup of ethylene gas (which can accelerate ripening) and helps regulate temperature and humidity, deterring mold.
Choosing Your Location and Method
Before you start digging, consider the best location for your cool storage. Look for a spot that is naturally cool, shaded, and has good drainage. Proximity to your home or garden is also practical for access.
There are several simple, electricity-free methods you can adapt:
- Buried Container Method: Ideal for smaller harvests, this involves burying a waterproof container (like a large plastic barrel or trash can) in the ground.
- Earthen Mound/Clamp: For larger quantities, this method involves piling produce on the ground, covering it with straw, and then a layer of soil.
- Modified Existing Structure: A corner of an unheated garage, shed, or even a crawl space can be insulated and ventilated to function as a cool storage area.
- Simple Pit or Bin: Digging a dedicated pit, lining it, and covering it with an insulated lid.
Building a Simple Buried Container Root Cellar
This method is popular for its simplicity and effectiveness. Here’s a general guide:
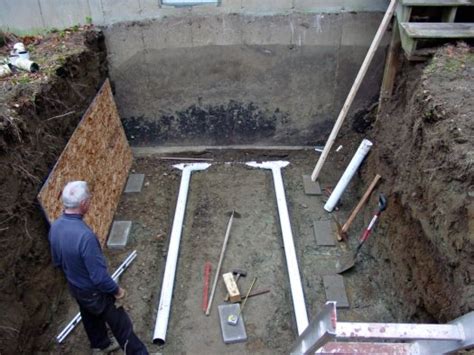
Step 1: Dig the Pit
Choose a shady, well-drained spot. Dig a hole slightly larger and deeper than your chosen container. The depth should allow the container’s top to be just below or at ground level once installed, maximizing the earth’s insulating properties.
Step 2: Prepare Your Container
Select a food-grade plastic barrel, a large plastic trash can with a tight-fitting lid, or even a sturdy galvanized metal can. Drill several small drainage holes in the bottom of the container to prevent water accumulation. For ventilation, you’ll need two pipe openings near the top and bottom of the container once it’s in place.
Step 3: Install the Container and Ventilation
Place a layer of gravel or sand at the bottom of your pit for drainage. Carefully lower the container into the pit. For ventilation, attach two PVC pipes:
- Inlet Pipe: Position one pipe near the bottom of the container, extending up and out of the ground at an angle. This allows cool, fresh air to enter.
- Outlet Pipe: Position the second pipe near the top of the container, extending up higher than the inlet pipe. This allows warmer, stale air to escape. Cover the pipe openings with hardware cloth to deter pests.
Backfill around the container with soil, compacting it firmly. You can also add a layer of insulation like straw or sawdust around the container before backfilling for extra protection against temperature fluctuations.

Step 4: Create an Insulated Lid
The container’s original lid can work, but for better insulation, consider building a small wooden lid that fits snugly over the container, or use a mound of straw and soil to cover it. The goal is to keep it dark and insulated from external temperatures. You might add a layer of Styrofoam insulation to the underside of a wooden lid.
Step 5: Interior Setup (Optional)
If your container is large enough, you might add a small, sturdy shelf or two for organizing different types of produce. Ensure good air circulation around the stored items. For crops that prefer slightly more humidity, a layer of damp sand in the bottom of the container can be beneficial.
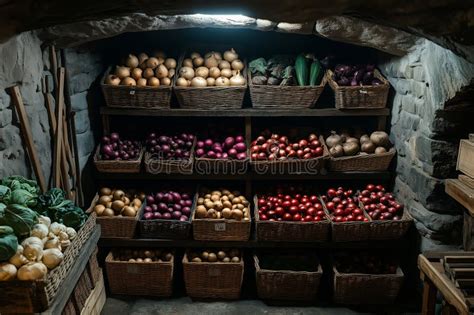
Crops Suitable for Root Cellar Storage
Many garden favorites thrive in root cellar conditions:
- Root Vegetables: Carrots, beets, parsnips, turnips, potatoes, sweet potatoes (cure first!), daikon.
- Hardy Fruits: Apples, pears.
- Cabbages and Gourds: Cabbage, winter squash, pumpkins.
- Onions and Garlic: Store in a slightly drier, cooler area (often the top of the cellar).
Always store produce clean, dry, and undamaged. Different crops have slightly different ideal storage conditions, so grouping similar items together can be helpful.
Maintenance and Tips
- Monitor Conditions: Periodically check the temperature and humidity inside your cellar, especially during extreme weather changes. Adjust ventilation as needed.
- Inspect Produce: Regularly check your stored goods for any signs of spoilage or pests. Remove any compromised items immediately to prevent them from affecting the rest of your harvest.
- Pest Proofing: Ensure all openings (vents, access points) are sealed and protected with hardware cloth to keep rodents and insects out.
- Curing: Some crops, like sweet potatoes and winter squash, benefit from a curing period (warm, humid conditions) before being placed in cool storage.
Building a simple root cellar is a rewarding project that extends your harvest season and reduces reliance on electricity. With a little planning and effort, you can enjoy fresh, homegrown produce long after the growing season ends, embracing a more sustainable and self-sufficient lifestyle.
