


How to build a simple, sturdy DIY root cellar for preserving garden harvests?
For centuries, root cellars have been an indispensable tool for homesteaders and gardeners, offering a natural, energy-free solution for storing fresh produce through the colder months. Building your own simple, sturdy root cellar is a rewarding DIY project that can significantly extend the shelf life of your garden harvests, providing access to fresh vegetables long after the growing season ends. This guide will walk you through the essential steps to construct an effective root cellar designed for durability and optimal preservation.
The Benefits of a DIY Root Cellar
A well-designed root cellar provides a cool, dark, and humid environment—ideal conditions for storing many types of fruits and vegetables, from potatoes and carrots to apples and cabbages. It reduces food waste, lowers your grocery bill, and helps you achieve greater food independence. Best of all, it requires no electricity, making it an eco-friendly and reliable storage method.

Planning Your Root Cellar Project
Careful planning is crucial for the success and longevity of your root cellar. Consider these factors before breaking ground:
Site Selection
- Drainage: Choose a location with excellent drainage to prevent water accumulation. A slight incline is often beneficial.
- Shade: Proximity to trees or a north-facing slope can help maintain cooler temperatures naturally.
- Accessibility: Ensure the site is reasonably accessible for construction and future harvest storage.
- Soil Type: Sandy loam is ideal, but avoid heavy clay or rocky areas if possible.
Design and Size
The size of your root cellar will depend on the volume of produce you anticipate storing. A common design involves excavating into a hillside or building a partially subterranean structure. Key design elements include:
- Insulation: Earth itself is a great insulator, but additional insulation (e.g., straw bales, rigid foam) can be used for the roof and exposed walls.
- Ventilation: Critical for air circulation and humidity control. You’ll need an intake vent near the floor and an exhaust vent near the ceiling.
- Sturdiness: The structure must withstand soil pressure and potential moisture. Concrete blocks, treated lumber, or natural stone are excellent choices.
Essential Materials and Tools
Before you begin digging, gather your materials and tools. While specifics vary by design, a basic list includes:
- Shovels and picks for excavation
- Measuring tape, level, and string line
- Heavy-duty gloves and safety glasses
- Concrete blocks, mortar, and rebar (for block construction) OR Treated lumber, gravel, and fasteners (for timber frame)
- Waterproof membrane (e.g., pond liner, heavy-duty tarp)
- Drainage gravel and sand
- Insulation material (e.g., straw, rigid foam)
- PVC pipes or similar for ventilation (two minimum)
- Sturdy door and frame
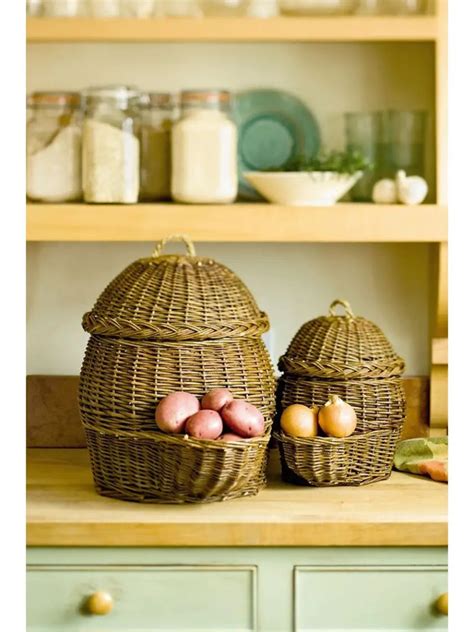
- Shelving materials (slatted wood is ideal for air circulation)
Step-by-Step Construction Guide
1. Excavation
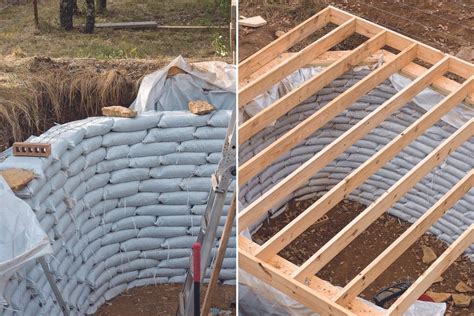
Mark out the dimensions of your root cellar on the chosen site. Dig the pit to your desired depth, ensuring the walls are as straight as possible. If building into a hillside, create a level floor and a gradual slope for the entrance if desired. Ensure good drainage by digging a small trench around the perimeter of the foundation and filling it with gravel, potentially leading to a French drain.
2. Foundation and Walls
For concrete block construction, lay a gravel base, then a concrete footing. Construct the walls using mortar and rebar for strength. For timber frame, set treated posts into concrete footings and frame the walls. Backfill the exterior walls with well-draining material like gravel to prevent hydrostatic pressure and ensure water runs away from the structure.
3. Roof Construction
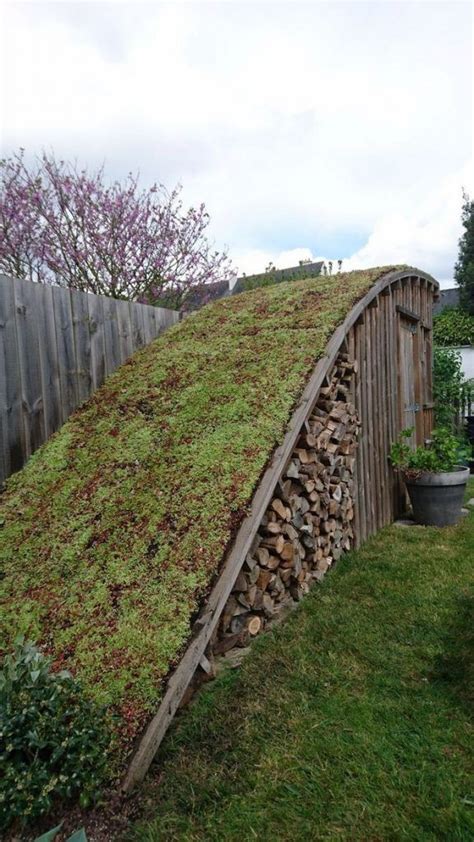
The roof must be strong enough to support the weight of the earth or insulation placed on top, as well as snow loads. Use heavy-duty treated lumber for rafters or concrete slabs. Cover the roof structure with a waterproof membrane, ensuring it extends down the exterior walls to prevent water infiltration. Add a layer of insulation, then cover with soil, grass, or other natural materials to maintain stable temperatures.
4. Door and Ventilation
Install a sturdy, well-insulated door that seals tightly to prevent unwanted temperature fluctuations and pests. For ventilation, install an intake vent near the floor level and an exhaust vent near the ceiling. These pipes should extend above the ground level, ideally with covers to keep out rodents and rain. The difference in air pressure will naturally draw cooler, fresh air in and push warmer, stale air out.
5. Interior Finishing
The interior floor can be left as compacted earth, which helps with humidity, or covered with gravel. Construct sturdy shelving using slatted wood to allow for air circulation around stored produce. Avoid treated lumber for interior shelving where food will directly contact it; opt for untreated wood or food-safe coatings.

Ensuring Optimal Conditions
The ideal root cellar environment is consistently cool (around 35-50°F or 2-10°C) and humid (85-95% relative humidity). Monitor temperature and humidity using a thermometer and hygrometer. Adjust ventilation as needed to maintain these conditions. In very dry climates, a bucket of sand or gravel kept moist can help increase humidity. In overly humid environments, increasing airflow is key.
Storing Your Harvest Safely
Before storing, ensure your produce is clean, dry, and free from blemishes, as one bad apple can spoil the bunch. Store different types of produce separately if possible, as some, like apples, release ethylene gas that can accelerate ripening in others. Use crates, baskets, or burlap sacks for good air circulation. Periodically inspect your stored goods and remove any spoiled items promptly.
Maintenance Tips
Regular maintenance ensures your root cellar remains effective. Check for leaks, structural integrity, and pest infestations annually. Clean the interior thoroughly before each new harvest season. Ensure ventilation pipes are clear of debris. With proper care, your DIY root cellar will serve as a reliable preservation hub for many years, enhancing your self-sufficiency and enjoyment of fresh, homegrown food.
Building a simple, sturdy DIY root cellar is an investment in your food security and a testament to sustainable living. By following these steps, you can create a highly functional storage solution that connects you more deeply with your garden’s bounty.


