


How to build a sturdy, budget-friendly raised garden bed using salvaged materials?
Creating a raised garden bed is an excellent way to improve soil drainage, deter pests, and extend your growing season. While new lumber and kits can be costly, building a sturdy, budget-friendly raised bed using salvaged materials is a rewarding and sustainable alternative. This guide will walk you through the process, transforming forgotten items into a thriving garden space.
The Benefits of Salvaged Materials for Raised Beds
Opting for salvaged materials offers a multitude of advantages beyond just cost savings. It’s an environmentally conscious choice, diverting waste from landfills and giving materials a second life. From an aesthetic perspective, repurposed materials often lend a unique, rustic charm to your garden that store-bought options can’t replicate. Furthermore, the satisfaction of creating something functional and beautiful from cast-offs is immense.

Choosing Your Salvaged Materials Wisely
The key to a successful salvaged raised bed lies in selecting appropriate and safe materials. Here are some popular options:
- Untreated Wood: Old fence panels, decking boards (check for splinters and rot), pallet wood (ensure it’s heat-treated ‘HT’ and not chemically treated ‘MB’), or leftover construction timber. Avoid pressure-treated wood, as chemicals can leach into your soil.
- Bricks or Concrete Blocks: Leftover pavers, bricks, or cinder blocks can form robust, long-lasting walls. They are excellent for beds requiring less cutting and assembly.
- Metal Sheets: Corrugated metal roofing or siding (new or reclaimed, check for rust integrity) can create a modern look, but ensure edges are protected for safety.
Always inspect materials for structural integrity, sharp edges, and any signs of harmful chemicals before use. Clean them thoroughly if necessary.
Planning Your Raised Bed Design
Before gathering your tools, take time to plan. Consider the following:
- Location: Choose a spot that receives adequate sunlight (usually 6-8 hours for most vegetables) and is relatively level.
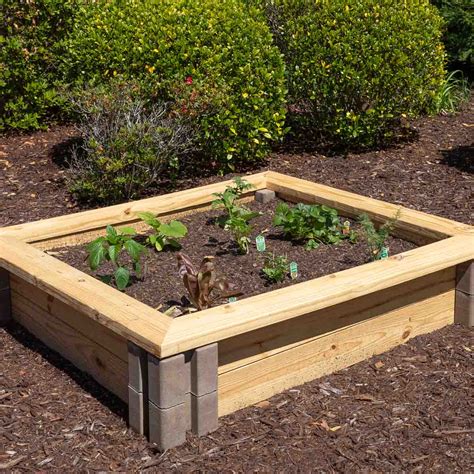
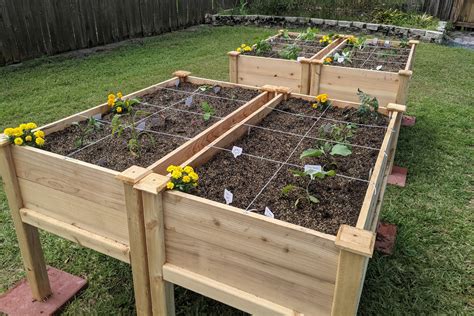
- Size and Shape: Determine the desired dimensions. A common width is 3-4 feet, allowing easy access from both sides. Length can vary. Height usually ranges from 8-12 inches for shallow-rooted crops, or 18-24 inches for deep-rooted plants.
- Drainage: Raised beds naturally drain well, but consider adding a layer of coarse material (like gravel or small branches) at the bottom if your native soil has poor drainage.
Tools You’ll Need
The specific tools will depend on your chosen materials, but generally, you’ll need:
- Measuring tape and pencil/marker
- Saw (circular, hand, or jigsaw) for wood
- Drill and screws (weather-resistant) or hammer and nails
- Level
- Shovel and rake
- Gloves and safety glasses
- Optional: Wheelbarrow, cutting tools for metal, mortar tools for bricks
Step-by-Step Construction Guide
Step 1: Gather and Prepare Your Materials
Collect all your chosen salvaged materials. Clean off any dirt, loose paint, or debris. For wooden planks, cut them to your desired lengths, ensuring all pieces for each side are uniform. Sand down any rough edges or splinters.
Step 2: Laying the Foundation
Clear the chosen area of weeds and debris. If the ground isn’t perfectly level, do your best to level it using a shovel. A level foundation is crucial for a stable bed.
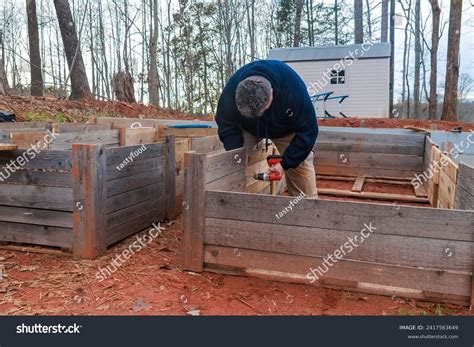
Step 3: Assembling the Walls
For Wooden Beds: Construct each side wall individually, then connect them. Use strong corner brackets or sturdy wooden posts (e.g., 2x4s) on the inside corners for reinforcement. Screw or nail planks securely into these posts. Stagger the plank seams if using multiple shorter pieces for added strength. Overlap corners like log cabin construction for extra stability.
For Brick/Block Beds: Lay your first course of bricks or blocks directly on the leveled ground. For a dry-stacked bed, ensure each subsequent layer overlaps the joints of the layer below (like brickwork). For a mortared bed, mix mortar according to instructions and lay bricks, tapping them into place.
Step 4: Ensuring Durability and Drainage
For wooden beds, reinforce corners with additional screws or braces. You can also add a horizontal brace across longer beds to prevent bowing. For all bed types, ensure there are small gaps or weep holes at the base if using solid materials like metal or concrete, to allow for excess water drainage.
Step 5: Lining the Bed (Optional but Recommended)
To extend the life of wooden beds and prevent soil from escaping through gaps, you can line the inside walls. Use a breathable landscape fabric, old untreated cardboard, or even heavy-duty plastic sheeting (punctured for drainage). Staple or tack the liner to the inside walls, stopping just below the rim to keep it out of sight.
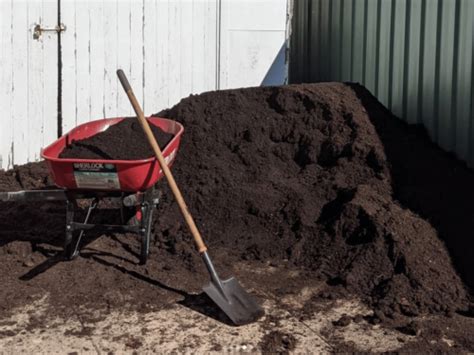
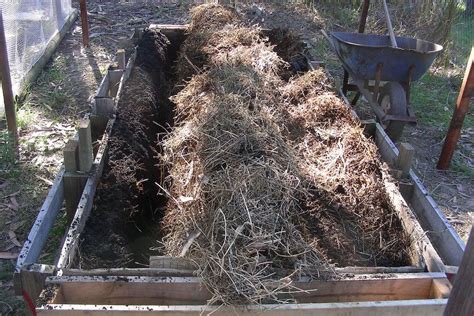
Step 6: Filling Your Raised Bed
A raised bed needs good soil. Avoid filling it entirely with bagged topsoil, which can be expensive. Instead, use the ‘lasagna method’:
- Bottom Layer: Coarse organic matter like small logs, branches, or cardboard (helps with drainage and decomposition).
- Middle Layers: Mix of compost, leaves, grass clippings, and untreated wood chips.
- Top Layer: A good quality soil mix specifically designed for raised beds, or a blend of compost, topsoil, and perlite/vermiculite for optimal growing conditions.
Maintenance Tips for Longevity
Even with salvaged materials, a little care goes a long way. Periodically check wooden beds for loose screws or rotting planks, replacing them as needed. Keep an eye on the soil level, topping it up with compost annually. With proper construction and a bit of love, your budget-friendly, salvaged raised garden bed will provide years of bountiful harvests.
Building a raised garden bed from salvaged materials is a testament to ingenuity and sustainability. Not only will you save money and reduce waste, but you’ll also create a unique and productive space for growing your own food, all while adding character to your garden.
