


How to build a sturdy, critter-proof raised garden bed?

Why Choose a Sturdy, Critter-Proof Raised Garden Bed?
Building a raised garden bed offers numerous benefits, from improved soil drainage and aeration to easier access for planting and harvesting. However, a truly successful raised bed goes beyond just containing soil; it needs to be sturdy enough to last for years and resilient enough to protect your crops from unwelcome guests. Critters like rabbits, squirrels, gophers, and even curious pets can decimate a garden overnight. This guide will walk you through constructing a robust raised bed that stands strong against time and cleverly deters pests.

Planning Your Raised Bed: Design and Materials
Considerations Before You Build:
- Location: Choose a spot that gets at least 6-8 hours of direct sunlight per day. Ensure it’s level or can be easily leveled.
- Size and Height: A width of 3-4 feet allows easy access from both sides without stepping into the bed. Length can vary. For critter-proofing, a minimum height of 18-24 inches is ideal, making it harder for many animals to jump in. Taller beds also mean less bending for you!
- Materials:
- Wood: Cedar, redwood, or juniper are naturally rot-resistant. Avoid treated lumber if growing edibles, as chemicals can leach into the soil. Standard untreated pine or fir can be used but will have a shorter lifespan.
- Composite Lumber: A durable, low-maintenance, and long-lasting alternative to wood.
- Stone, Brick, or Concrete Blocks: Excellent for sturdiness and longevity but can be more labor-intensive and expensive.
Essential Materials & Tools:
For a typical wooden raised bed (e.g., 4×8 feet, 24 inches high):
- Rot-resistant lumber (e.g., 2×10 or 2×12 cedar boards)
- Corner brackets or joining plates (galvanized for outdoor use)
- Exterior-grade screws (3-inch minimum)
- Hardware cloth (1/4-inch or 1/2-inch mesh) – essential for critter proofing
- Staple gun and heavy-duty staples
- Landscape fabric (optional, for lining the sides)
- Shovel, rake, level
- Drill, saw (circular or miter), measuring tape, pencil

Step-by-Step Construction Guide
Step 1: Prepare and Level the Site
Clear the chosen area of weeds and debris. Use a shovel to level the ground where your raised bed will sit. This is crucial for stability and ensuring your frame sits flush.
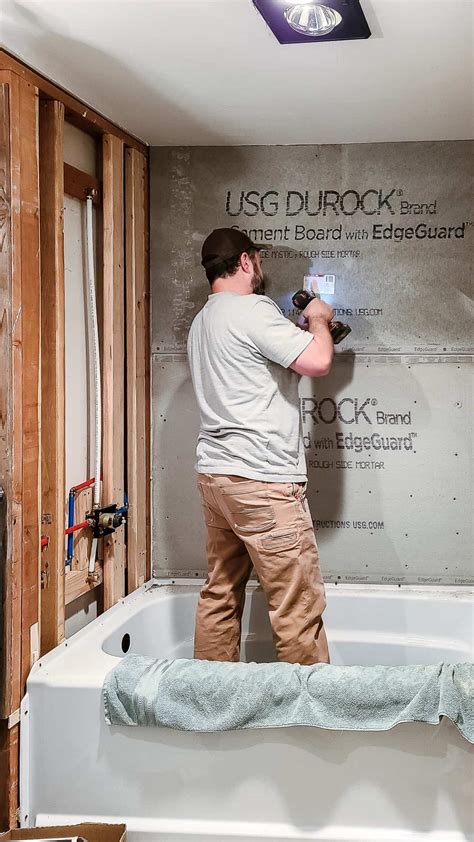
Step 2: Assemble the Frame
Cut your lumber to the desired lengths for the sides of your bed. For a 4×8 foot bed, you’ll need two 8-foot boards and two 4-foot boards per layer. Stack two boards for each side to achieve a 20-24 inch height. Use corner brackets and exterior-grade screws to securely join the boards at each corner, creating strong rectangular tiers. Ensure all joints are tight and square.

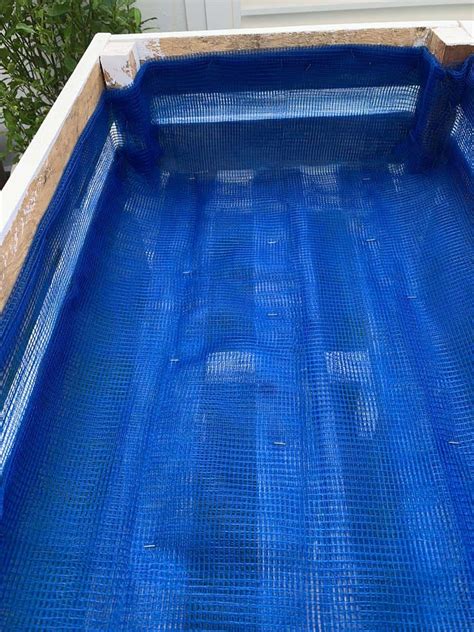
Step 3: Install the Critter Barrier (Bottom)
This is a critical step for critter-proofing. Lay your hardware cloth over the entire base of the assembled frame. Cut it to size, leaving a few inches extra on each side to bend up the interior walls. Securely staple the hardware cloth to the bottom edges of the frame and then up the inside walls using your staple gun. The tight mesh prevents gophers, voles, and other burrowing animals from tunneling into your bed. Ensure there are no gaps for critters to exploit.
Step 4: Add Internal Bracing for Sturdiness
For longer beds or taller designs, internal bracing prevents bowing over time as the soil settles and expands. Cut shorter pieces of lumber (e.g., 2x4s) and screw them vertically into the inside corners and along the midpoints of the longer sides. This significantly enhances the structural integrity.
Step 5: Fill Your Raised Bed
Once the frame is complete and the critter barrier is in place, you can begin filling your bed. A common method is the “lasagna garden” approach: start with a layer of cardboard (to suppress weeds), then add layers of organic matter like leaves, straw, wood chips, and finally, a good quality raised bed soil mix on top. This provides excellent drainage and nutrient retention.
Advanced Critter-Proofing Techniques
- Vertical Fencing: For critters that jump or climb (like rabbits, deer, or even some squirrels), a fence around the perimeter of the raised bed is highly effective. You can attach wire mesh (chicken wire or welded wire) directly to the top edge of your raised bed frame, extending 2-3 feet upwards. Secure it with staples or zip ties.
- Overhead Netting/Covers: To protect against birds, squirrels, or even hail, consider building a simple frame over your raised bed to support bird netting or row covers. This can be removable or hinged for easy access.
- Raised Height: As mentioned, a taller bed makes it harder for ground-dwelling critters to access. For a truly determined rabbit, a 2-foot height combined with an inward-sloping top edge can be a good deterrent.
- Pest Deterrents: While not a physical barrier, integrating strong-smelling herbs (like mint or rosemary) or using companion planting can naturally deter some pests.
Enjoy Your Productive, Protected Garden!
By investing a little extra time and effort into making your raised garden bed sturdy and critter-proof, you’ll reap the rewards of healthy, unmolested crops for many seasons to come. You’ll spend less time battling pests and more time enjoying the fruits (and vegetables) of your labor. Happy gardening!


