


How to build a sturdy, pest-proof DIY raised garden bed cheaply?

Why Build a Raised Garden Bed?
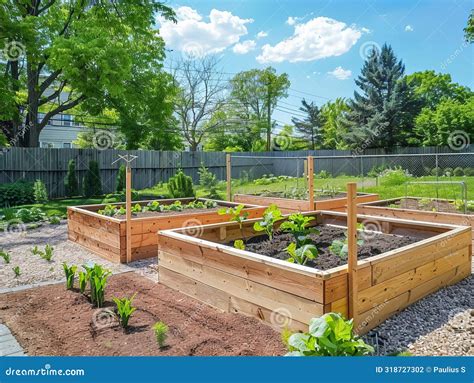
Raised garden beds offer numerous benefits for home gardeners, from better drainage and warmer soil to reduced back strain. They also provide a controlled environment, making it easier to manage soil quality and deter weeds. However, the cost of materials and the potential for pests can be daunting. This guide will walk you through building a raised bed that is not only sturdy and pest-proof but also incredibly budget-friendly.

Selecting Your Materials: Sturdy & Budget-Friendly
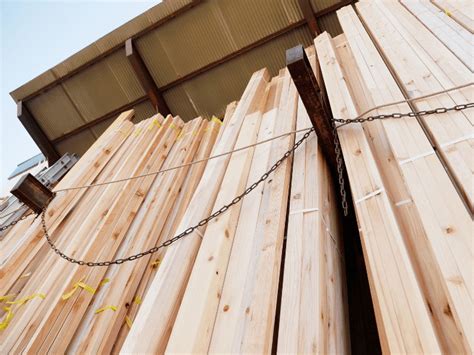
The key to a cheap yet sturdy raised bed lies in material selection. While cedar and redwood are rot-resistant, they come with a hefty price tag. For a budget build, consider these options:
- Untreated Pine or Fir: Readily available and inexpensive. While not naturally rot-resistant, you can extend its life with proper drainage and by lining the interior with a pond liner or heavy-duty plastic sheeting (ensure it’s food-safe if directly contacting soil).
- Salvaged Wood: Check local construction sites, pallet suppliers, or online marketplaces for free or cheap lumber. Always ensure salvaged wood hasn’t been treated with harmful chemicals (like CCA, common in older pressure-treated wood).
- Concrete Blocks or Cinder Blocks: Can be very affordable, especially if salvaged. While durable, they can sometimes leach lime into the soil, altering pH, so consider lining the inside.
For corner bracing, look for galvanized screws or deck screws, and consider inexpensive metal corner brackets for added stability.
Comprehensive Pest-Proofing Techniques
A raised bed is inherently better at deterring some ground pests, but with a few extra steps, you can make it virtually critter-proof:
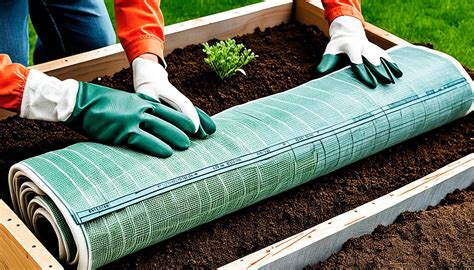
- Bottom Barrier (Essential): Before adding soil, line the bottom of your raised bed with heavy-duty hardware cloth (1/4-inch or 1/2-inch mesh). This acts as an impenetrable barrier against gophers, voles, moles, and other burrowing animals. Extend it up the inner sides of the bed a few inches and secure it with staples.
- Side Protection: Ensure your bed walls are deep enough (at least 10-12 inches) to deter common pests. For slugs and snails, consider installing a copper tape barrier around the top perimeter of the bed – the copper reacts with their slime, giving them a mild electric shock.
- Top Protection (Optional but Recommended): For birds, squirrels, and larger animals, consider constructing simple PVC hoops over your bed and covering them with bird netting or row covers. This is particularly useful for young seedlings or fruiting plants.
- Raised Edges/Ledges: A small outward-sloping lip around the top edge can make it harder for slugs and snails to climb in.
Assembling Your Sturdy Raised Bed
Tools and Materials Needed:
- Lumber (untreated pine, fir, or salvaged wood)
- Tape measure
- Pencil
- Circular saw or hand saw
- Drill and driver bits
- Galvanized screws or deck screws (2.5-3 inches)
- Hardware cloth (1/4 or 1/2 inch mesh)
- Staple gun and staples
- Optional: Corner brackets, wood glue, pond liner/plastic sheeting
Step-by-Step Construction:
- Plan and Measure: Decide on your desired dimensions. A common size is 4×8 feet, making it easy to reach the center from both sides. For longer beds, plan for internal bracing to prevent bowing.
- Cut Your Lumber: Cut your boards to length according to your plan. For a 4×8 bed, you’ll need two 8-foot boards and two 4-foot boards for each level.
- Assemble the First Layer: On a flat surface, form a rectangle with your cut boards. Overlap the ends (e.g., the 8-foot boards overlap the 4-foot boards at the corners) and pre-drill pilot holes to prevent splitting. Secure corners with at least two screws per joint. For added strength, apply wood glue before screwing.
- Add Additional Layers: Stack subsequent layers, staggering the joints if possible for extra strength. Secure each layer to the one below it with screws. For beds longer than 6 feet, add a vertical support post in the middle of the long sides, secured with screws from both sides, to prevent bowing when filled with soil.
- Install Internal Bracing (for long beds): For beds over 8 feet, consider internal cross-bracing made from scrap wood, running across the width of the bed and secured to the long sides.
Preparing for Planting: Pest Barrier and Filling
- Install the Hardware Cloth: Lay the assembled frame on its side or upside down. Measure and cut the hardware cloth to cover the entire bottom opening, plus enough to extend 2-4 inches up the inside walls. Secure it firmly with a staple gun every few inches around the perimeter and up the inner walls. Ensure there are no gaps for pests to enter.
- Site Preparation: Choose a level spot in your garden with adequate sunlight. Clear any weeds or grass from the area where the bed will sit.
- Lining (Optional): If using untreated wood, line the inside walls with heavy-duty plastic sheeting or pond liner, stapling it to the wood, ensuring it doesn’t extend above the soil line to avoid moisture trapping and wood rot. Poke small holes in the bottom if using a full liner to allow drainage.
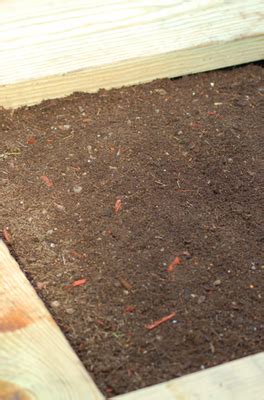
- Filling Your Bed: Fill your bed with a high-quality soil mix. To save money, consider the ‘hugelkultur’ method (filling the bottom with logs, branches, and organic matter) or a ‘lasagna garden’ approach (layers of cardboard, leaves, compost, and soil). Top with 6-12 inches of good garden soil or a raised bed mix.
Cost-Saving Hacks & Maintenance
To further reduce costs:
- Source Free Mulch: Local arborists or municipalities often offer free wood chips for mulch, which helps retain moisture and suppress weeds.
- Compost Your Own: Start a compost pile to create nutrient-rich soil amendments for free.
- Start Seeds Indoors: Buying starter plants can be expensive; starting from seed saves a lot over time.
With these strategies, you can build a robust, pest-resistant raised garden bed that will serve you for years, all without breaking the bank. Happy gardening!
