How to build a sturdy, pest-proof raised garden bed for bountiful harvest?
Why Choose a Raised Garden Bed?
Raised garden beds offer numerous advantages over traditional in-ground gardening. They provide better drainage, allow for custom soil mixes tailored to your plants’ needs, reduce strain on your back, and extend the growing season. However, to truly reap these benefits, your raised bed must be both sturdy enough to withstand the elements and effectively proofed against common garden pests. This guide will walk you through building a raised bed that not only stands the test of time but also protects your precious crops.
Planning Your Raised Bed Project
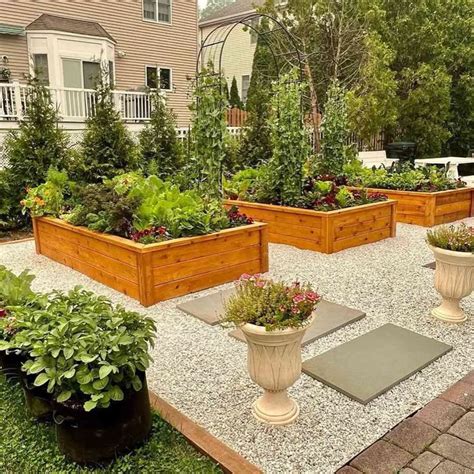
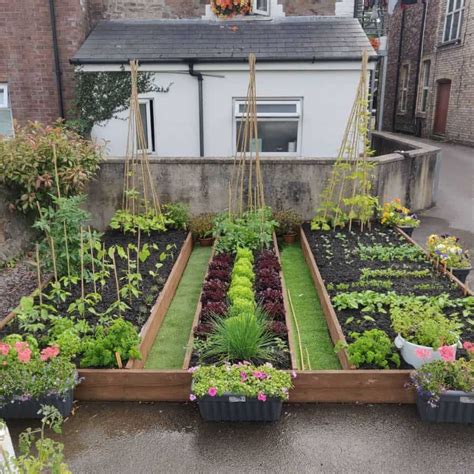
Before you even pick up a tool, thoughtful planning is crucial. Consider the ideal location in your yard—one that receives at least 6-8 hours of direct sunlight daily. Determine the optimal size and shape for your space, keeping in mind that most beds are between 3-4 feet wide to allow easy reach from either side, and 8-12 inches deep for adequate root growth (deeper is better for root vegetables). Think about the overall design and how it will integrate with your landscape.
Choosing the Right Materials for Durability
The materials you choose directly impact your bed’s sturdiness and longevity. For wood, untreated options like cedar or redwood are excellent choices due to their natural rot resistance. Pine and fir can also be used but will have a shorter lifespan unless treated with food-safe preservatives. Alternatives include composite decking, concrete blocks, or galvanized metal stock tanks, all of which offer excellent durability.
- Wood: Cedar, Redwood (most common and durable untreated options).
- Composite: Long-lasting, low maintenance.
- Metal: Galvanized steel (modern aesthetic, very durable).
- Fasteners: Use exterior-grade screws (galvanized or stainless steel) that won’t rust and stain your wood.
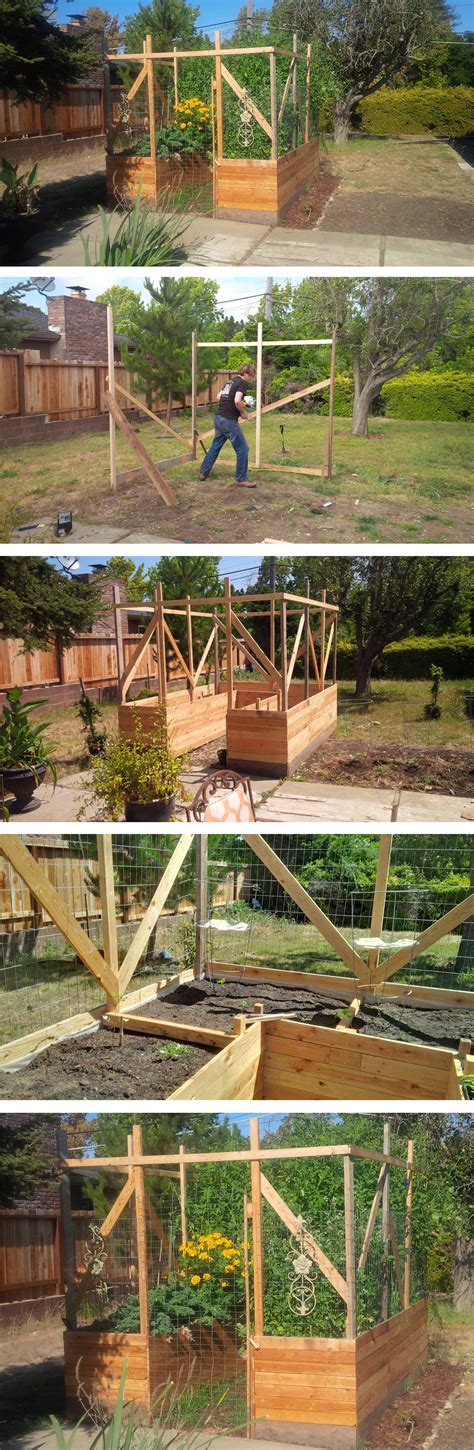
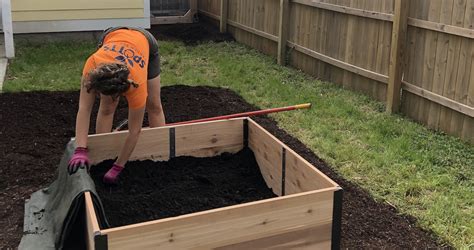
Building the Sturdy Frame
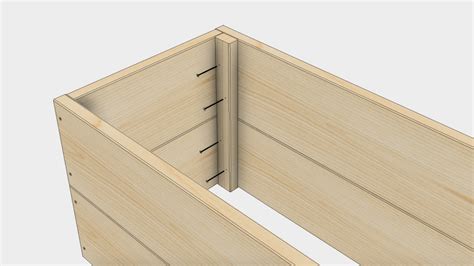
Once you have your materials, it’s time to assemble the frame. Cut your chosen lumber to the desired lengths. For strong corners, consider using corner braces or joining techniques like butt joints reinforced with L-brackets or cleats. Make sure your frame is level on all sides. Adding vertical corner posts (2x4s) on the inside corners provides extra stability, especially for larger beds or those intended to be very deep.
Pre-drill holes before driving screws to prevent splitting the wood. Double-check all measurements as you go to ensure a square and true frame. A sturdy foundation is key to preventing warping and collapsing over time, especially once filled with heavy soil and water.
Implementing Effective Pest-Proofing Measures
This is where your raised bed truly excels. Protecting your harvest from common garden invaders requires a few strategic additions:
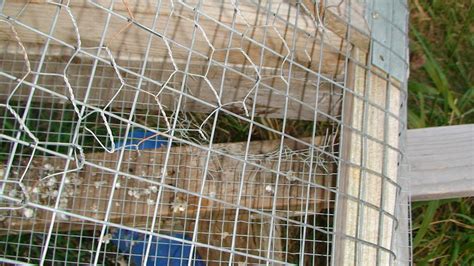
Bottom Protection (Voles, Gophers, Moles):
Before placing the bed, line the bottom with a layer of hardware cloth (1/4-inch or 1/2-inch mesh). Extend the mesh up the inside walls of the bed by at least 6-8 inches and secure it with staples. This creates an impenetrable barrier against burrowing pests while allowing water to drain freely.
Side and Top Protection (Slugs, Snails, Deer):
- Slugs & Snails: Consider installing a copper barrier around the top perimeter of your bed. The copper reacts with slug and snail slime, creating a small electric charge that deters them.
- Deer & Rabbits: For larger pests, a simple fencing solution or a lightweight row cover draped over hoops can be effective. While these might not be permanently attached, planning for their integration is part of a pest-proof strategy.
Ensuring Proper Drainage and Filling the Bed
Good drainage is vital for healthy plants. If your site has poor drainage, you might consider adding a layer of gravel or coarse wood chips at the very bottom, beneath the hardware cloth and above the ground level. However, for most soil types, the hardware cloth directly on the ground will suffice, as the raised bed structure itself inherently improves drainage.
Layering for Optimal Soil Health:
Filling your raised bed is an opportunity to create a rich, fertile growing environment. A common and highly effective method is ‘lasagna gardening’ or layering:
- Bottom Layer (optional): Cardboard (wet it down to suppress weeds).
- Branch/Twigs: Provides slow-release nutrients and improves aeration.
- Straw/Leaves: Adds organic matter.
- Compost: A thick layer of nutrient-rich compost is essential.
- Topsoil/Potting Mix: The top 6-8 inches should be a high-quality blend of organic topsoil and compost, specifically formulated for vegetable gardening.
This layering approach ensures excellent drainage, aeration, and a slow release of nutrients as the organic matter breaks down.
Maintaining Your Bountiful Raised Bed
Once your raised bed is built and planted, ongoing maintenance will ensure its continued success. Regularly check for signs of pests and address them promptly. Top up your soil with fresh compost annually to replenish nutrients. Water consistently, as raised beds can dry out faster than in-ground gardens. With proper care, your sturdy, pest-proof raised garden bed will provide you with abundant, healthy harvests for many seasons to come.