


How to build an inexpensive, predator-proof chicken coop?

Introduction: Why Build Your Own Predator-Proof Coop?
Keeping backyard chickens offers fresh eggs, natural pest control, and delightful companionship. However, ensuring their safety from predators is paramount. While commercial coops can be costly, building your own allows for custom design, significant cost savings, and the peace of mind that comes from knowing your flock is secure. This guide will walk you through constructing an inexpensive yet robust chicken coop, designed specifically to deter common predators.
Predators such as raccoons, foxes, coyotes, hawks, and even neighborhood dogs pose a constant threat to chickens. A well-built coop isn’t just a shelter; it’s a fortress. The key lies in strategic design and material choices that prioritize security without breaking your budget.

Planning Your Inexpensive Fortress
Location and Size Considerations
Before you begin building, plan your coop’s location. Choose a spot that offers some shade in summer and protection from harsh winds in winter. Ensure good drainage and easy access for cleaning and egg collection. For sizing, a general rule is 2-4 square feet per chicken inside the coop and 8-10 square feet per chicken in the run (if building one). This space ensures adequate ventilation and reduces stress on your flock.
Budget-Friendly Material Selection
The secret to an inexpensive coop often lies in sourcing materials. Look for:
- Reclaimed Wood: Pallets (ensure they haven’t been chemically treated), old fence posts, or discarded lumber from construction sites can be excellent, free resources.
- Recycled Roofing: Metal sheets from old sheds, corrugated plastic, or even salvaged shingles can serve as durable roofing.
- Hardware Cloth: This is non-negotiable for predator proofing. Opt for 1/2-inch or 1/4-inch galvanized hardware cloth, not chicken wire (which is easily breached by most predators). Buy in bulk if possible to save money.
- Basic Lumber: For framing, new 2x4s or 2x2s might be necessary for structural integrity, but search for sales or ‘seconds’ at your local lumber yard.
- Secure Latches: Invest in sturdy, predator-resistant latches for all doors and access points. Spring-loaded bolts or barrel bolts that require two actions to open are ideal.

Key Predator-Proofing Strategies
The Foundation of Security: Hardware Cloth
This is the most critical element. All windows, vents, and any openings larger than 1/2-inch must be covered with hardware cloth, securely fastened. For ground-based predators, dig a trench around the perimeter of your coop and run (at least 12-18 inches deep and bent outwards by 6-12 inches) and bury the hardware cloth. This creates an apron or ‘skirt’ that discourages digging predators like foxes and raccoons.
Secure Entrances and Exits
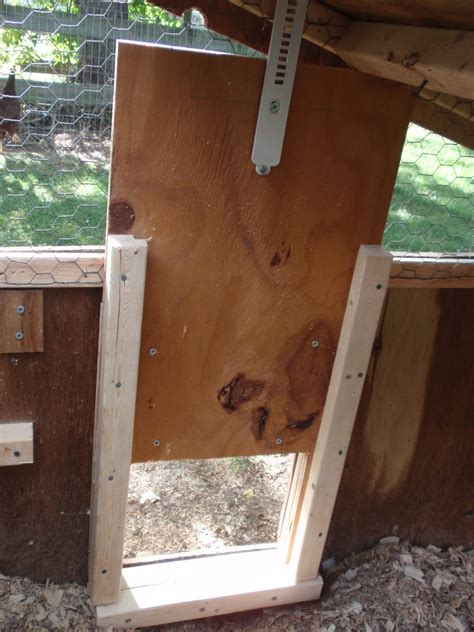
All doors and gates, including the main human entry door and the chicken pop-door, need robust latches. Simple hook-and-eye latches are easily manipulated by raccoons. Choose latches that require a lifting and pulling motion, or better yet, use two latches per door. Ensure there are no gaps around the door frames where a predator could squeeze through.
Robust Construction and Materials
Ensure all walls, floor, and roof are tightly constructed with no significant gaps. Inspect the coop regularly for any signs of wear or new access points. Even small gaps can be exploited by weasels or rats, which can also harm your flock.
Step-by-Step Construction Guide
1. Laying the Foundation and Frame
Start by creating a sturdy, level base. This could be a treated lumber frame, a concrete slab, or even concrete blocks, ensuring it’s elevated off the ground to prevent rot and deter digging predators. Build your wall frames using your chosen lumber, keeping openings for doors, windows, and ventilation in mind.
2. Building Walls and Roof
Attach reclaimed wood panels, exterior-grade plywood, or salvaged metal sheets to your wall frames. Ensure all seams are tight. Construct a sloped roof frame to shed water, then apply your chosen roofing material securely. Overhangs can offer additional protection from rain and sun.

3. Installing Hardware Cloth
Cover all window and vent openings with 1/2-inch or 1/4-inch hardware cloth, using heavy-duty staples or screws with washers every few inches to prevent predators from prying it loose. If you have a run, extend the hardware cloth up the walls of the run and then bury the skirt as described above.
4. Adding Doors, Windows, and Ventilation
Install your human entry door and chicken pop-door, ensuring they fit snugly and can be securely latched. Add windows (covered with hardware cloth) for light and cross-ventilation. Adequate airflow is crucial for chicken health, especially in warmer climates.
5. Interior Furnishings
Install roosting bars higher than nesting boxes, allowing at least 8-12 inches of bar space per bird. Build simple nesting boxes (one for every 3-4 hens) using scrap wood or repurposed containers. Add feeders and waterers, ideally elevated to keep them clean and prevent bedding from being scratched into them.

Cost-Saving Tips and Tricks
- Free Lumber: Check Craigslist, local construction sites, or pallet companies for free wood.
- Community Resources: Ask friends or neighbors if they have materials they’re looking to get rid of.
- Simple Design: Avoid complex angles and elaborate designs. A simple rectangular or square coop is easier and cheaper to build.
- DIY Accessories: Make your own feeders and waterers from buckets, PVC pipes, or old containers.
Conclusion
Building an inexpensive, predator-proof chicken coop is a rewarding project that combines frugality with security. By carefully planning, sourcing materials wisely, and focusing on robust predator-proofing techniques, you can provide a safe and comfortable home for your flock without excessive spending. The effort you put into building a secure coop will pay off in healthy, happy chickens and bountiful eggs for years to come.


