How to build durable, critter-proof raised beds cheaply?
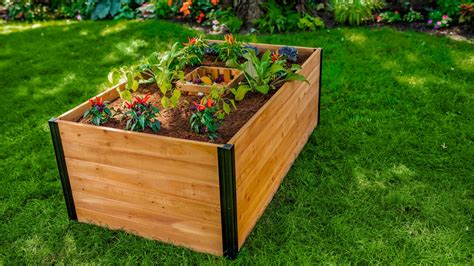
Raised garden beds offer a multitude of benefits, from better soil control and improved drainage to easier access and extended growing seasons. However, two common hurdles for aspiring gardeners are the cost of construction and the relentless challenge of protecting precious plants from critters. This guide will walk you through building robust, critter-resistant raised beds without breaking the bank, transforming your gardening dreams into an affordable reality.
The Allure of Raised Beds: Why Build One?
Beyond aesthetics, raised beds provide superior control over soil composition, crucial for challenging native soils. They improve drainage, warm up faster in spring, and reduce back strain from bending. Plus, a well-built bed can become a permanent, attractive feature in your landscape. The key is combining these benefits with smart, cost-effective construction and strategic critter defense.
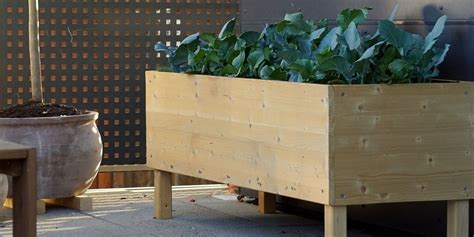
Selecting Durable Materials on a Budget
Durability in a raised bed primarily comes down to material choice. While cedar and redwood are naturally rot-resistant and beautiful, their price tag can be prohibitive. Here are some budget-friendly alternatives:
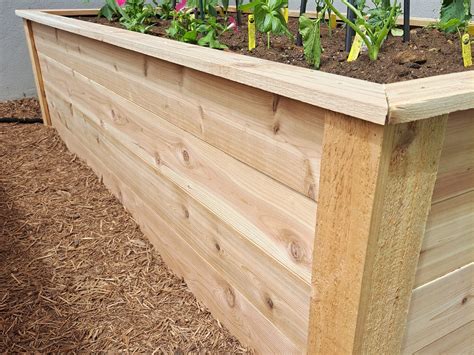
Wood Options: Balancing Cost and Longevity
- Untreated Pine/Fir: The cheapest wood option, but it will decompose quickly if left untreated. Extend its life by lining the interior with heavy-duty pond liner or thick plastic sheeting (avoiding direct soil contact with the wood) or by charring the wood (Shou Sugi Ban technique) for a natural, resistant finish.
- Pressure-Treated Lumber: While effective against rot, some gardeners are wary of chemicals leaching into the soil, especially for food crops. If you choose this, opt for newer, less toxic ACQ or MCA treatments and line the interior with a barrier.
- Recycled or Reclaimed Wood: Scour local building sites, online marketplaces, or salvage yards for free or cheap pallets (check for heat treatment ‘HT’ rather than chemical treatment ‘MB’), old fence boards, or decking. Just ensure it’s not contaminated with harmful chemicals.
Alternative Materials: Long-Lasting & Affordable
- Corrugated Metal Roofing (Galvanized Steel): Highly durable, lasts for decades, and offers a modern aesthetic. Often available as surplus or seconds at a discount. Pair it with wooden posts for a sturdy frame.
- Concrete Blocks/Pavers: Extremely durable and readily available. They can be stacked without mortar for easy assembly and disassembly. Check local classifieds for used blocks, which are often free or very cheap.
- Recycled Plastic Lumber: While often pricier than new wood, its virtually infinite lifespan can make it a cost-effective choice in the long run. Look for sales or recycled material suppliers.
Critter-Proofing Your Raised Beds Effectively
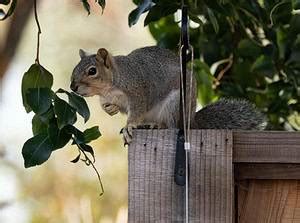
A durable bed is only half the battle; keeping out burrowing rodents, curious rabbits, and other garden pests is crucial for a bountiful harvest. Integrated critter-proofing from the start is far more effective than adding it later.
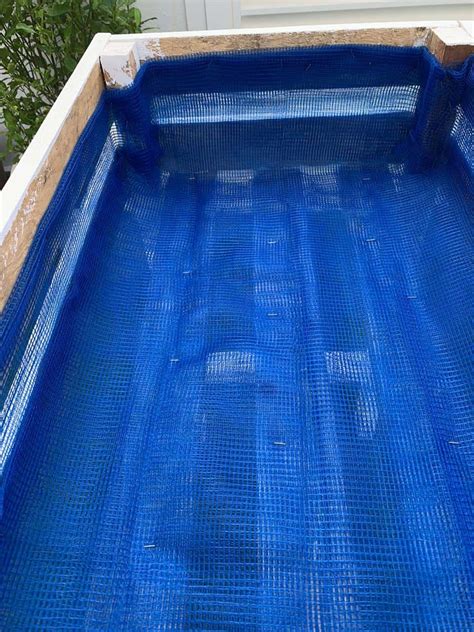
Foundation Protection: The Critter Barrier
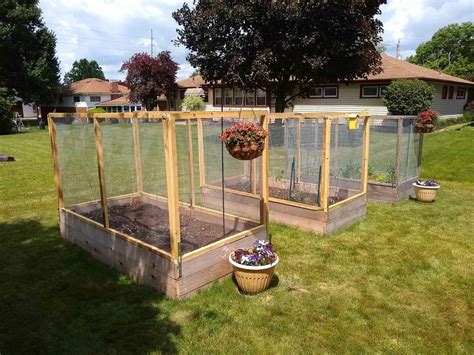
The most crucial step for deterring burrowing animals (voles, gophers, rabbits) is to install a hardware cloth barrier at the bottom of your bed. Purchase galvanized hardware cloth with a 1/2-inch or 1/4-inch mesh size (smaller mesh keeps out more pests). Cut it to fit the inside dimensions of your bed and staple it securely to the bottom edges of the frame before adding soil. For extra protection, extend the hardware cloth 6-12 inches up the interior sides of the bed.
Side and Top Protection
- Fencing: For larger animals like rabbits and deer, a perimeter fence around the bed or even attaching mesh fencing directly to the bed’s exterior can work. Bury the bottom edge of the fence a few inches deep or bend it outwards into an ‘L’ shape and bury to prevent digging under.
- Netting and Hoops: For birds and flying insects, consider a removable netting system. Simple DIY hoops made from PVC pipes can be inserted into the bed’s corners, allowing you to drape bird netting or insect mesh over them. This creates a flexible, temporary cover that can be removed for harvesting or when pests aren’t an issue.
- Vertical Barriers: For climbers, ensure your bed walls are smooth and high enough. Integrating mesh vertically along the exterior can also deter some climbing pests.
Smart Strategies for Cost Savings
Beyond material selection, smart planning and execution can significantly cut down costs:
- Creative Sourcing: Always check local classifieds, Freecycle, or even construction sites for discarded materials. Often, lumber yards have ‘cull’ piles of slightly damaged wood at deeply discounted prices.
- Simple Designs: Avoid complex joinery that requires specialized tools or excessive cuts. Simple butt joints reinforced with corner brackets or sturdy screws are often sufficient and much cheaper.
- DIY Fill Materials: Instead of buying bags of expensive potting mix, create your own ‘lasagna bed’ by layering organic materials like cardboard, leaves, grass clippings, and compost. This technique, sometimes called Hugelkultur, can drastically reduce the amount of purchased soil needed.
- Borrow Tools: Don’t buy expensive tools you’ll only use once. Ask friends, family, or local community gardens if you can borrow saws, drills, or staple guns.
Step-by-Step: Assembling Your Durable, Critter-Proof Bed
- Plan & Measure: Decide on your bed’s dimensions. A common size is 4×8 feet, allowing easy access to the center from either side.
- Gather Materials: Purchase or reclaim your chosen lumber or alternative material, along with hardware cloth, screws/nails, and a stapler.
- Cut & Assemble Frame: Cut your chosen material to length and assemble the frame. Reinforce corners with additional blocks or corner brackets for longevity.
- Install Critter Barrier: Line the bottom of the bed with hardware cloth, stapling it securely along the interior perimeter. If desired, extend it up the sides.
- Position & Level: Place your bed in its final location, ensuring it’s level for even watering and aesthetics.
- Add Soil & Plant: Fill your bed using a combination of collected organic matter and purchased topsoil/compost.
- Consider Top Protection: If using, install PVC hoops or other frameworks for netting.
Maintenance Tips for Longevity
Even with durable materials, a little care goes a long way. Periodically inspect your bed for loose fasteners, rotting wood (if applicable), or damaged critter barriers. Touching up any wear and tear promptly will ensure your raised bed continues to serve your gardening needs for many years.
Conclusion
Building durable, critter-proof raised beds doesn’t have to be an expensive endeavor. By intelligently choosing materials, implementing smart critter-proofing strategies from the outset, and employing cost-saving construction techniques, you can create a beautiful, productive, and resilient garden space that will yield harvests for seasons to come. Get creative, get building, and enjoy the fruits of your labor!