How to build raised garden beds for soil health on a budget?
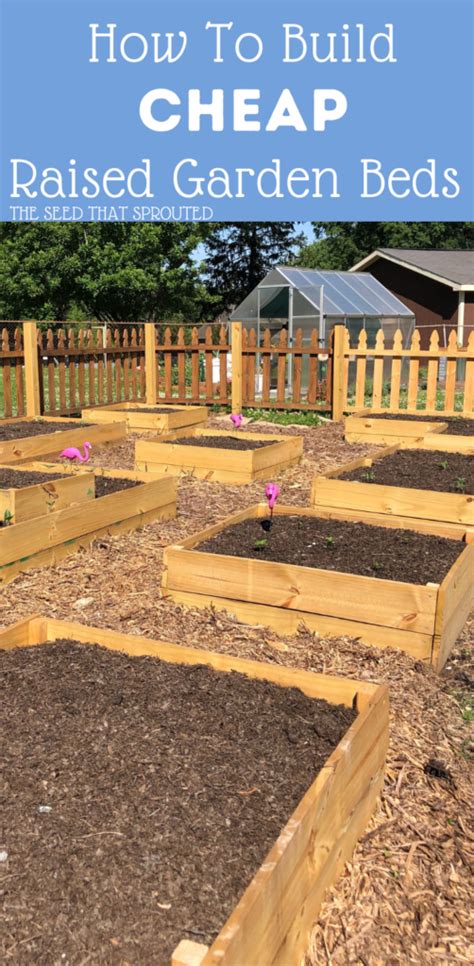
Creating a thriving garden doesn’t have to be an expensive endeavor, especially when you focus on the foundational element of any successful garden: healthy soil. Raised garden beds offer a multitude of benefits for soil health, from improved drainage to greater control over nutrient composition. The good news is, you can achieve these advantages on a shoestring budget.
This guide will walk you through the process of building raised garden beds using cost-effective materials and clever techniques to cultivate rich, vibrant soil, ensuring your plants flourish without emptying your wallet.
The Soil Health Advantage of Raised Beds
Raised garden beds revolutionize soil management. By elevating your garden, you gain immediate control over the soil structure and composition, a luxury often not afforded by in-ground gardening. This elevation prevents compaction from foot traffic, ensuring your soil remains loose and aerated – vital for root development and microbial activity. Excellent drainage is another significant benefit, as excess water can easily escape, preventing waterlogged roots and soil-borne diseases.
Furthermore, raised beds allow for precise soil amendments. You can tailor the soil mix to your specific plants’ needs, building a nutrient-rich environment from the ground up. This focused approach reduces the need for constant chemical interventions, fostering a more natural and sustainable growing system.
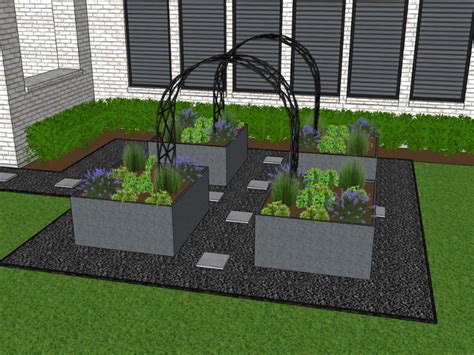
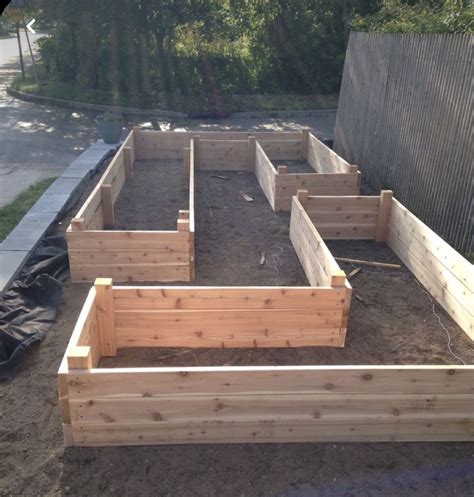
Selecting Affordable Materials for Your Raised Beds
The key to a budget-friendly raised bed lies in resourceful material selection. Don’t immediately reach for expensive lumber; look for reclaimed or inexpensive alternatives. Old fence posts, pallets (ensure they are heat-treated, marked HT, not chemically treated), or even fallen logs can form sturdy, rustic bed frames. Cinder blocks are another durable and readily available option, often found cheap or free on local marketplaces, though they can raise soil pH slightly, so plan accordingly.
Other creative options include large rocks, repurposed corrugated metal roofing, or even tightly woven branches (wattle fencing style) for a more organic look. The goal is to find materials that are durable, non-toxic, and align with your budget and aesthetic.
Planning Your Raised Bed Layout and Depth
Before you start building, plan your bed’s location and dimensions. Choose a spot that receives adequate sunlight (typically 6-8 hours for most vegetables). Consider the bed’s width – usually no more than 4 feet across – to allow easy access from both sides without stepping into the bed and compacting the soil. Length can be flexible.
Depth is crucial for root development and soil volume. While a minimum of 6-8 inches is often cited, 10-12 inches is ideal for most vegetables, and 18-24 inches is excellent for deep-rooted plants like tomatoes or potatoes, providing ample space for extensive root systems and greater soil volume for moisture retention.
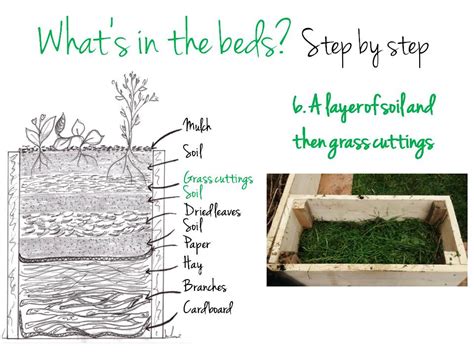
Smart, Economical Filling for Nutrient-Rich Soil
Filling your raised bed entirely with bagged potting mix can be costly. Instead, adopt a “lasagna gardening” approach, layering organic materials to build a rich, fertile soil structure over time. Start with a weed barrier layer of cardboard (remove tape and labels) or several layers of newspaper at the bottom – this smothers weeds and eventually breaks down, adding organic matter.
Above this, layer “brown” materials like twigs, small branches, straw, and dried leaves. Then add “green” materials such as grass clippings (untreated), kitchen scraps (vegetable and fruit), and fresh manure if available. Alternate these layers, moistening each as you go. Finally, top with a mix of finished compost and inexpensive bulk topsoil. This method mimics nature’s soil-building process, provides a slow-release of nutrients, and reduces the amount of purchased soil needed significantly.
Step-by-Step Budget Raised Bed Construction
Once your materials are gathered and your plan is set, construction is relatively straightforward:
- Prepare the Site: Clear the chosen area of weeds and debris. Level the ground as much as possible.
- Assemble the Frame: If using lumber or logs, lay out your chosen material to form the perimeter. Secure corners using screws, nails, or by interlocking (for logs/cinder blocks). Ensure it’s square and level.
- Add a Liner (Optional but Recommended): For beds made from wood or materials that might leach, consider lining the inside walls with pond liner or heavy-duty landscape fabric to prolong the life of the wood and prevent soil from seeping out. Don’t line the bottom, as you want drainage and earthworm access.
- Fill with Layers: Follow the layering strategy described above, moistening each layer.
- Planting: Once filled, allow the layers to settle for a week or two, then plant your desired crops.
Maintaining Soil Health in Your Budget Raised Beds
Building a raised bed is just the first step; maintaining its soil health is an ongoing process. Practice crop rotation to prevent nutrient depletion and pest buildup. Implement cover cropping during off-seasons to add organic matter and protect the soil. Always replenish nutrients by adding fresh compost annually and mulching with straw or wood chips to conserve moisture, regulate soil temperature, and suppress weeds. With consistent care, your budget-friendly raised beds will provide years of bountiful harvests and healthy soil.