


How to build simple, food-safe shelving for a root cellar or pantry?

Why Food-Safe Shelving Matters
Creating an organized and efficient storage space is crucial for any root cellar or pantry. Beyond just maximizing space, ensuring your shelving is food-safe is paramount. Materials that off-gas chemicals, absorb moisture, or are difficult to clean can contaminate stored produce and increase the risk of mold or spoilage. Simple, sturdy, and non-toxic shelving provides the perfect foundation for keeping your harvest fresh and your pantry items in top condition for extended periods.

Choosing the Right Materials
The key to food-safe shelving lies in selecting appropriate materials. For a DIY project focusing on simplicity and safety, untreated wood is generally the best choice. Here’s what to consider:
- Untreated Lumber: Softwoods like pine, fir, or spruce are affordable, easy to work with, and readily available. Ensure the wood is completely untreated – no pressure-treated lumber, as it contains chemicals harmful to food. Cedar and redwood are naturally rot-resistant but can be more expensive and some people dislike the scent near food.
- Avoid Particleboard/MDF: These engineered wood products often contain formaldehyde-based glues that can off-gas, making them unsuitable for food storage areas. They also absorb moisture readily, leading to swelling and mold.
- Hardware: Use galvanized or stainless steel screws and bolts to prevent rust, especially in damp environments like root cellars.
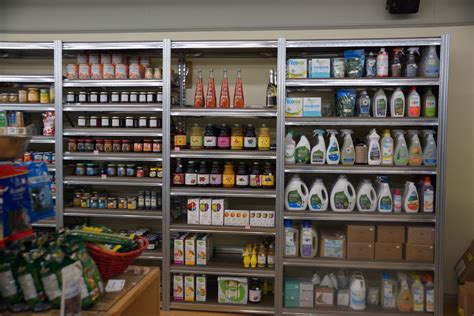
For the shelves themselves, slatted designs are often preferred for root cellars as they allow for better airflow around produce, which is vital for preventing spoilage. For pantries, solid shelves work well for jars and cans.

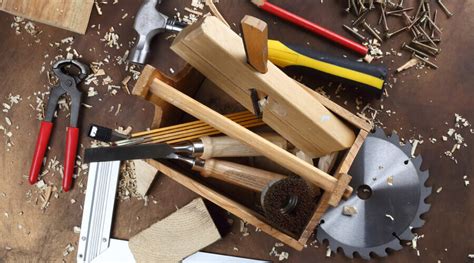
Essential Tools and Supplies
Before you begin, gather your materials and tools. This project requires basic woodworking skills and common household tools:
Materials:
- 2x4s or 2x6s for uprights and horizontal supports (framing)
- 1x4s or 1x6s for shelf slats, or plywood for solid shelves (untreated)
- Wood screws (2.5-3 inches for framing, 1.5-2 inches for shelves)
- Optional: Bolts and washers if assembling a freestanding, heavy-duty unit
Tools:
- Tape measure
- Pencil
- Circular saw or hand saw
- Drill/driver with appropriate bits
- Level
- Stud finder (if anchoring to walls)
- Safety glasses
Step-by-Step Construction Guide
1. Plan and Measure Your Space
Determine the dimensions of your shelving unit. Measure the width, height, and depth of the area where the shelves will go. Consider the types of items you’ll store and adjust shelf spacing accordingly (e.g., taller gaps for jars, shorter for cans).
2. Cut Your Lumber
Based on your plan, cut the following pieces:
- Uprights: Four vertical posts the height of your unit.
- Side Frames: Pieces for the top, bottom, and any intermediate shelves to form the side frames (depth of your unit). You’ll need two for each shelf level.
- Back/Front Supports: Pieces to connect the side frames horizontally (width of your unit). You’ll need two for each shelf level.
- Shelf Slats/Panels: Cut these to fit the width and depth of your desired shelves.
3. Assemble the Side Frames
Lay two uprights parallel on a flat surface. Attach the side frame pieces horizontally between them at your desired shelf heights, using two screws per joint. Repeat for the other set of uprights to create two identical side frames.
4. Connect the Side Frames
Stand your two assembled side frames upright. Connect them using the back/front support pieces, screwing them into the side frames at each shelf level. This forms the main structure of your shelving unit.

5. Add the Shelves
For slatted shelves, space your 1x4s or 1x6s evenly across the horizontal supports and screw them down. Leave a small gap (e.g., 1/2 inch) between slats for airflow. For solid shelves, cut plywood to size and screw it onto the supports. Ensure all shelves are level.
6. Secure the Unit (Optional but Recommended)
If your shelving unit is tall or will hold heavy items, it’s wise to anchor it to the wall studs using L-brackets or hurricane ties. This prevents tipping and enhances safety.
Food-Safe Finishing Touches & Maintenance
For root cellars, it’s often best to leave untreated wood completely unfinished to allow it to breathe and avoid introducing chemicals. The natural porousness of wood helps regulate humidity. If you desire a finish for pantry shelving (e.g., for easier cleaning), consider a food-grade mineral oil, beeswax finish, or natural tung oil, which are non-toxic and provide some protection. However, these are generally not necessary and can impede the natural ventilation vital in a root cellar.
Regular cleaning with a damp cloth (and mild soap if necessary) will keep your shelves hygienic. Ensure good air circulation in your root cellar or pantry to prevent mold and mildew, which is supported by the open design of slatted shelves.
By following these simple steps, you can create durable, food-safe shelving that will serve your root cellar or pantry efficiently for years, helping you store your preserved foods safely and accessibly.
