


How to build sturdy, budget-friendly shelves for canning jars?

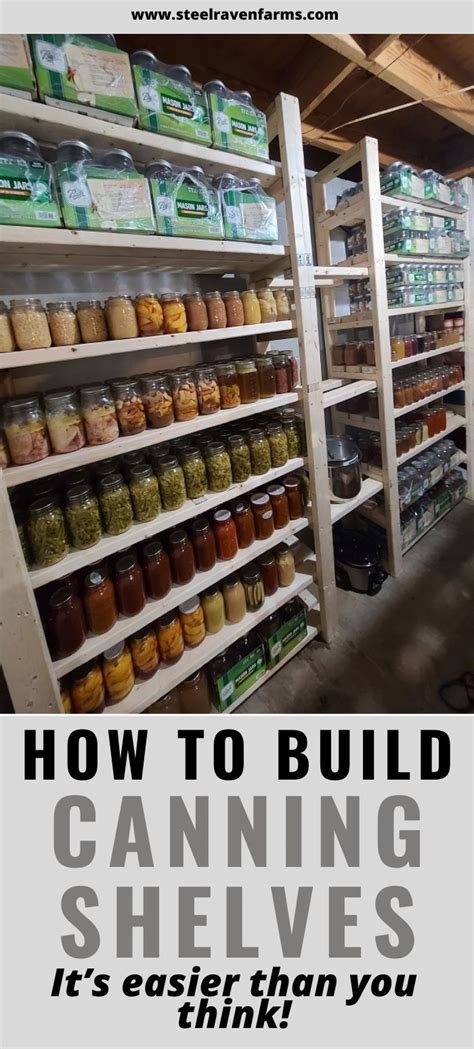
For home canners, a well-organized pantry is essential. Sturdy, reliable shelving is crucial for safely storing heavy jars, and building it yourself can save money while ensuring your custom needs are met. This guide will walk you through creating robust and budget-friendly shelves designed specifically for the weight and dimensions of canning jars.
Why DIY Canning Shelves?
Opting to build your own canning shelves offers several advantages over buying pre-made units. You gain complete control over dimensions, allowing you to maximize storage in unique spaces like a pantry corner or basement wall. Furthermore, you can choose strong, durable materials that might be cost-prohibitive in pre-assembled form, ensuring your shelves can handle the substantial weight of dozens of filled canning jars without sagging or failing. This DIY approach not only saves money but also provides a deeply satisfying sense of accomplishment.
Planning Your Shelf Design
Careful planning is the first step to successful construction. Begin by measuring the exact space where your shelves will reside—width, height, and depth. Consider the types and sizes of canning jars you primarily use (pint, quart, half-gallon) to determine optimal shelf spacing. Generally, 10-12 inches of vertical clearance between shelves is sufficient for most quart jars, with a little extra for easy access. For depth, 10-12 inches is usually ideal to accommodate a single row of quart jars, preventing wasted space and making labels easy to read. Sketch out your design, noting all dimensions and anticipating how many jars each shelf will hold.
Essential Materials and Tools
Materials List:
- Lumber: 2x4s or 2x3s for the frame (pine or fir are budget-friendly), and 1/2-inch or 3/4-inch plywood for the shelves. For heavier loads or wider spans, 3/4-inch plywood is recommended to prevent bowing.
- Wood Screws: 2.5-inch to 3-inch deck screws for framing, and 1.25-inch to 1.5-inch wood screws for attaching shelves.
- Wood Glue: For added strength at all joints.
- Optional: Sandpaper, wood filler, primer, paint or sealant.
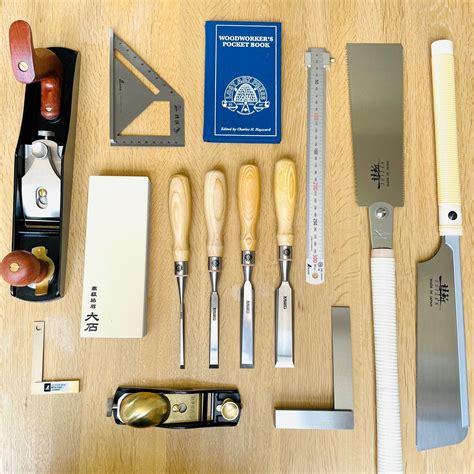
Tools You’ll Need:
- Tape Measure
- Pencil
- Circular Saw or Miter Saw (for precise cuts)
- Drill/Driver
- Level
- Speed Square or Framing Square
- Safety Glasses and Hearing Protection
Step-by-Step Construction Guide
1. Cut Your Lumber:
Based on your design, cut all your lumber to size. You’ll need four vertical posts (for the height), horizontal supports for the top, bottom, and each shelf level (two per level – front and back), and the plywood shelf pieces themselves. Accuracy in cutting is key for a stable structure.
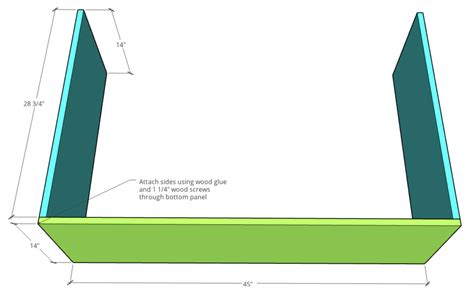
2. Assemble the Side Frames:
Lay two vertical posts parallel on a flat surface. Attach the horizontal supports for the top, bottom, and intermediate shelves between them using screws and wood glue. Ensure all joints are square. Repeat this process for the second side frame.
3. Connect the Side Frames:
Stand your two assembled side frames upright. Connect them with horizontal supports at the front and back, forming the full rectangular frame of your shelving unit. Use a level frequently to ensure the structure remains plumb and square as you work. Diagonal bracing on the back can significantly increase stability, especially for taller units.
4. Install the Shelves:
With the main frame assembled, place your pre-cut plywood shelf pieces onto the horizontal supports. Secure them from above using 1.25-inch to 1.5-inch wood screws, driving them through the plywood into the supporting lumber. For heavy loads, consider adding additional support blocks under the middle of longer shelves.

Finishing and Securing Your Shelves
Once construction is complete, inspect all joints for stability. Sand down any rough edges or splinters. If the shelves will be in a damp environment (like a basement), or if you want to make them easier to clean, apply a coat of primer and paint or a wood sealant. For maximum safety and stability, especially for tall units or in earthquake-prone areas, secure the top of your shelving unit to a wall stud using L-brackets. This prevents accidental tipping.
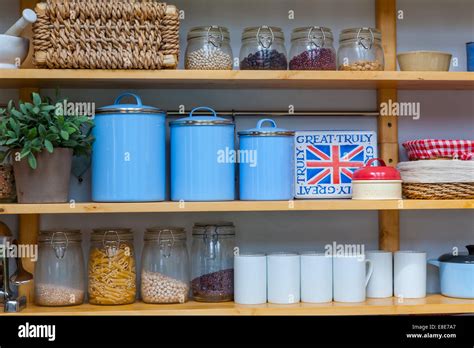
Loading and Maintenance
When loading your new shelves, distribute the weight evenly, placing heavier jars on lower shelves. Avoid overloading any single shelf beyond its designed capacity. Periodically check the shelves for any signs of wear, loosening screws, or sagging, and make necessary adjustments or repairs. With proper construction and care, your budget-friendly shelves will provide safe, organized storage for your canned goods for many years to come.
Conclusion
Building your own canning jar shelves is a rewarding and practical DIY project that results in custom, incredibly sturdy storage without breaking the bank. By carefully planning your design, selecting the right materials, and following these steps, you’ll create a durable solution perfectly suited to your food preservation needs, transforming a cluttered space into an organized haven for your home-canned treasures.
