


How to compost kitchen scraps effectively for healthy garden soil?
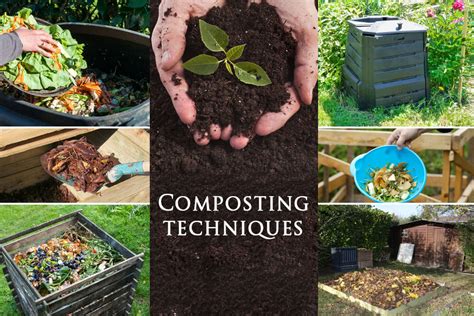
The Transformative Power of Kitchen Composting
Composting kitchen scraps is one of the simplest yet most impactful ways to enrich your garden soil, reduce household waste, and embrace a more sustainable lifestyle. Instead of sending food waste to landfills where it generates harmful methane gas, you can convert it into a valuable soil amendment known as humus – a dark, nutrient-rich material that improves soil structure, water retention, and provides essential nutrients for plants. It’s a win-win for your garden, your wallet, and the planet.
Understanding Your Composting Ingredients: Greens and Browns
Successful composting relies on a balanced mix of “greens” (nitrogen-rich materials) and “browns” (carbon-rich materials). Think of it as creating a balanced diet for the microorganisms that do all the hard work.
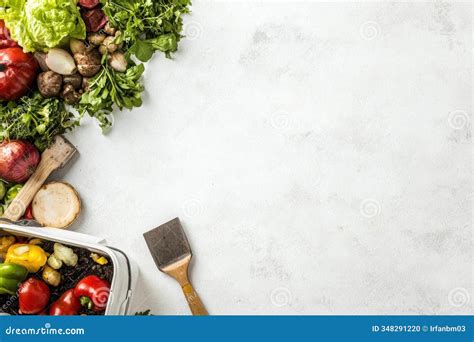
Greens (Nitrogen Sources):
- Fruit and vegetable scraps (peels, cores, spoiled produce)
- Coffee grounds and tea bags
- Fresh grass clippings
- Plant trimmings (non-diseased)
- Eggshells (crushed)
Browns (Carbon Sources):
- Dried leaves
- Shredded newspaper and cardboard (non-glossy, non-colored)
- Wood chips and sawdust (untreated)
- Straw or hay
- Small twigs

What to Keep Out of Your Compost Bin
While most organic matter can be composted, certain items should be avoided to prevent odors, pests, and the spread of pathogens. Avoid adding:
- Meat, fish, bones, and dairy products (attracts pests, creates odors)
- Oils, grease, and fatty foods (attracts pests, slows decomposition)
- Pet waste (may contain harmful pathogens)
- Diseased plants (can spread diseases to your garden)
- Weeds that have gone to seed (to prevent spreading weeds)
- Chemically treated wood or sawdust
Setting Up Your Composting System
There are various methods for composting kitchen scraps, each with its own advantages. Choose a system that fits your space, budget, and lifestyle:
- Compost Piles: Simple and inexpensive for larger yards, but require more frequent turning.
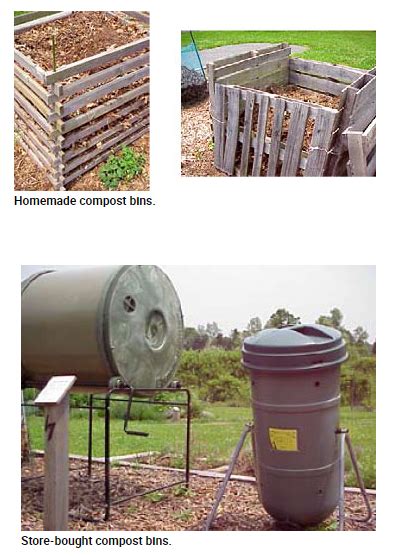
- Compost Bins: Enclosed structures (store-bought or DIY) that help contain the pile, retain heat, and deter pests.
- Compost Tumblers: Excellent for faster composting as they make turning easy and efficient.
- Worm Composting (Vermicomposting): Ideal for smaller spaces, processing kitchen scraps into nutrient-rich worm castings.
Place your composting system in a convenient, shaded location with good drainage, away from your main living areas.
The Art of Layering, Moisture, and Aeration
Once you have your system, the magic begins. A successful compost pile needs the right balance of greens, browns, moisture, and air.
- Layering: Start with a layer of browns at the bottom for drainage. Then, alternate layers of greens and browns, aiming for roughly a 2:1 ratio of browns to greens by volume.
- Moisture: Your compost pile should be consistently moist, like a wrung-out sponge. If it’s too dry, decomposition slows down. If it’s too wet, it can become anaerobic and smelly. Add water as needed, especially during dry spells.
- Aeration: Regular turning is crucial for providing oxygen to the microbes and speeding up decomposition. Turn your pile every week or two with a pitchfork or compost aerator. This also helps mix materials and distribute moisture.
Troubleshooting Common Composting Problems
- Odor: Often caused by too many greens, too much moisture, or lack of aeration. Add more browns, turn the pile, and ensure proper drainage.
- Pests: Usually attracted by meat, dairy, or uncovered food scraps. Bury fresh kitchen scraps deep within the pile and avoid prohibited items. Enclosed bins can also help.
- Slow Decomposition: Can be due to lack of moisture, insufficient nitrogen (not enough greens), or lack of aeration. Adjust moisture, add more greens, and turn the pile more frequently.
Harvesting and Utilizing Your “Black Gold”
Your compost is ready when it’s dark brown, crumbly, smells earthy, and you can no longer recognize the original scraps. This typically takes anywhere from two months to a year, depending on the method and conditions.
Once ready, your finished compost can be used in numerous ways:
- Soil Amendment: Mix it into garden beds before planting to improve soil structure and fertility.
- Top Dressing: Spread a layer around existing plants to provide a slow-release nutrient boost.
- Potting Mix: Blend with garden soil, sand, or perlite to create a custom potting mix for containers.
- Lawn Care: Sprinkle a thin layer over your lawn as a natural fertilizer.

Conclusion
Composting kitchen scraps is a rewarding journey that connects you more deeply with your food and your garden. By taking a few simple steps, you can divert waste from landfills and create a powerful, natural fertilizer that will lead to healthier plants, richer soil, and a more vibrant ecosystem right in your backyard. Start today and watch your garden thrive!


