


How to get a perfectly crisp crust on homemade sourdough bread?

The Quest for the Ultimate Sourdough Crust
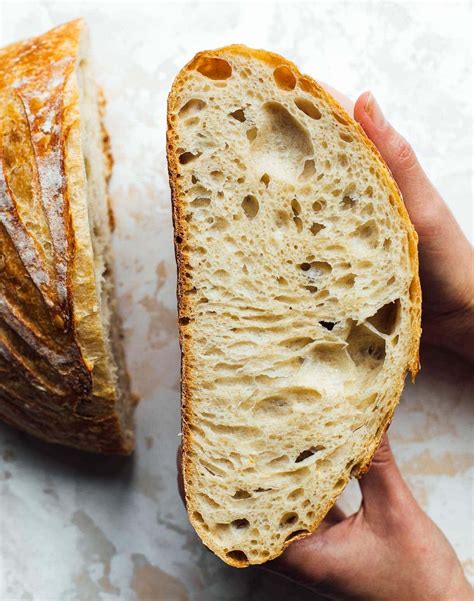
There’s nothing quite like the sound and sensation of biting into a perfectly crisp sourdough crust, giving way to a soft, airy interior. It’s a hallmark of artisan bread, a texture many home bakers strive for. While sourdough baking can seem intimidating, achieving that coveted crackly crust is well within reach with a few key techniques and a little attention to detail. Let’s dive into the secrets that professional bakers use to get that irresistible crunch.

Mastering Heat: The Foundation of Crispness
High heat is paramount for a crisp crust. It promotes oven spring and rapidly sets the crust, creating that desirable texture. Preheating your oven to a high temperature, typically between 450°F and 500°F (232°C to 260°C), is non-negotiable. But it’s not just the oven that needs to be hot; your baking vessel needs to be screaming hot too.
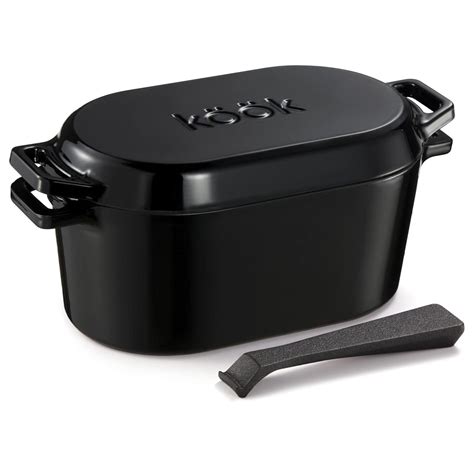
Preheating Your Dutch Oven (or Baking Steel)
If you’re using a Dutch oven, preheat it inside the oven for at least 30-60 minutes. This ensures the cast iron is thoroughly heated, providing an immediate burst of radiant heat to the dough when it’s transferred, which is crucial for crust development. The same applies to a baking steel or stone – allow ample time for it to reach and maintain the high temperature.
The Magic of Steam: Preventing Premature Hardening
Steam is the unsung hero of a crisp, blistered crust. When dough is first introduced to a hot oven, steam prevents the crust from forming too quickly. This allows the dough to expand fully (oven spring) before the crust sets, creating a thinner, more extensible skin that can crisp up beautifully later. Without sufficient steam, the crust hardens prematurely, resulting in a tougher, less expanded loaf.
Effective Steaming Methods
- Dutch Oven: The simplest method. The lid traps the moisture released by the bread itself, creating a steamy environment.
- Water Tray/Lava Rocks: For baking on a stone or steel, place a pan of hot water or preheated lava rocks on a lower rack to generate steam. Be cautious when opening the oven.
- Spray Bottle: Some bakers mist the oven walls with water, though this is less consistent and effective than other methods.
Typically, steam is maintained for the first 15-20 minutes of baking. After this initial phase, the steam should be released to allow the crust to dry out and brown.

Optimal Baking Environment: Dutch Oven vs. Baking Stone
The choice of baking surface significantly impacts crust development.
- Dutch Oven: Provides excellent all-around heat and traps steam efficiently, making it ideal for beginners and consistently producing a great crust.
- Baking Stone/Steel: Offers intense radiant heat from below, promoting a strong oven spring and a crisp bottom crust. When used with external steam, it can create incredibly artisanal results.
Whichever method you choose, ensuring it’s fully preheated is the key to imparting that initial burst of heat that sets the crust.
Precision Baking: Scoring and Temperature Control
The Art of Scoring
Proper scoring isn’t just for aesthetics; it directs the oven spring, allowing the bread to expand predictably without tearing haphazardly. A deep, clean score (using a razor blade or lame) helps create an “ear” and contributes to a beautiful, crisp surface.
Lid On, Lid Off
If baking in a Dutch oven, bake with the lid on for the first 20-30 minutes to trap steam. Then, remove the lid for the remaining 20-30 minutes of baking. This allows the crust to dry out, brown deeply, and become wonderfully crisp. If baking on a stone with external steam, remove the steam source after the initial phase and continue baking.
Temperature Adjustment
Some bakers reduce the oven temperature slightly after the initial high-heat, steam-rich phase. For example, dropping from 475°F to 450°F (245°C to 232°C) after removing the lid can prevent the crust from burning while still allowing the interior to cook through and the crust to darken.
The Crucial Cooling Phase: Patience is a Virtue
This step is often overlooked but is absolutely critical for a crisp crust. Once your sourdough comes out of the oven, it’s still cooking internally, and moisture is migrating. Placing it directly on a solid surface will trap steam and lead to a soggy bottom crust.
Always transfer your freshly baked loaf to a wire rack immediately. This allows air to circulate around the entire bread, preventing condensation and letting the crust fully dry and crisp up as it cools. Resist the urge to cut into it too soon! A sourdough loaf needs at least 1-2 hours (and ideally longer) to cool completely for the crumb to set and the crust to achieve its full potential. Cutting it hot will release steam prematurely and result in a gummy interior and a less crisp crust.
Conclusion
Achieving a perfectly crisp crust on your homemade sourdough bread is a rewarding endeavor that elevates your baking. By consistently applying high heat, strategic steam, appropriate baking vessels, precise scoring, and most importantly, patient cooling, you’ll be well on your way to baking loaves with that irresistible crunch and beautiful blistered exterior. Happy baking!


