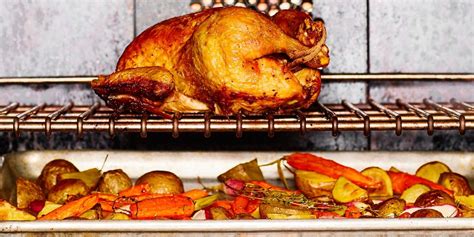
How to get crispy skin on a slow-roasted country chicken?

The Quest for Golden, Irresistibly Crispy Skin
Slow-roasting a country chicken promises tender, juicy meat infused with rich flavors. However, the lower temperatures often associated with slow roasting can sometimes lead to less-than-crispy skin, leaving you with a delicious bird that lacks that coveted crackle. Fear not, achieving a beautiful, golden, and shatteringly crisp skin is entirely possible with a few strategic steps and a little know-how. It’s about understanding how to manage moisture and fat effectively throughout the cooking process.

Preparation is Paramount: Moisture is the Enemy
The single most crucial step for crispy skin is eliminating moisture. Water on the skin prevents browning and crisping. Think of it like trying to fry a wet potato – it steams instead of crisps.
Pat it Dry, REALLY Dry
- Paper Towels are Your Best Friend: Before you do anything else, use plenty of paper towels to thoroughly pat down every inch of the chicken’s exterior, including under the wings and legs. Don’t be shy; ensure it’s as dry as possible.
Salt Generously and Air Dry
- Salt Draws Moisture Out: Rub the chicken generously with coarse salt (like kosher salt). The salt will draw out residual moisture from the skin.
- Refrigeration is Key: Place the seasoned chicken, uncovered, on a rack set over a baking sheet in the refrigerator for at least 8 hours, or preferably overnight (up to 24 hours). The cool, dry air of the refrigerator will further dehydrate the skin, creating the perfect canvas for crisping.

Fat and Flavor: The Crisping Catalysts
Once the chicken is dry, it’s time to introduce elements that aid in browning and flavor.
Apply Fat Liberally
- Oil or Butter: Before roasting, rub the entire chicken with a thin layer of olive oil, avocado oil, or melted butter. This fat will help conduct heat, promote even browning, and contribute to the crisp texture.
- Rendered Fat: For an extra layer of flavor and crispness, consider rendering some chicken fat (if available) and brushing that onto the skin.
Season Under and Over the Skin
- While salt has already been applied, consider adding your preferred herbs and spices. Gently separate the skin from the breast and thigh meat and rub seasonings directly onto the meat for deeper flavor. A light dusting of seasoning on top of the skin is also fine, but avoid anything that might burn or contain too much sugar.
The Roasting Strategy: Temperature Control is Critical
The way you manage oven temperature plays a pivotal role in achieving that sought-after crispy skin while ensuring the meat remains tender.
Start High, Finish High (or Low then High)
- Initial High Heat Blast: A popular method is to start the chicken in a very hot oven (around 425-450°F or 220-230°C) for the first 15-20 minutes. This intense heat quickly renders the fat under the skin and kick-starts the crisping process.
- Lower and Slow: After the initial blast, reduce the oven temperature to a slower roasting temperature (around 325-350°F or 160-175°C) for the remainder of the cooking time, until the internal temperature reaches 165°F (74°C).
- Final High Heat Boost (Optional): If the skin isn’t quite as crisp as you’d like at the end of the slow roast, you can return the chicken to the higher temperature for another 5-10 minutes, keeping a close eye on it to prevent burning.
Don’t Crowd the Pan and Use a Rack
- Air Circulation: Ensure there’s plenty of space around the chicken in the roasting pan. Crowding will trap steam and prevent crisping.
- Elevate it: Always roast the chicken on a V-rack or a flat rack set inside a roasting pan. This elevates the chicken, allowing hot air to circulate all around it, including underneath, promoting even crisping.
The Final Touches: Basting and Resting
Resist Excessive Basting
- While basting can add flavor to the meat, frequently basting the skin directly with pan juices can reintroduce moisture and soften the crispness you’ve worked so hard to achieve. If you must baste, focus on the meatier parts or do it sparingly during the initial lower temperature phase, avoiding the skin as much as possible, or do so just before the final high-heat crisping.
Resting is Non-Negotiable
- Once cooked, transfer the chicken to a cutting board and tent it loosely with foil. Let it rest for 15-20 minutes before carving. This allows the juices to redistribute throughout the meat, making it incredibly tender, and also gives the skin a chance to set and maintain its crispness.
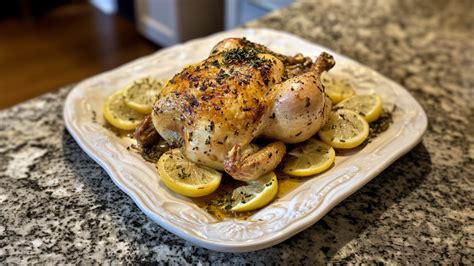
Enjoy Your Culinary Masterpiece
By meticulously following these steps – thorough drying, proper seasoning, strategic fat application, careful temperature management, and adequate resting – you’ll transform your slow-roasted country chicken from simply delicious to an absolute showstopper. The reward? A chicken with incredibly juicy meat and that glorious, golden, and irresistibly crispy skin that defines culinary perfection. Happy roasting!