


How to perfectly season a cast iron skillet for non-stick country cooking?
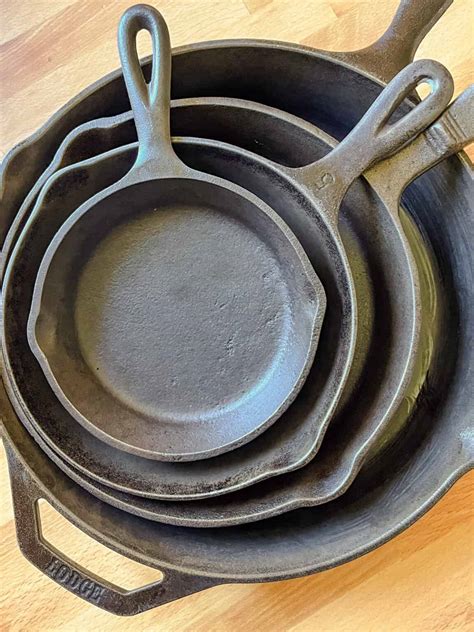
A well-loved cast iron skillet is a cornerstone of country cooking, revered for its ability to produce crispy fried chicken, golden cornbread, and perfectly seared meats. However, its legendary performance isn’t just about the iron itself; it’s about the magic of a perfectly developed seasoning. This guide will walk you through the essential steps to transform your cast iron into a naturally non-stick workhorse, ready for generations of delicious country meals.
The Science of Seasoning: What is it?
Seasoning isn’t simply oil baked onto the surface; it’s a layer of polymerized oil that creates a natural, resilient coating. When fats and oils are heated past their smoke point, they break down and restructure into a hard, plastic-like film that bonds directly to the iron. This process, known as polymerization, forms a protective barrier that prevents food from sticking, enhances flavor, and guards against rust. For country cooking, this means effortlessly flipping eggs, achieving that coveted crust on your fried dishes, and enjoying easy cleanup.

Step 1: Thorough Cleaning and Preparation
Before you begin the seasoning process, your skillet needs to be impeccably clean and dry. If you have a brand new skillet, wash it with hot water and a small amount of dish soap (yes, for the first time!) to remove any factory-applied protective coatings. For a used or rusty skillet, use steel wool, a metal scraper, or even sandpaper to remove all rust, old seasoning, and gunk until you reach bare metal.
Rinse the skillet thoroughly under hot water. The most critical step here is drying: place the skillet on a stovetop over medium heat for 5-10 minutes, or in a warm oven, until every trace of moisture has evaporated. Any residual water will lead to rust under the new seasoning layer.
Step 2: Choosing the Right Oil and Applying a Thin Layer
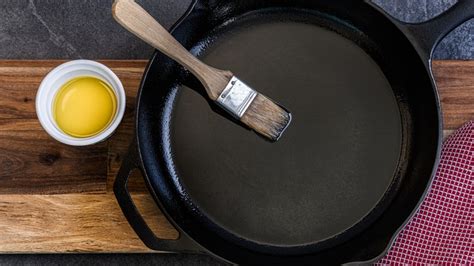
Once your skillet is completely dry and has cooled to the touch, it’s time to apply oil. For initial seasoning, oils with high smoke points and good polymerization properties work best. Excellent choices include grapeseed oil, flaxseed oil, vegetable oil, or solid vegetable shortening. Avoid olive oil or butter for initial seasoning, as they can result in a sticky finish.
Apply a very thin layer of your chosen oil to every surface of the skillet – inside, outside, and the handle. Use a clean paper towel or lint-free cloth to rub the oil in, then wipe it down thoroughly as if you’re trying to remove it all. The goal is to leave an almost invisible film; too much oil will result in a sticky, uneven, and potentially flaky seasoning.
Step 3: The Baking Process
Preheat your oven to a high temperature, ideally between 450-500°F (230-260°C). Place the oiled skillet upside down on the middle rack of your oven. This prevents any excess oil from pooling at the bottom and creating gummy spots. To catch any potential drips, place a sheet of aluminum foil or a baking sheet on the bottom rack below the skillet.
Bake the skillet for one hour. During this time, the oil will polymerize and bond with the iron. After one hour, turn off the oven and allow the skillet to cool completely inside the oven. Slow cooling helps the seasoning cure properly and become more durable.

Step 4: Repeat for Optimal Layers
A single layer of seasoning is a good start, but for truly non-stick performance and lasting durability, especially for heavy country cooking, multiple layers are essential. Repeat Steps 2 and 3 – applying a very thin layer of oil, baking for an hour, and cooling completely – at least 3-5 times. The more layers you build, the more robust and non-stick your surface will become. Patience during this process will yield significant dividends in cooking performance.
Maintaining Your Perfectly Seasoned Skillet
Post-Cooking Care
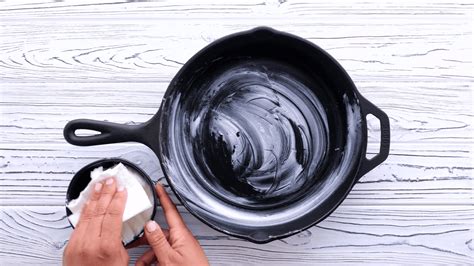
After each use, scrape out any food residue with a spatula. For most cleaning, hot water and a stiff brush or a chainmail scrubber are sufficient. For initial seasoning, avoid harsh soaps as they can strip nascent seasoning. After cleaning, always dry your skillet immediately and thoroughly; placing it back on the stovetop over low heat for a few minutes ensures all moisture is gone. Once dry, apply a very light coat of oil before storing it in a dry place.
Cooking for Longevity
The best way to maintain and improve your skillet’s seasoning is to cook with it regularly. Oily foods like bacon, fried chicken, or cornbread are particularly beneficial for building up the seasoning. Try to avoid cooking highly acidic foods like tomato sauces or wine-based dishes for extended periods in a newly seasoned skillet, as they can strip away the developing layers.
Embrace Non-Stick Country Cooking
With a perfectly seasoned cast iron skillet, you’re now equipped to tackle any country cooking challenge. Imagine fried eggs sliding effortlessly, buttermilk pancakes browning beautifully without sticking, and cornbread releasing cleanly from the pan. This natural non-stick surface not only makes cooking easier but also imparts that unique, rich flavor that only cast iron can provide.
Conclusion
Perfectly seasoning your cast iron skillet is an investment in time and care, but the payoff is a naturally non-stick, durable cooking surface that will serve you for decades. Follow these steps diligently, be patient with the layering process, and you’ll unlock the full potential of your cast iron, ready to create countless cherished country meals.


