


How to properly save heirloom tomato seeds for next season?
Saving seeds from your favorite heirloom tomatoes is a rewarding way to preserve unique varieties, ensure future harvests of your preferred flavors, and build self-sufficiency in your garden. Unlike hybrid varieties, heirloom tomatoes will produce offspring true to the parent plant, making them perfect candidates for seed saving. This guide will walk you through the proper fermentation method, which is crucial for successful tomato seed storage and germination.
Why Save Heirloom Tomato Seeds?
Beyond the satisfaction of growing your own food, saving heirloom tomato seeds helps maintain genetic diversity in the plant world. Many commercial varieties prioritize shelf-life and uniform appearance over flavor, but heirlooms offer an incredible spectrum of tastes, colors, and textures. By saving seeds, you become a steward of these unique plant lineages, ensuring they thrive for generations to come and allowing you to adapt varieties best suited to your local climate.
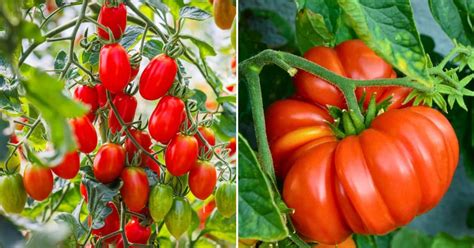
Step 1: Selecting the Best Tomatoes
The success of your seed-saving efforts begins with choosing the right fruit. Select tomatoes from healthy, vigorous plants that produced the characteristics you desire most – whether that’s exceptional flavor, disease resistance, or productivity. The fruit should be fully ripe, slightly soft to the touch, and free from disease or blemishes. Avoid saving seeds from plants that show signs of stress or disease, as these traits can be passed on.
Step 2: The Fermentation Method (Essential for Tomatoes)
Tomatoes have a natural gel sac around each seed that contains germination inhibitors. The fermentation process breaks down this gel, cleans the seeds, and helps eliminate seed-borne diseases, leading to higher germination rates and healthier seedlings.
The Process:
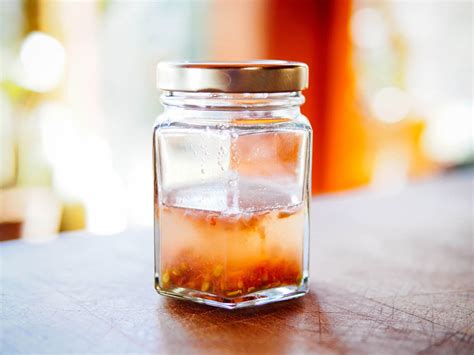
- Extract Seeds and Pulp: Cut your chosen ripe tomatoes in half. Using a spoon or your fingers, scoop out the seeds and the surrounding jelly-like pulp into a clean glass jar. You can add a small amount of water (about 1/4 cup for a few tomatoes) to help the process along.
- Ferment: Loosely cover the jar with a lid or a piece of cloth secured with a rubber band. Do not seal it tightly, as gases will be produced. Place the jar in a warm spot (around 70-75°F / 21-24°C) away from direct sunlight.
- Monitor: Over the next 2-5 days, a layer of mold or scum will typically form on the surface, and the good, viable seeds will sink to the bottom. The fermentation is complete when you see this mold and the seeds have separated from the pulp. If left too long (more than 5-7 days), the seeds can start to germinate in the jar, or rot.
Step 3: Cleaning and Rinsing Your Seeds
Once fermentation is complete, it’s time to clean your seeds. Carefully skim off the mold, pulp, and any floating seeds (these are often inviable). Then, pour the remaining contents into a fine-mesh sieve. Rinse the seeds thoroughly under cool, running water, using your fingers to gently rub and dislodge any remaining pulp until the seeds are completely clean. Clean seeds are crucial for preventing mold during storage.
Step 4: Thorough Drying for Longevity
Proper drying is arguably the most critical step in ensuring your seeds remain viable for future seasons. If seeds are not thoroughly dry, they will mold and rot in storage.
- Spread Thinly: Spread the clean, rinsed seeds in a single layer on a non-stick surface. Good options include a ceramic plate, a sheet of glass, parchment paper, or coffee filters. Avoid paper towels, as the seeds can stick to them.
- Air Dry: Place the drying surface in a warm, well-ventilated area away from direct sunlight. Good air circulation is key. Stir the seeds occasionally to ensure even drying.
- Be Patient: This process can take anywhere from a few days to a week, depending on humidity and temperature. Seeds are completely dry when they snap rather than bend.

Step 5: Storing Your Heirloom Seeds
Once your seeds are bone dry, they are ready for storage. The goal is to keep them cool, dark, and dry to maintain their viability for as long as possible.
- Containers: Store seeds in airtight containers like small glass jars, plastic baggies, or paper envelopes. If using paper, place the envelopes inside an airtight container for extra protection against moisture and pests.
- Labeling: Always label your containers clearly with the tomato variety and the date the seeds were harvested. This information is vital for future planning and record-keeping.
- Location: A cool, dark pantry, a refrigerator, or even a freezer are ideal storage locations. Temperatures between 35-45°F (2-7°C) are best for long-term storage.

Tips for Success
- Collect from Multiple Plants: To maintain genetic diversity within a variety, collect seeds from several healthy plants of the same type.
- Test Germination: If you’re unsure about the viability of older seeds, you can perform a simple germination test before planting season to gauge their potential.
- Record Keeping: Keep a garden journal with notes on which varieties you saved, how they performed, and any specific traits you observed.
Conclusion
Saving heirloom tomato seeds is a fulfilling practice that deepens your connection to the food you grow and helps secure the future of these cherished varieties. With careful selection, proper fermentation, thorough drying, and mindful storage, you’ll be well on your way to enjoying the unique flavors of your favorite heirloom tomatoes season after season. Happy gardening!