


How to properly season cast iron for non-stick everyday cooking?

Understanding the Magic of Cast Iron Seasoning
Cast iron cookware is beloved by chefs and home cooks alike for its durability, even heat distribution, and ability to last generations. However, its true superpower lies in its seasoning – a naturally non-stick surface created through a process of baking oil into the pan. Achieving and maintaining proper seasoning transforms a rustic piece of metal into an indispensable kitchen tool for everyday cooking, from perfectly seared steaks to fluffy scrambled eggs.
Unlike synthetic non-stick coatings, cast iron’s non-stick properties actually improve with use and proper care. This article will guide you through the precise steps to season your cast iron cookware effectively, ensuring a smooth, non-stick surface for years of culinary enjoyment.
What Exactly is Cast Iron Seasoning?
Seasoning isn’t just a layer of grease; it’s a polymerized layer of oil that has bonded to the iron surface. When oil is heated past its smoke point, it breaks down and forms a plastic-like coating that fills microscopic pores in the iron. This creates a slick, durable, and rust-resistant barrier. The more layers of this polymerized oil you build up, the more non-stick and protective your cast iron becomes.

Initial Seasoning: For New or Stripped Pans
Whether you’ve just bought a new (unseasoned) cast iron pan or stripped an old one down to bare metal, the initial seasoning process is crucial.
Step 1: Clean Thoroughly
Even pre-seasoned pans benefit from an initial wash to remove manufacturing residues. For bare iron, scrub with hot soapy water and a stiff brush or steel wool to remove any rust or debris. Rinse thoroughly and immediately dry the pan completely over low heat on the stovetop for a few minutes to evaporate all moisture. Any residual water will lead to rust.
Step 2: Apply a Thin Layer of Oil
Once the pan is dry and slightly warm, apply a very thin, even layer of high smoke point oil to all surfaces – inside, outside, and handle. Good choices include flaxseed oil, grapeseed oil, vegetable oil, or Crisco. The key is “thin.” Too much oil will result in a sticky, gummy finish. Use a paper towel to wipe away as much excess oil as you can, as if you’re trying to remove it all. There should be no visible droplets or pools of oil.

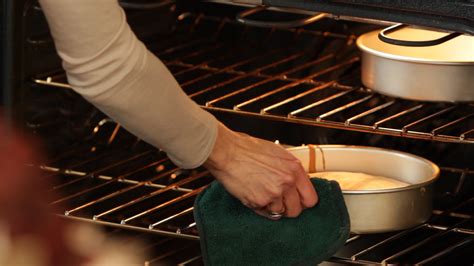
Step 3: Bake Your Pan
- Preheat your oven to 450-500°F (230-260°C).
- Place the pan upside down on the middle rack. This helps prevent oil from pooling.
- Place aluminum foil or a baking sheet on the bottom rack to catch any drips.
- Bake for one hour.
- After an hour, turn off the oven and let the pan cool completely inside the oven. This slow cooling process helps the seasoning adhere.
Repeat steps 2 and 3 at least 3-5 times for a robust initial seasoning. Each layer adds to the non-stick quality and durability. You’ll notice the pan getting darker and developing a satin sheen.
Maintaining Seasoning for Non-Stick Everyday Cooking
Initial seasoning is just the beginning. The real magic happens with consistent use and proper care.
Cooking with Cast Iron
- Use Fat: Always use a little cooking oil, butter, or animal fat when cooking. This not only prevents sticking but also adds to your seasoning with every use.
- Preheat Properly: Gently preheat your cast iron over medium-low heat for several minutes before adding food. This ensures even heating and prevents scorching.
- Avoid Acidic Foods Initially: While your seasoning is developing, try to avoid cooking highly acidic foods (like tomato sauces or lemon juice) for long periods, as they can strip seasoning. Once your pan has a strong seasoning, this becomes less of an issue.
Cleaning and Care
- Clean Immediately After Use: While the pan is still warm, scrape off any food bits with a spatula. For stubborn residue, use hot water and a stiff brush or a cast iron scraper.
- Avoid Harsh Soaps (Mostly): Modern dish soaps are less caustic than older formulas. A tiny bit of mild dish soap won’t destroy a well-established seasoning, but it’s generally best to avoid it for routine cleaning. Hot water and a good scrub are usually sufficient.
- Never Air Dry: Always dry your cast iron thoroughly immediately after washing. You can do this by wiping with a cloth and then placing it on low heat on the stovetop for a few minutes until completely dry.
- Apply a Thin Coat of Oil: After drying, apply another very thin layer of cooking oil to the pan’s interior (and exterior if desired) before storing. This protects against rust and continues to build the seasoning.
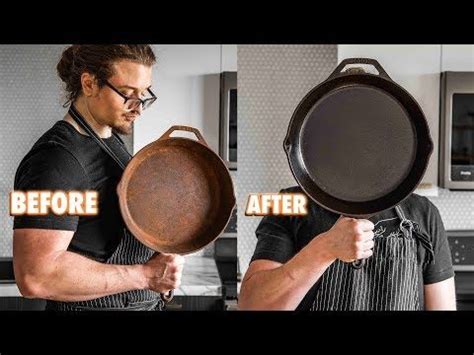
Troubleshooting and Re-seasoning
If your cast iron starts to stick, develop rust spots, or loses its sheen, don’t despair! It just needs some attention.
- Sticky Spots: Too much oil applied during seasoning or not wiping off enough can lead to sticky patches. To fix, scrub the sticky area with hot water and a stiff brush, then repeat the seasoning process (bake with a very thin layer of oil).
- Rust Spots: If rust appears, scrub it off completely with steel wool or a scouring pad until you see bare metal. Then wash, dry, and re-season immediately.
- Dull or Patchy Seasoning: This is a sign it needs a quick re-season. Simply wash, dry, apply a thin coat of oil, and bake for an hour at 450-500°F (or even a quick stovetop seasoning if you’re in a hurry).
Conclusion
Properly seasoning cast iron isn’t a one-time event; it’s an ongoing relationship. With a little patience and consistent care, your cast iron cookware will develop an incredible non-stick surface that improves with every meal. Embrace the process, and you’ll soon find your cast iron becoming your most cherished and reliable cooking companion, offering superior results and a lifetime of delicious meals.


