


How to safely can low-acid vegetables from the garden for winter storage?
Preserving the harvest is a cherished tradition in country living, and canning vegetables from your garden is a fantastic way to enjoy their goodness long after the growing season ends. However, when it comes to low-acid vegetables, safety is paramount. Unlike high-acid foods, these require a specific method to prevent the risk of foodborne illness. This guide will walk you through the safe and essential steps of pressure canning your low-acid garden bounty for winter.
Understanding Low-Acid Vegetables and Botulism Risk
Low-acid vegetables are those with a pH greater than 4.6. Common examples include green beans, corn, peas, carrots, potatoes, most leafy greens, and squash. The primary concern with canning these foods is the potential for the growth of Clostridium botulinum, the bacteria that causes botulism, a serious and often fatal form of food poisoning. This bacterium thrives in anaerobic (oxygen-free), low-acid environments like those found in sealed canning jars.
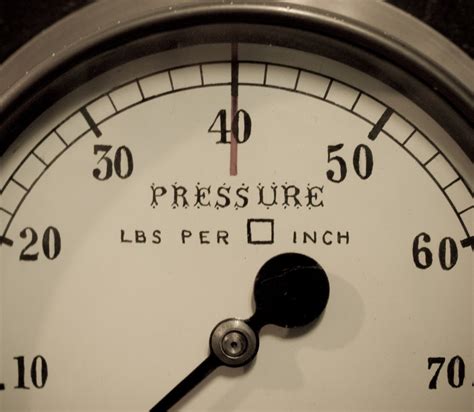
Crucially, botulism spores are resistant to boiling water temperatures. This means that a boiling water bath canner, safe for high-acid foods like pickles and jams, is insufficient for low-acid vegetables. The only tested and safe method for canning low-acid foods is a pressure canner, which reaches temperatures high enough (240°F / 116°C or higher) to destroy these dangerous spores.
Essential Equipment for Safe Pressure Canning
Having the right tools is critical for a successful and safe canning experience:
- Pressure Canner: This is a non-negotiable item. Ensure it has a reliable pressure gauge (dial or weighted) and is in good working order. Always differentiate between a pressure canner and a pressure cooker; they are not interchangeable for canning purposes.
- Canning Jars: Use only jars specifically designed for canning (e.g., Mason jars). They must be clean, free of chips or cracks, and the correct size for your recipe.
- New Lids and Bands: Always use new, self-sealing lids for each canning session. Bands can be reused if they are rust-free and not bent.
- Jar Lifter: Essential for safely placing hot jars into and removing them from the canner.
- Canning Funnel: Helps keep jar rims clean when filling.
- Bubble Remover/Headspace Tool: A non-metallic utensil to remove air bubbles and measure headspace.
- Large Pot or Bowl: For preparing vegetables and heating liquid.
- Clean Towels: For wiping jar rims and cooling jars.
Step-by-Step Preparation of Your Harvest
Careful preparation sets the stage for safe canning.
1. Select and Clean Produce: Always choose fresh, firm, blemish-free vegetables at their peak. Wash them thoroughly under cool running water, removing all dirt and debris. Trim any undesirable parts.
2. Prepare Vegetables: Follow specific instructions for each vegetable. This might involve peeling, chopping, dicing, or blanching. For example, green beans are snapped, corn is cut from the cob, and carrots are peeled and sliced. Many low-acid vegetables benefit from a ‘hot pack’ method, where they are heated in water or broth before being placed in jars; this helps remove air and ensures better packing.
3. Prepare Jars and Lids: Wash canning jars in hot, soapy water, rinse well, and keep them hot. While sterilization is generally not required for foods processed in a pressure canner for 10 minutes or more (the high temperature sterilizes them), ensuring they are clean and hot helps prevent thermal shock. Heat new lids in simmering (not boiling) water according to manufacturer directions to soften the sealing compound.
The Canning Process: Filling and Processing
This is where precision and adherence to guidelines are critical.
1. Pack Jars: Using a canning funnel, pack your prepared vegetables (hot or raw, as specified by your recipe) into the hot jars. Leave the recommended headspace (usually 1 inch for low-acid foods) from the top of the jar rim. Too little headspace can lead to food boiling out; too much can result in an unsealed lid.
2. Add Liquid: Cover the vegetables with hot water, broth, or juice, ensuring the liquid also maintains the specified headspace. For raw-packed foods, use boiling liquid; for hot-packed, use simmering liquid.
3. Remove Air Bubbles: Slide a non-metallic spatula or bubble remover tool around the inside of the jar, gently pushing the food to release trapped air bubbles. Add more liquid if necessary to restore the proper headspace.
4. Wipe Rims and Apply Lids: Clean jar rims thoroughly with a damp, clean cloth to remove any food particles that could interfere with the seal. Center a hot lid on each jar, then screw the band down finger-tight. Do not overtighten, as air needs to escape during processing for a proper seal.
5. Load Canner: Place the rack in the bottom of your pressure canner and add 2-3 inches of hot water. Carefully place the filled jars onto the rack, ensuring they do not touch each other or the sides of the canner. Secure the canner lid.
6. Vent the Canner: Turn the heat to high. Allow steam to escape steadily from the vent pipe or petcock for 10 minutes. This crucial step expels all air from the canner, ensuring the internal temperature accurately reflects the pressure. Failure to vent properly can lead to under-processing.
7. Process: After venting, place the weighted gauge or close the petcock and allow pressure to build. Once the desired pressure is reached (refer to your recipe and adjust for altitude), begin timing. Maintain a consistent pressure by adjusting the heat. If the pressure drops below the recommended level at any point, restart the timing from the beginning.
Cooling, Checking Seals, and Storage
The final steps ensure your preserved food is safe and ready for storage.
1. Depressurize Naturally: Once the processing time is complete, turn off the heat and allow the canner to cool naturally until the pressure gauge reads zero. Do not try to rush this process by opening the vent or pouring cold water over the canner, as this can cause liquid loss from jars and may result in an unsafe product.
2. Remove Jars: After the pressure has dropped to zero, wait another 10 minutes before carefully removing the canner lid (lift it away from your face to avoid steam). Let the jars sit in the canner for 5-10 minutes, then use a jar lifter to carefully transfer them to a towel-lined surface or cooling rack, ensuring they are not touching.
3. Check Seals: Let jars cool undisturbed for 12-24 hours. After cooling, check for seals. A properly sealed lid will be concave (curved inward) and will not flex when pressed. Remove the bands (they can rust onto the lid if left on). If a jar has not sealed, refrigerate it and use it within a few days, or reprocess within 24 hours with a new lid (ensure proper re-preparation if reprocessing).
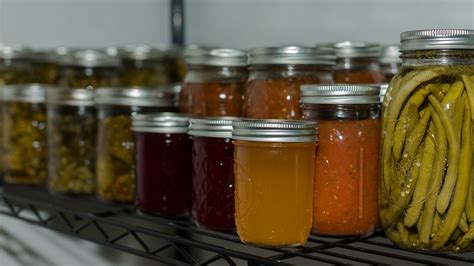
4. Store: Label sealed jars with the contents and date. Store them in a cool, dark, dry place, ideally between 50-70°F (10-21°C). Properly canned low-acid vegetables maintain their best quality for about one year.

Safety First: Important Considerations
Never take shortcuts when pressure canning. Always use up-to-date, tested recipes from reputable sources like the National Center for Home Food Preservation (NCHFP), Cooperative Extension services, or the USDA Complete Guide to Home Canning. Do not rely on old family recipes unless they have been updated to modern safety standards.
Before consuming, inspect all jars. Never taste food from a jar with a bulging lid, signs of leakage, mold growth, or an off-odor. When in doubt, throw it out – it’s not worth the risk.
Conclusion
Canning low-acid vegetables from your garden is an incredibly rewarding endeavor, providing your family with nutritious, homegrown food throughout the colder months. By understanding the critical importance of pressure canning and diligently following established safety guidelines, you can confidently preserve your harvest, ensuring a safe and delicious pantry for winter storage.

