How to safely can surplus garden tomatoes for winter meals?
The bounty of a summer garden, especially ripe, juicy tomatoes, is one of nature’s greatest gifts. While fresh tomatoes are a delight, a surplus can quickly overwhelm. Canning offers a fantastic way to preserve this goodness, allowing you to enjoy the taste of summer sunshine in your winter meals. However, safety is paramount when it comes to home canning. This guide will walk you through the process of safely canning your garden tomatoes, ensuring delicious and secure provisions for the colder months.
Why Can Tomatoes for Winter?
Canning tomatoes is more than just a way to deal with an overflowing harvest; it’s a practice that offers numerous benefits. It allows you to control the ingredients, avoiding the additives often found in store-bought products. It’s cost-effective, using produce you’ve already grown, and provides a profound sense of satisfaction knowing you’ve stocked your pantry with homemade goodness. Imagine robust pasta sauces, rich chilis, or vibrant soups made with your own preserved tomatoes during the depths of winter.
Essential Equipment for Safe Canning
Before you begin, gather all necessary equipment. Having everything at hand ensures a smooth and safe process.
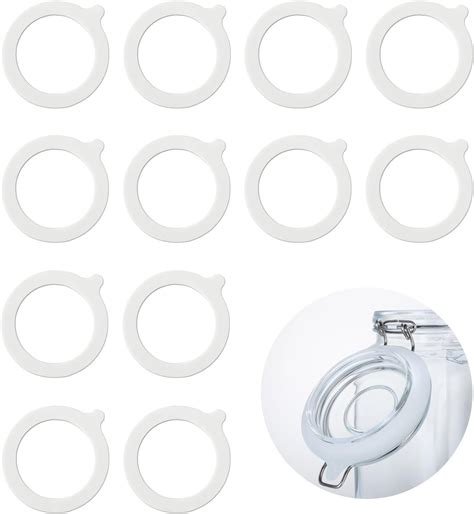
- Canning jars: Mason jars, specifically designed for canning, in appropriate sizes (pint, quart).
- New lids and bands: Lids are single-use; bands can be reused.
- Large water bath canner with a rack: Essential for processing high-acid foods.
- Jar lifter: For safely moving hot jars.
- Canning funnel: To prevent spills when filling jars.
- Bubble remover/headspace tool: To release trapped air and measure headspace.
- Non-reactive pot: For cooking tomatoes (stainless steel is ideal).
- Acid: Lemon juice (bottled, not fresh) or citric acid.

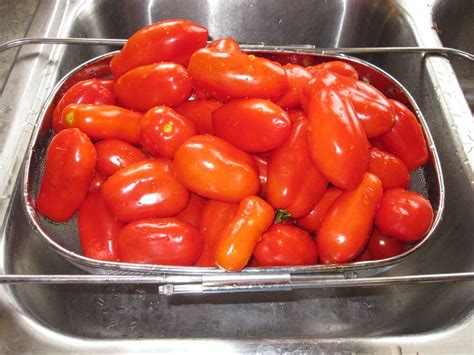
Choosing and Preparing Your Tomatoes
The quality of your canned tomatoes starts with the quality of the fresh ones. Select firm, ripe, unblemished tomatoes. Avoid any with soft spots, mold, or decay. Wash them thoroughly under cool running water. For most canning recipes, you’ll need to remove the skins. This can be done by blanching them in boiling water for 30-60 seconds, then immediately transferring them to an ice bath. The skins should then peel off easily. Core and chop your tomatoes as desired – whole, halved, crushed, or diced.
The Critical Role of Acidification
Tomatoes are generally considered high-acid foods, making them suitable for water bath canning. However, some varieties (especially heirlooms or over-ripe tomatoes) can have lower acidity, making them potentially unsafe for water bath canning without added acid. To ensure safety and inhibit the growth of spoilage bacteria like Clostridium botulinum, you must add acid to each jar:
- For quart jars: Add 2 tablespoons of bottled lemon juice or ½ teaspoon of citric acid.
- For pint jars: Add 1 tablespoon of bottled lemon juice or ¼ teaspoon of citric acid.
Vinegar (5% acidity) can also be used (4 tablespoons per quart, 2 per pint), but it may significantly alter the flavor.
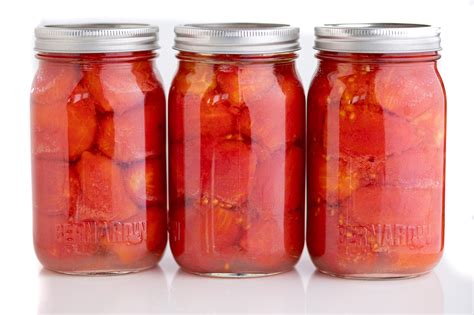
Water Bath Canning: The Preferred Method for Tomatoes
Water bath canning is the recommended method for high-acid foods like properly acidified tomatoes. It involves processing jars in boiling water for a specific duration, which heats the contents enough to destroy spoilage microorganisms and create a vacuum seal.

Step-by-Step Canning Process:
- Prepare Jars and Lids: Wash jars in hot, soapy water, rinse well, and keep them hot (in simmering water or a warm oven) to prevent thermal shock when filled with hot tomatoes. Sanitize lids according to manufacturer directions (usually simmering in water, not boiling).
- Prepare Tomatoes: Core, peel, and chop/crush tomatoes as desired. You can pack them raw (add acid first, then fill jars, pressing to release juice and remove air) or hot (simmer tomatoes in a pot for 5 minutes, then ladle into jars). Hot packing generally results in less liquid separation.
- Add Acid: Place the required amount of bottled lemon juice or citric acid at the bottom of each hot jar.
- Fill Jars: Using a canning funnel, carefully ladle the prepared tomatoes into the hot jars, leaving 1/2 inch of headspace (the space between the food and the rim of the jar).
- Remove Air Bubbles: Insert a non-metallic spatula or bubble remover down the sides of the jar to release any trapped air bubbles. Add more tomatoes if necessary to maintain headspace.
- Wipe Rims: Clean jar rims thoroughly with a damp, clean cloth to ensure a good seal. Any food particles on the rim can prevent sealing.
- Apply Lids and Bands: Center a hot lid on each jar, then screw on the band fingertip-tight (just until resistance is met, no overtightening).
- Process in Water Bath: Carefully place the filled jars onto the rack in your water bath canner, ensuring jars do not touch each other or the sides of the canner. Add hot water to cover jars by at least 1-2 inches. Bring the water to a rolling boil, then begin timing. Process pints for 35 minutes and quarts for 45 minutes (adjust for altitude).
- Cool and Check Seals: Once processing time is complete, turn off the heat and let jars sit in the canner for 5 minutes before carefully removing them with a jar lifter. Place jars on a wire rack or towel, away from drafts, to cool undisturbed for 12-24 hours.
Ensuring a Proper Seal and Safe Storage
After jars have cooled, check the seals. Lids should be concave (curved inward) and not flex when pressed. If a lid does not seal (it’s still convex or pops up and down), refrigerate the contents and consume within a few days, or reprocess within 24 hours with a new lid. Remove bands from sealed jars (they can trap moisture and cause rust). Wipe jars clean, label them with the contents and date, and store in a cool, dark, dry place. Canned tomatoes stored properly can last for at least 12-18 months.
Safety First, Always!
Never take shortcuts in canning. Always follow tested recipes from reliable sources (such as the USDA Guide to Home Canning or university extension offices). If you’re ever in doubt about a canned food’s safety, err on the side of caution and discard it. Look for signs of spoilage before opening: bulging lids, broken seals, leaks, or unusual odors. Once opened, if there’s any sign of mold or off-odor, discard immediately.
Enjoying Your Winter Bounty
Canning your garden tomatoes is a rewarding process that connects you more deeply with your food source and provides delicious, healthy ingredients for countless winter meals. With proper technique and adherence to safety guidelines, you’ll be able to savor the taste of summer sunshine long after the garden has gone to sleep.