


How to safely water bath can summer tomatoes for winter pantry?
Capture Summer’s Flavor: A Guide to Safe Tomato Water Bath Canning
There’s nothing quite like the taste of a ripe, sun-kissed summer tomato. But what happens when the season ends, and fresh tomatoes become a distant memory? Water bath canning is a fantastic and rewarding way to capture that vibrant, fresh flavor, allowing you to enjoy homegrown goodness all year round. Filling your pantry with homemade sauces, diced tomatoes, or whole peeled tomatoes not only enhances your winter meals but also gives you control over the ingredients. This guide will walk you through the essential steps to safely preserve your summer tomato harvest.

Understanding Water Bath Canning Safety for Tomatoes
Water bath canning is suitable for high-acid foods. While tomatoes are generally considered acidic, their pH can vary depending on the variety, ripeness, and growing conditions. To ensure safety and prevent the growth of harmful bacteria like Clostridium botulinum, it is crucial to add additional acid to every jar when canning tomatoes. This step lowers the pH to a safe level, making the water bath method effective for preservation.
Essential Equipment You’ll Need
Before you begin, gather your equipment. Having everything ready makes the process smoother and more efficient:
- Canning Jars: Mason-type jars with two-piece lids (new flat lids are recommended for each use).
- Water Bath Canner: A large pot with a rack, deep enough to cover jars by at least 1-2 inches of water.
- Jar Lifter: For safely placing and removing hot jars from the canner.
- Canning Funnel: To prevent spills when filling jars.
- Headspace Tool/Ruler: To accurately measure the proper space at the top of the jar.
- Bubble Remover/Spatula: A non-metallic tool to remove trapped air bubbles from packed jars.
- Clean Towels: For wiping jar rims and general cleanup.
- Ingredients: Fresh, firm, ripe tomatoes; bottled lemon juice or citric acid; canning salt (optional).
Step-by-Step Guide to Safely Canning Tomatoes
1. Prepare Your Jars and Lids
Wash canning jars and screw bands in hot, soapy water and rinse well. Keep jars hot until filling to prevent thermal shock when they enter the hot canner. Lids should be prepared according to manufacturer instructions; typically, they are simmered in warm (not boiling) water.
2. Select and Prepare Tomatoes
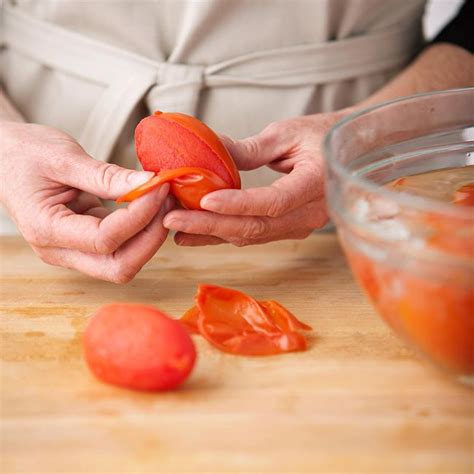
Choose firm, ripe tomatoes free from blemishes. Wash them thoroughly under cool running water. For peeled tomatoes, blanch them in boiling water for 30-60 seconds, then immediately plunge into ice water. The skins should slip off easily. Core the tomatoes and cut them into halves, quarters, or crush them, depending on your desired end product (e.g., whole, diced, or crushed tomatoes).
3. Add Acid and Fill Jars
This is a critical safety step! Add 2 tablespoons of bottled lemon juice or 1/2 teaspoon of citric acid per quart jar. For pint jars, use 1 tablespoon of bottled lemon juice or 1/4 teaspoon of citric acid. You can also add 1 teaspoon of canning salt per quart (1/2 teaspoon per pint) for flavor, if desired. Pack the prepared tomatoes into the hot jars, leaving 1/2 inch of headspace. For whole or halved tomatoes, add hot water or hot tomato juice to cover them, maintaining the 1/2-inch headspace.

4. Remove Air Bubbles and Clean Rims
Use a non-metallic utensil (like a plastic spatula or wooden chopstick) to gently remove air bubbles from the jars. Adjust headspace if necessary by adding more tomatoes or liquid. Wipe the jar rims thoroughly with a clean, damp cloth to ensure a perfect seal. Place new, prepared lids on the jars and screw bands on fingertip-tight.
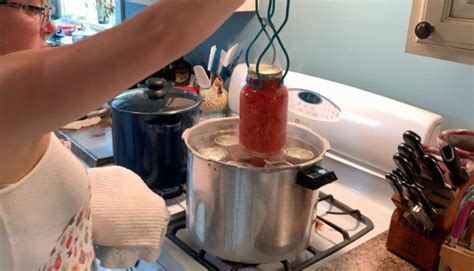
5. Process in the Water Bath Canner
Carefully place the filled jars onto the rack in your water bath canner. Ensure that water covers the jars by at least 1-2 inches. Cover the canner and bring the water to a rolling boil. Once boiling vigorously, start your timer. Process pint jars for 35 minutes and quart jars for 45 minutes. Remember to adjust processing times for your altitude according to USDA guidelines.

6. Cool and Check Seals
Once processing is complete, turn off the heat and remove the canner lid. Let the jars sit in the hot water for 5 minutes before carefully removing them with a jar lifter. Place jars on a clean, towel-lined surface, ensuring they are not touching, and let them cool undisturbed for 12-24 hours. Do not retighten screw bands during cooling.
After cooling, check seals by pressing the center of the lid; it should be concave and not flex when pressed. If a lid did not seal, refrigerate the jar and consume within a few days, or reprocess with a new lid within 24 hours.
Storage and Enjoyment
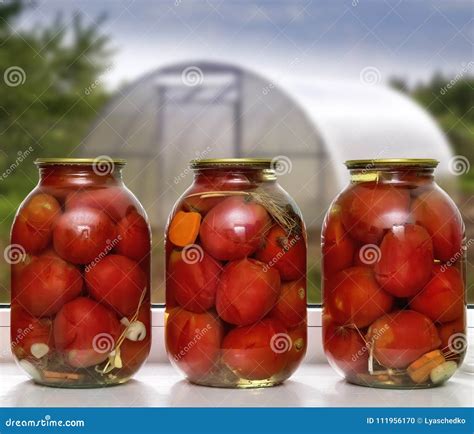
Once jars are cooled and sealed, remove the screw bands (they can trap moisture and rust), wipe the jars clean, and label them with the contents and date. Store your sealed jars in a cool, dark, dry place for up to 18 months. Before opening, always check for signs of spoilage such as bulging lids, leaks, or unusual odors. With properly canned tomatoes, you’ll have a taste of summer ready to elevate your winter stews, sauces, and chilis.
Conclusion
Water bath canning summer tomatoes is a deeply satisfying way to preserve nature’s bounty. By following these safe canning practices, you can enjoy the taste of fresh, vibrant tomatoes even in the depths of winter, enriching your meals with homemade goodness and a touch of summer sunshine. Happy canning!


