


How to save heirloom vegetable seeds for next year’s garden?

Saving heirloom vegetable seeds is a rewarding practice that connects gardeners to the past while securing future harvests. Beyond the financial savings, it’s about preserving unique genetic diversity, adapting plants to local climates, and perpetuating beloved varieties that might otherwise disappear. This guide will walk you through the essential steps to ensure your treasured heirloom seeds are viable and ready for next year’s garden.
Understanding Heirloom and Open-Pollinated Seeds
Before you begin, it’s crucial to understand what makes a seed “heirloom.” Heirloom vegetables are open-pollinated varieties, meaning they are pollinated by insects, wind, or other natural means. Unlike hybrid seeds (F1), open-pollinated plants will produce offspring that are true to the parent plant, provided they haven’t cross-pollinated with another variety. This genetic stability is what makes them ideal for seed saving. Always ensure you are saving seeds from open-pollinated varieties, not hybrids, as hybrid seeds will not reliably produce the same plant.
Choosing the Right Parent Plants
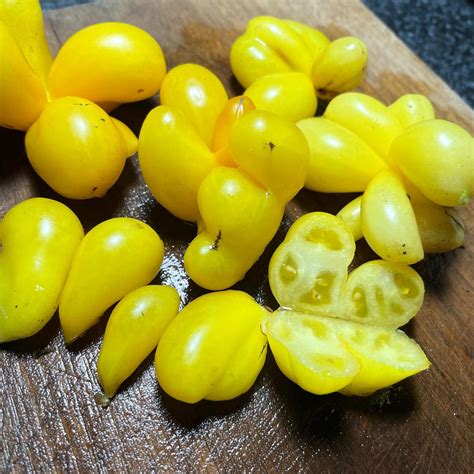
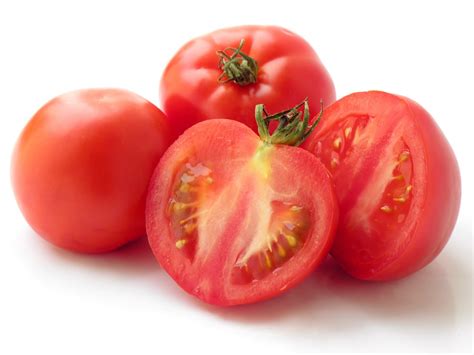
The success of your seed saving efforts begins with selecting the best parent plants. Choose plants that exhibit desirable traits: robust growth, resistance to disease, excellent flavor, and good yield. Avoid saving seeds from weak or diseased plants, as these traits can be passed on. For most vegetables, allow the fruit or pod to fully mature on the plant, often past its prime eating stage, to ensure the seeds inside are fully developed. This means letting a tomato get very ripe, or beans dry completely on the vine.
Preventing Cross-Pollination
To maintain the genetic purity of your heirloom seeds, preventing cross-pollination is vital. Different plant species and even varieties within the same species can cross-pollinate, leading to unexpected results in the next generation. For self-pollinating plants like peas, beans, and lettuce, the risk is lower, but it’s still wise to provide some isolation. For cross-pollinating plants like squash, corn, and peppers, you’ll need greater distances between varieties or employ techniques like hand-pollination or caging individual plants.
Harvesting Seeds: Wet vs. Dry Methods
Dry Seed Harvesting
Many seeds are harvested using the dry method. This includes beans, peas, corn, most greens (lettuce, kale), onions, and many herbs. Allow the seeds to dry completely on the plant. For beans and peas, wait until the pods are brittle and rattle. For corn, let the kernels dry on the cob until hard. For greens and herbs, allow the flower heads to turn brown and dry before collecting. Once harvested, gently separate the seeds from their chaff. Winnowing (using wind or a fan) or screening can help clean them.
Wet Seed Harvesting (Fermentation)
Seeds encased in fleshy fruits, like tomatoes, cucumbers, squash, and melons, require a wet method, often involving fermentation. This process helps separate the seeds from the pulp and can inhibit seed-borne diseases. For tomatoes, scoop the seeds and pulp into a jar with a little water. Cover loosely and let it sit at room temperature for 2-5 days, stirring daily, until a layer of mold forms on top. The viable seeds will sink to the bottom. Carefully pour off the moldy top layer and pulp, then rinse the seeds thoroughly in a sieve.
Drying and Storing Your Seeds
Once cleaned, proper drying is paramount to prevent mold and ensure longevity. Spread the seeds in a single layer on a non-stick surface like a ceramic plate, coffee filter, or screen in a warm, dry, well-ventilated area, out of direct sunlight. Stir them occasionally to ensure even drying. This can take anywhere from a few days to several weeks, depending on the seed type and humidity. Seeds should be completely dry—they shouldn’t bend or feel pliable, but snap cleanly.
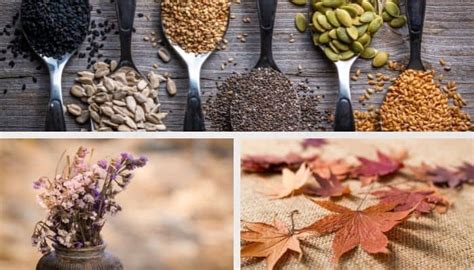
After thorough drying, store your seeds in airtight containers (e.g., glass jars, Mylar bags, or small paper envelopes placed inside a larger airtight container). Label each container clearly with the plant type, variety, and the year the seeds were harvested. Store them in a cool, dark, and dry place. A refrigerator or freezer can extend seed viability significantly, but ensure seeds are completely dry before freezing to prevent moisture damage.

Testing Seed Viability (Optional)
If you’re unsure about the age or quality of your stored seeds, you can perform a simple germination test. Place 10-20 seeds on a damp paper towel, roll it up, and put it in a plastic bag in a warm spot. Check daily for sprouting. After a week or two, count how many have germinated. If 7 out of 10 sprout, you have a 70% germination rate, which is generally good. This helps you decide if you need to sow more densely or if it’s time to refresh your seed stock.
Conclusion
Saving heirloom vegetable seeds is a rewarding journey that empowers you to become a steward of biodiversity and a more self-sufficient gardener. By following these steps—from careful selection and harvesting to meticulous drying and storage—you can ensure a continuous supply of your favorite varieties, year after year. Embrace this ancient practice and watch your garden flourish with the unique heritage of heirloom plants.


