


How to start a simple backyard compost pile for kitchen and garden waste?

Why Start Composting? The Benefits Are Abundant
Composting is a fantastic way to reduce household waste, enrich your garden soil, and contribute to a healthier environment. Instead of sending food scraps and yard trimmings to the landfill, you can transform them into “black gold” – a nutrient-rich material that improves soil structure, water retention, and provides essential nutrients for your plants. It’s a simple, eco-friendly practice that anyone with a bit of outdoor space can adopt.
Step 1: Choosing the Perfect Location for Your Compost Pile
The success of your compost pile starts with its location. You’ll want a spot that is:
- Partially Shaded: Direct, intense sun can dry out your pile too quickly, slowing down decomposition. Partial shade helps maintain consistent moisture.
- Well-Drained: Avoid areas where water pools, as this can lead to a soggy, anaerobic pile that smells.
- Accessible: Position it conveniently for both adding kitchen scraps and turning the pile, as well as for transporting finished compost to your garden.
- Away from Your House: While a well-maintained compost pile shouldn’t smell, a slight earthy odor is natural. Keep it a reasonable distance from windows and doors.
- On Bare Earth: Building directly on soil allows beneficial microorganisms and worms to enter the pile, accelerating the composting process.
Step 2: Understanding What to Compost (and What to Avoid)
A balanced compost pile needs a mix of “greens” (nitrogen-rich materials) and “browns” (carbon-rich materials). Aim for a roughly 50/50 mix, though don’t get too caught up in precise ratios – nature is forgiving!
Greens (Nitrogen Sources):
- Fruit and vegetable scraps (non-citrus preferred for worms)
- Coffee grounds and tea bags
- Fresh grass clippings (in thin layers to prevent matting)
- Weeds (non-seeding)
- Plant trimmings
Browns (Carbon Sources):
- Dried leaves
- Shredded newspaper and cardboard (non-glossy, torn into small pieces)
- Straw and hay
- Small twigs and wood chips
- Pine needles
What to AVOID:
- Meat, bones, fish, dairy products, oils, and greasy foods: These attract pests and can create foul odors.
- Diseased plants: To prevent spreading pathogens to your garden.
- Weeds with seeds: Unless your pile gets very hot, seeds can survive and sprout in your garden.
- Pet waste (dogs, cats): May contain harmful pathogens.
- Treated wood: Contains chemicals.
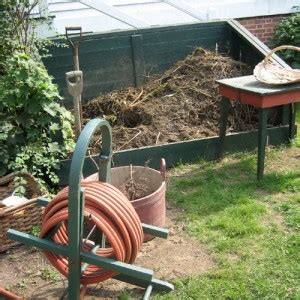
Step 3: Building Your Simple Compost Pile
You don’t need a fancy bin to start; a simple pile works perfectly. Here’s how to build it:
- Start with a Base: Lay down a layer of coarse, woody browns (like twigs or small branches) about 4-6 inches thick. This allows for air circulation.
- Layer Browns and Greens: Add alternating layers of browns and greens, each 2-4 inches thick. For example, a layer of dried leaves, then a layer of kitchen scraps, then grass clippings.
- Add a Touch of Soil (Optional but Recommended): Sprinkle a thin layer of garden soil or finished compost over every few layers. This introduces beneficial microorganisms that jumpstart decomposition.
- Moisten Each Layer: Lightly water each layer as you add it. The pile should be damp like a wrung-out sponge, not soaking wet.
- Continue Layering: Keep adding layers until your pile is about 3 feet wide and 3 feet high – this size is optimal for generating heat and breaking down materials efficiently.
Step 4: Maintaining Your Compost Pile for Success
Once built, your compost pile requires a little ongoing care:
- Keep it Moist: Periodically check the moisture level. If it feels dry, give it a good watering. If it’s too wet, add more browns.
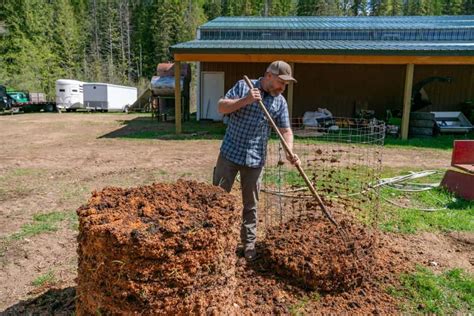
- Turn Your Pile: Ideally, turn your pile with a pitchfork or shovel every 1-2 weeks. This aerates the pile, mixes the materials, and speeds up decomposition. More frequent turning leads to faster compost.
- Continue Adding Materials: As you generate more kitchen and garden waste, keep adding it in layers, ensuring a good brown-to-green balance. It’s best to add new materials to the center of the pile where decomposition is most active.
Step 5: Harvesting Your “Black Gold”
You’ll know your compost is ready when it’s dark brown, crumbly, smells earthy, and you can no longer recognize the original materials. Depending on your climate, the materials you add, and how often you turn it, this can take anywhere from 2 months to a year. Harvest the finished compost from the bottom or center of your pile.
Use your finished compost to amend garden beds, top-dress houseplants, start seeds, or side-dress established plants. Your garden will thank you!

Conclusion: Embrace the Composting Journey
Starting a backyard compost pile is a rewarding step towards a more sustainable lifestyle. It’s a simple process that transforms waste into a valuable resource, benefiting your garden and the planet. With a little patience and consistent effort, you’ll soon be enjoying the fruits (and vegetables!) of your composting labor.


