


How to start a simple, productive compost pile for kitchen scraps & garden waste?

Composting is an incredibly rewarding and environmentally friendly practice that turns organic waste into nutrient-rich soil. It reduces landfill waste, enriches your garden soil, and helps your plants thrive. You don’t need fancy equipment to get started; a simple, productive compost pile can be created with just a little know-how and a willingness to gather your kitchen and garden leftovers. Let’s dig in!
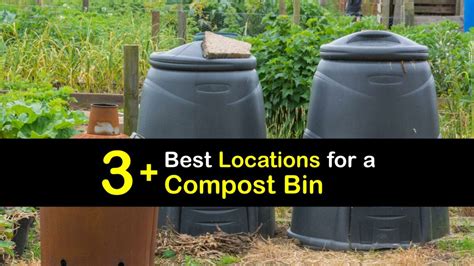
1. Choose Your Composting Method and Location
Before you start piling, decide on the best approach for your space and needs. You can use a dedicated compost bin (store-bought or DIY) or simply create an open pile. Both work effectively, but bins can be tidier and deter pests more easily. Once you have a method in mind, select an ideal spot in your yard:
- Shady and Well-Drained: A shaded area helps retain moisture, while good drainage prevents your pile from becoming waterlogged.
- Accessible: Position it close enough to your kitchen and garden for easy additions and turning.
- Consider Neighbors: Keep it a reasonable distance from property lines, just in case odors become an issue (though a well-managed pile rarely smells bad).
2. Gather Your Composting Materials: Greens & Browns
A healthy compost pile relies on a balanced mix of “greens” (nitrogen-rich materials) and “browns” (carbon-rich materials). Think of it as a diet for the microorganisms that break down your waste.
Greens (Nitrogen-rich):
- Fruit and vegetable scraps (peels, cores, stale produce)
- Coffee grounds and tea bags
- Grass clippings (use sparingly to avoid matting)
- Fresh plant trimmings
- Eggshells
Browns (Carbon-rich):
- Dry leaves
- Shredded newspaper or cardboard
- Small twigs and wood chips
- Sawdust
- Straw or hay
Aim for a ratio of roughly 2 parts browns to 1 part greens. This balance is crucial for efficient decomposition and preventing foul odors.
3. What NOT to Compost
To avoid attracting pests, creating odors, or spreading disease, keep these items out of your compost pile:
- Meat, bones, fish, dairy products, and oily foods: Attract rodents and pests, and can cause strong odors.
- Diseased plants: Can spread pathogens to your garden when the compost is used.
- Weeds with seeds: The seeds may survive the composting process and sprout in your garden.
- Pet waste (dog and cat): May contain harmful pathogens.
- Chemically treated wood or plants: Can introduce toxins into your compost.
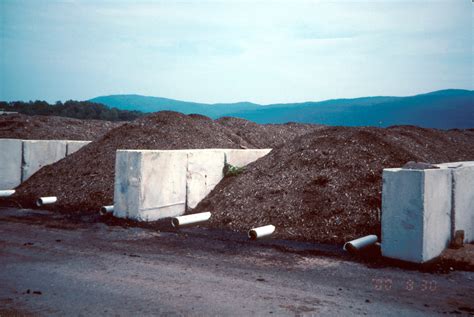
4. Building Your Compost Pile
With your materials gathered, it’s time to build!
- Start with a Base: Lay down a 4-6 inch layer of coarse browns (twigs, straw) at the bottom. This ensures good airflow and drainage.
- Alternate Layers: Add a layer of greens (2-4 inches), followed by a layer of browns (4-6 inches). Continue alternating.
- Add a Soil Layer (Optional but Recommended): Occasionally sprinkle a thin layer of garden soil or finished compost over your new additions. This introduces beneficial microorganisms that jumpstart the decomposition process.
- Moisture is Key: Water each layer as you build, ensuring the pile is consistently moist, like a wrung-out sponge. Too dry, and decomposition slows; too wet, and it becomes anaerobic and smelly.
- Size it Up: Aim for a pile at least 3x3x3 feet (1x1x1 meter) for optimal heat generation, which speeds up composting.
5. Maintaining a Healthy Compost Pile
Your compost pile isn’t a “set it and forget it” project, but maintenance is simple:
- Keep it Moist: Check the moisture level regularly. If it’s dry, give it a good soak. If it’s too wet, add more browns.
- Turn It: Every week or two, use a pitchfork to turn the pile. This aerates the materials, preventing compaction and providing oxygen to the microbes, which speeds up decomposition. A well-aerated pile also smells fresh and earthy, not sour.
- Continue Adding Materials: Keep adding your kitchen scraps and garden waste, always trying to maintain the green-to-brown ratio. Chop larger items into smaller pieces to help them break down faster.
6. Harvesting Your “Black Gold”
Depending on the materials, temperature, and maintenance, it can take anywhere from a few months to a year for your compost to be ready. You’ll know it’s done when:
- It’s dark brown or black.
- It has a crumbly texture.
- It smells earthy and pleasant, like rich soil.
- Most of the original materials are unrecognizable.
To harvest, simply scoop out the finished compost from the bottom or sides of the pile. You can use a sieve to separate any larger, undecomposed pieces and return them to the active pile. Spread your “black gold” around your garden beds, mix it into potting soil, or use it as a top dressing for lawns. Your plants (and the planet) will thank you!

Starting a simple compost pile is an impactful step towards sustainable living and a thriving garden. With a little attention to the balance of materials, moisture, and aeration, you’ll soon be transforming your waste into a valuable resource, creating healthier soil and a greener environment.


