Packing homemade food for country travel: tips for freshness & ease?
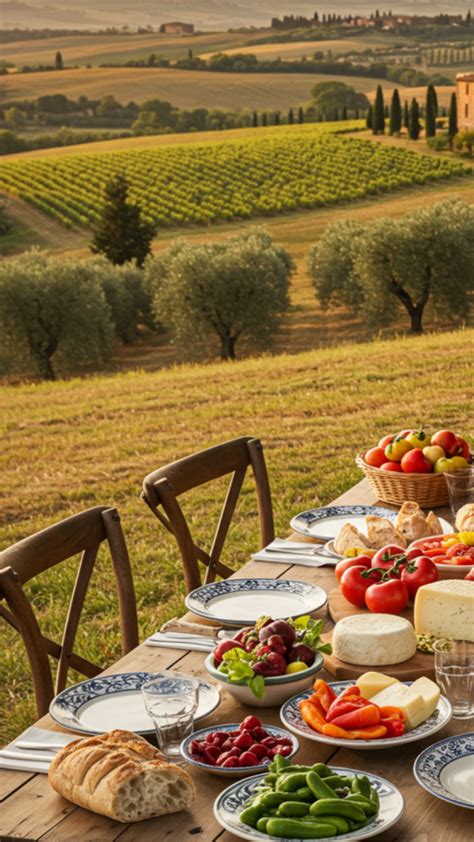
Embarking on a country adventure often means long drives, picturesque stops, and a desire for wholesome, comforting meals. While local eateries are part of the charm, bringing your own homemade food offers unparalleled freshness, dietary control, and significant cost savings. However, keeping your culinary creations fresh and easily accessible on the road can be a challenge. This guide will equip you with practical strategies to master the art of packing homemade food for your next country escape.
Why Homemade Food for Country Travel?
Opting for homemade meals on your travels brings a host of benefits. Beyond the obvious health advantages of knowing exactly what goes into your food, it allows you to cater to specific dietary needs or preferences, which can be particularly challenging in remote areas. Furthermore, preparing your own meals can drastically reduce travel expenses, freeing up your budget for experiences rather than overpriced highway snacks. It also adds a personal touch to your trip, making roadside picnics and scenic overlooks even more memorable.

Strategic Meal Planning: The First Step
Choose Travel-Friendly Foods
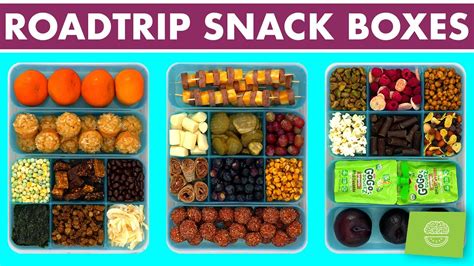
The foundation of successful travel food packing lies in smart meal selection. Focus on foods that are robust, less prone to spoilage, and easy to eat without extensive preparation. Think hearty sandwiches (using sturdy bread like whole wheat or sourdough), wraps, pasta salads (without creamy dressings that can spoil quickly), roasted vegetables, hard-boiled eggs, nuts, dried fruits, and sturdy fresh fruits like apples or oranges. Low-moisture foods generally fare better and prevent soggy messes.
Avoid highly perishable items like seafood, soft cheeses, mayonnaise-heavy salads, or delicate leafy greens that wilt easily. Foods with strong odors can also be problematic in confined spaces like a car.
Consider Your Journey’s Logistics
Before you cook, consider the length of your trip, access to refrigeration, and whether you’ll have opportunities to heat food. For short trips, a basic cooler might suffice. Longer journeys may require more robust cooling solutions or a heavier reliance on non-perishable items. Plan meals that require minimal assembly on the go, making your stops quicker and more enjoyable.
The Right Gear: Containers and Coolers
Airtight and Leak-Proof Containers
Quality containers are non-negotiable. Invest in durable, airtight, and leak-proof containers, preferably glass or BPA-free plastic. Glass containers are excellent for reheating and don’t retain odors or stains, but they can be heavier and more fragile. Silicone-sealed lids are highly effective at preventing spills and keeping food fresh. Portion out meals into individual containers to simplify serving and reduce waste.
Insulated Coolers and Ice Packs
A good quality insulated cooler or cool bag is crucial for keeping perishable foods at a safe temperature. For maximum effectiveness, pre-chill your cooler with ice packs or frozen water bottles overnight. Pack the cooler as full as possible, as a full cooler stays cold longer than a partially empty one. Use multiple ice packs, gel packs, or frozen water bottles strategically placed among your food items. Frozen food items can also double as extra ice packs!
Mastering the Packing Technique
Smart Layering and Organization
Pack your cooler or bag with strategy. Place heavier, less fragile items at the bottom. Delicate items, like soft fruits or pre-made sandwiches, should go on top. Arrange items logically so that meals you plan to eat first are easily accessible without having to unpack the entire cooler. Consider using reusable bags or dividers within your cooler to keep different categories of food separate.
Preventing Spills and Cross-Contamination
Even with good containers, extra precautions are wise. For liquid-prone items like sauces or dressings, double-bag them in zip-top bags. Place a layer of plastic wrap directly under the lid of containers for an extra seal. Always keep raw meats (if you’re bringing any for cooking later) completely separate from cooked foods and produce to prevent cross-contamination.

Prioritizing Food Safety and Freshness
Proper Cooking and Cooling
Always ensure food is cooked thoroughly before packing. After cooking, cool hot foods rapidly before sealing them in containers. Placing hot food directly into a sealed container can create condensation, encouraging bacterial growth. An ice bath can speed up the cooling process. Never leave perishable food at room temperature for more than two hours.
Temperature Management On The Go
The ‘danger zone’ for bacterial growth is between 40°F (4°C) and 140°F (60°C). Keep cold foods below 40°F and hot foods above 140°F. Periodically check your ice packs and replace them if they’ve melted. If you’re unsure about a food item’s freshness, especially perishables that have been out of refrigeration for too long, it’s always best to err on the side of caution and discard it.

Conclusion
Packing homemade food for country travel doesn’t have to be daunting. With careful planning, the right equipment, and smart packing techniques, you can enjoy delicious, fresh, and wholesome meals throughout your journey. These tips will help you streamline your meal prep, keep your food safe, and add an extra layer of enjoyment to your explorations. Happy travels, and bon appétit on the open road!