


Quick DIY compost bin plan for kitchen scraps & garden waste?

Unlock the Power of Composting at Home
Composting is one of the most rewarding gardening activities, turning what would otherwise be waste into ‘black gold’ for your garden. Not only does it enrich your soil naturally, but it also reduces landfill waste and your carbon footprint. You don’t need fancy equipment to start; a simple, effective compost bin can be built quickly with common materials.
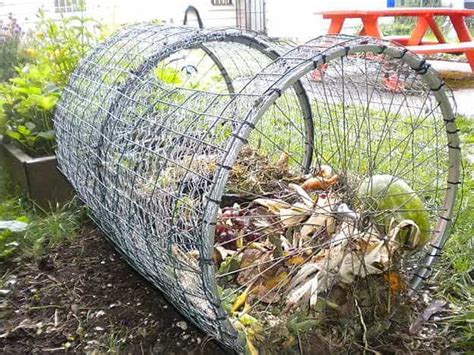
This guide provides a straightforward plan for a wire mesh compost bin, perfect for tackling kitchen scraps and garden waste efficiently.
Gather Your Materials & Tools
This design prioritizes simplicity and speed, making it ideal for beginners or those looking for a quick solution. Here’s what you’ll need:
- Wire Mesh: Approximately 10-12 feet of hardware cloth or chicken wire, at least 3 feet tall. Choose a sturdy gauge that won’t easily collapse.
- Wire Snips/Cutters: For cutting the mesh to size.
- Heavy-Duty Pliers: For bending wire ends and securing the bin.
- Garden Gloves: To protect your hands from sharp wire.
- Stakes (Optional): 3-4 wooden or metal stakes (about 4 ft long) for added stability, especially in windy areas.
Step-by-Step Assembly Guide
1. Prepare Your Wire Mesh
Roll out your wire mesh and decide on the desired diameter for your bin. A 3-foot diameter is common, which would require approximately 9.5 feet of wire. Use your wire snips to cut the mesh to length, ensuring you leave about 6 inches of extra wire on one end for overlapping and securing.
2. Form the Cylinder
Carefully bring the two ends of the cut wire mesh together to form a cylinder. Overlap the ends by about 6 inches. Using your heavy-duty pliers, bend the loose wire ends of one side around the vertical wires of the other side to securely fasten the cylinder. Work your way up and down the seam, creating a strong closure.
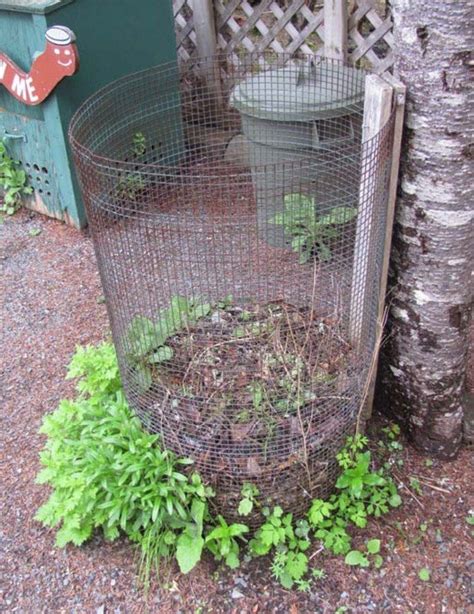
3. Choose Your Location
Select a level, well-drained spot in a partially shaded area of your garden. Proximity to a water source for occasional moistening is a plus. Ensure it’s not too far from your kitchen door for easy access with scraps.
4. Anchor the Bin (Optional, but Recommended)
If you opted for stakes, drive them into the ground around the inside or outside perimeter of the bin, pushing them deep enough to be sturdy. Use additional wire or zip ties to secure the bin to the stakes for extra stability against wind and pressure from the compost material.

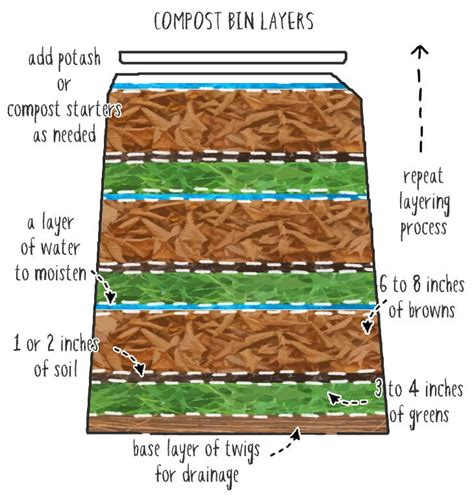
Filling Your Compost Bin: The Green and Brown Layers
A successful compost pile relies on a good balance of ‘greens’ (nitrogen-rich) and ‘browns’ (carbon-rich). Aim for a ratio of roughly 2 parts brown to 1 part green.
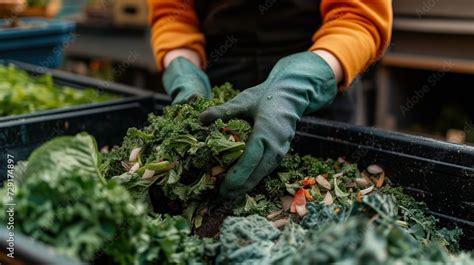
- Greens: Kitchen scraps (fruit and vegetable peels, coffee grounds, tea bags), fresh grass clippings, plant trimmings.
- Browns: Dry leaves, shredded newspaper, cardboard, wood chips, straw, sawdust.
Layering these materials helps aeration and decomposition. Remember to chop larger items into smaller pieces to speed up the process.
Maintenance Tips for Optimal Composting
To keep your compost pile active and healthy:
- Keep it Moist: The pile should feel like a wrung-out sponge. Water if it’s too dry, or add dry browns if it’s too wet.
- Turn Regularly: Aerate your compost pile every week or two with a pitchfork. This introduces oxygen, which is crucial for the microbes doing the work, and speeds up decomposition.
- Avoid Problematic Items: Do not add meat, dairy products, oily foods, diseased plants, pet waste, or chemically treated wood to your compost, as these can attract pests or introduce pathogens.
Start Composting Today!
Building your own compost bin is a simple and rewarding DIY project that pays dividends for your garden and the environment. With this quick plan, you can start diverting waste from landfills and enriching your soil with homemade organic fertilizer in no time. Happy composting!
