


Quick DIY tips for preserving excess garden bounty without special tools?

Embracing the Abundance: Preserving Your Garden’s Bounty, Simply
The joy of a thriving garden is often matched only by the challenge of what to do with its generous output. When your raised beds and fruit trees are overflowing, and you’ve already shared with neighbors, the question arises: how can you make this goodness last? Fortunately, you don’t need a pantry full of specialized canning equipment or an industrial dehydrator to preserve your harvest. With a little creativity and some basic kitchen staples, you can extend the life of your fresh produce, ensuring those homegrown flavors are savored all year long.
Drying Your Harvest: The Sun and Air Method
Drying is perhaps the oldest and simplest form of food preservation. It removes moisture, preventing spoilage, and concentrates flavors. Herbs like oregano, thyme, rosemary, and even basil are perfect candidates. Simply gather them into small bunches, tie the stems with twine, and hang them upside down in a warm, dry, well-ventilated spot away from direct sunlight (which can bleach them). In a week or two, they’ll be brittle and ready to crumble into jars.
For fruits and some vegetables, sun drying is an option in hot, dry climates. Slice fruits thinly (apples, peaches, tomatoes) and arrange them on screens or baking racks elevated for airflow. Cover with cheesecloth to deter insects and bring them indoors overnight. This process can take several days, but the result is deliciously chewy dried snacks. Ensure they are fully dry and leathery before storing in airtight containers.

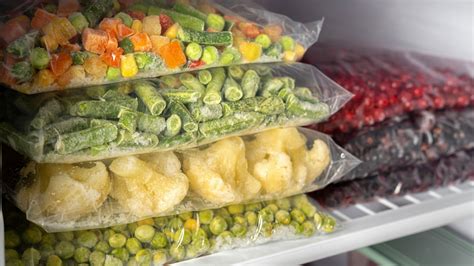
Freezing for Freshness: The Easiest Way
Freezing is a fantastic method for retaining nutrients and flavor with minimal effort. Most vegetables benefit from a quick blanching before freezing to stop enzyme action that can degrade quality. Simply immerse chopped vegetables (green beans, broccoli, corn kernels, peas) in boiling water for 1-3 minutes, then immediately plunge them into ice water to stop the cooking process. Drain thoroughly, pat dry, and pack into freezer-safe bags or containers, removing as much air as possible.
Fruits, on the other hand, generally don’t require blanching. Berries can be flash-frozen by spreading them in a single layer on a baking sheet until firm, then transferring them to bags. Sliced fruits like peaches or apples can be frozen with a light sugar syrup or a sprinkle of lemon juice to prevent browning. Label everything with the date!

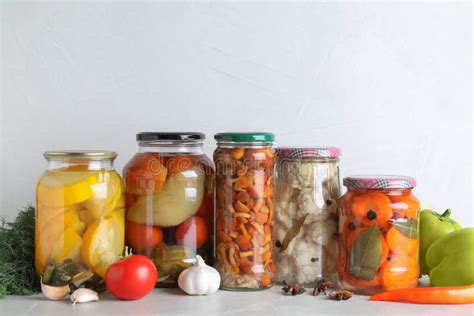
Simple Fermentation and Quick Pickles
Fermentation is an ancient art that creates delicious, probiotic-rich foods. For beginners, making sauerkraut or lacto-fermented pickles requires little more than vegetables, salt, water, and a clean jar. Chop or shred your chosen vegetables (cabbage, cucumbers, carrots), massage them with salt, and pack them tightly into a clean jar, ensuring they are submerged under their own brine (or a prepared salt brine). Seal loosely or use an airlock if you have one, and let nature do its work for a week or two in a cool, dark place. The resulting tangy crunch is incredibly rewarding.
Quick pickles, while not fermented, offer an instant gratification solution. Slice vegetables (cucumbers, onions, bell peppers) and pack them into jars. Heat a mixture of vinegar, water, sugar, and salt (plus any desired spices like dill or mustard seeds) until dissolved, then pour over the vegetables. Let cool, then refrigerate. They’ll be ready to eat in a few hours and last for several weeks.
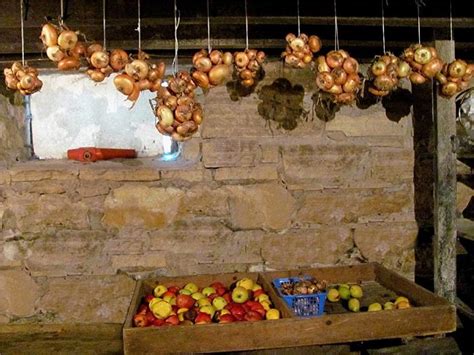
The Cool, Dark Storage Solution
For certain types of produce, the best preservation method involves simply finding the right spot. A cool, dark, and moderately humid environment—often found in a basement, garage, or even an unheated closet—can act as a natural root cellar. Potatoes, onions, garlic, winter squash, and root vegetables like carrots and beets (with their greens removed) thrive in these conditions. Ensure good air circulation and check regularly for any signs of spoilage. Apples also store well this way, but keep them separate from other produce, as they release ethylene gas which can hasten ripening.
Herbal Oils and Salt Curing
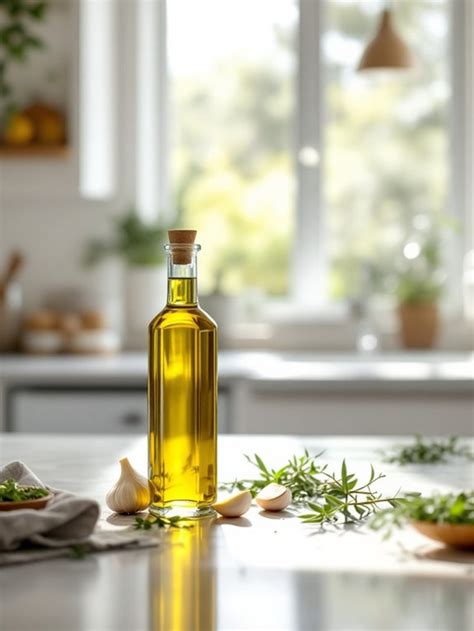
Transforming herbs into flavored oils or salts is another straightforward way to capture their essence. For herbal oils, simply pack clean, dry herbs (rosemary, thyme, oregano) into a sterilized jar and cover completely with a good quality olive oil. Let it infuse for 2-4 weeks in a cool, dark place, then strain out the herbs. Store in a cool place and use within a few months. Note: For safety, always store infused oils in the refrigerator and use them quickly, as there’s a small risk of botulism if improperly handled.
Salt curing is excellent for preserving herbs and even some small vegetables. Layer fresh herbs (like sage or rosemary) with coarse salt in an airtight container. The salt draws out moisture and acts as a preservative. You can also create flavored salts by grinding dried herbs with salt, perfect for seasoning meals throughout the year.
Enjoy Your Harvest, Year-Round
Preserving your garden’s bounty doesn’t have to be a daunting task involving complicated machinery. By embracing these simple, no-special-tools DIY methods, you can significantly reduce food waste, enjoy the peak flavors of your produce long after the growing season has ended, and bring a touch of country living self-sufficiency into your home. Experiment with different techniques and find what works best for your harvest and your lifestyle. Happy preserving!