


Safely canning summer tomatoes: What’s the best water bath method for beginners?

Embrace the Summer Harvest: Why Can Tomatoes?
There’s nothing quite like the taste of a ripe, juicy summer tomato. Whether from your garden or a local farmers’ market, these versatile fruits are a cornerstone of many cuisines. But summer is fleeting, and the desire to capture that fresh flavor for colder months is strong. Canning is an age-old tradition that allows us to do just that, and for high-acid foods like tomatoes, the water bath canning method is a fantastic and accessible starting point for beginners.
Canning your own tomatoes not only extends their shelf life but also gives you complete control over ingredients, avoiding preservatives and excessive sodium often found in store-bought options. It’s a rewarding process that transforms a perishable harvest into pantry staples like diced tomatoes, sauces, or whole peeled tomatoes, ready to elevate your meals at any time of the year.
Prioritizing Safety: The Golden Rules of Home Canning
Safety is paramount when it comes to home canning. Improperly canned goods can lead to serious health risks, including botulism. Fortunately, with tomatoes, the water bath method is safe when proper procedures are followed. Tomatoes are generally considered a high-acid food, which inhibits the growth of harmful bacteria. However, modern tomato varieties can sometimes have lower acidity, making the addition of an acid (like lemon juice or citric acid) a non-negotiable step.
Always use tested recipes from reputable sources like the National Center for Home Food Preservation (NCHFP), university extension offices, or USDA guidelines. Never make up your own canning recipes or deviate from established processing times. Cleanliness and proper sterilization are also key to preventing spoilage.
Essential Equipment for Water Bath Canning
Getting started with water bath canning doesn’t require a huge investment. Here’s what you’ll need:
- Water Bath Canner: A large pot with a lid and a rack to keep jars off the bottom. A very large stockpot can work if it’s deep enough for jars to be covered by at least an inch of water.
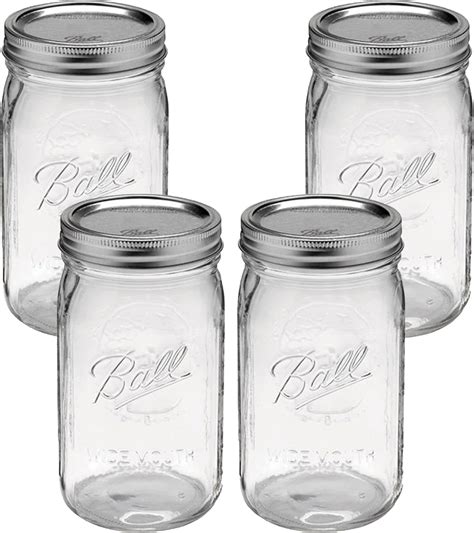
- Canning Jars: Glass jars specifically designed for canning (e.g., Ball, Kerr). Ensure they are free of chips or cracks.
- New Lids: Lids are single-use; the sealing compound degrades after one use. Rings can be reused.
- Jar Lifter: Essential for safely placing hot jars into and out of the canner.
- Canning Funnel: Helps keep jar rims clean when filling.
- Bubble Remover/Headspace Tool: A plastic or wooden stick to release air bubbles and measure headspace.
- Non-Metallic Spatula: For removing air bubbles.
- Clean Towels: For wiping jar rims and spills.
- Large Stockpot: For preparing your tomatoes.
- Large Bowl: For ice bath if peeling tomatoes.

Preparing Your Tomatoes for Canning Success
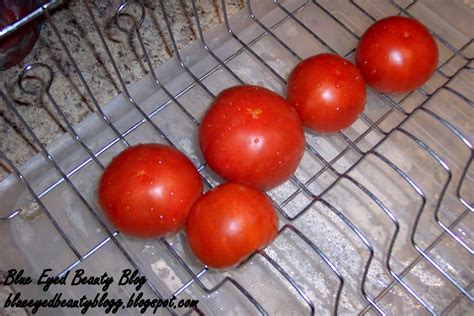
Choosing the right tomatoes is the first step. Opt for firm, ripe tomatoes free of blemishes. Roma or paste tomatoes are often preferred for canning due to their meaty texture and fewer seeds, but any suitable canning variety will work. Wash your tomatoes thoroughly under cool running water.
Peeling and Coring
Most canning recipes call for peeled tomatoes. To peel, blanch tomatoes in boiling water for 30-60 seconds, then immediately transfer them to an ice bath. The skins should slip off easily. Core the tomatoes and remove any green or bruised spots.
Adding Acid is Crucial
To ensure safety, you must add acid to your tomato jars. For pint jars, add 1 tablespoon of bottled lemon juice or 1/4 teaspoon of citric acid. For quart jars, use 2 tablespoons of bottled lemon juice or 1/2 teaspoon of citric acid. Do not use fresh lemon juice as its acidity can vary. Salt is optional and added for flavor, not preservation.
Step-by-Step Water Bath Canning for Beginners
1. Prepare Jars and Lids
Wash jars, lids, and rings in hot, soapy water. Sterilize jars by placing them in boiling water for 10 minutes or running them through a dishwasher’s sanitizing cycle. Keep jars hot until ready to fill. Set lids aside in a small saucepan of simmering (not boiling) water to soften the sealing compound.
2. Prepare Your Tomatoes (Hot or Raw Pack)
Hot Pack: This method is generally recommended as it helps remove air from the tomatoes, preventing floating and ensuring a better seal. After peeling and coring, roughly chop tomatoes and simmer them in a large pot for 5 minutes, or until heated through.
Raw Pack: Place raw, prepared tomatoes directly into the jars. This method is quicker but can result in more floating and slightly less attractive jars. Fill jars with boiling water to cover tomatoes.
3. Fill Jars and Add Acid
Place the required amount of lemon juice or citric acid into each hot jar. Using a canning funnel, carefully fill hot jars with your prepared tomatoes, leaving 1/2 inch of headspace (the space between the food and the rim of the jar). If using raw pack, cover tomatoes with boiling water, maintaining 1/2 inch headspace. Use a non-metallic spatula to remove air bubbles, pressing the tomatoes down gently. Wipe jar rims clean with a damp cloth.

4. Process in the Water Bath Canner
Place lids on jars and screw on rings fingertip-tight (just until resistance is met). Using a jar lifter, carefully lower jars onto the rack in the canner. Ensure jars are not touching each other. Add hot water to the canner until jars are covered by at least 1-2 inches of water. Place the lid on the canner and bring the water to a rolling boil. Once boiling, start your timer for the recommended processing time (check your recipe, typically 35 minutes for pints and 45 minutes for quarts at sea level for crushed tomatoes).
5. Cool, Check Seals, and Store
Once the processing time is complete, turn off the heat and let the canner stand for 5 minutes before carefully removing jars with the jar lifter. Place jars on a clean towel or cooling rack in a draft-free area, leaving space between them. Do not disturb them for 12-24 hours. As they cool, you’ll hear a ‘ping!’ sound, indicating a successful seal.
After 24 hours, check seals by pressing the center of each lid. If it doesn’t flex, the jar is sealed. Remove the rings, wipe jars clean, label with contents and date, and store in a cool, dark, dry place for up to 18 months. Any unsealed jars should be refrigerated and consumed within a week.
Tips for a Successful Canning Season
- Altitude Adjustment: If you live at an altitude above 1,000 feet, you’ll need to increase processing times. Consult NCHFP guidelines for your specific altitude.
- Listen for the Ping: The satisfying ‘ping’ sound is a great indicator of a good seal, but always do a physical check.
- Don’t Rush: Canning is a process that benefits from patience. Take your time with each step.
- Keep it Clean: A clean work area and sterilized equipment are your best defense against spoilage.
Enjoy Your Preserved Bounty
With these beginner-friendly steps, you’re well on your way to safely preserving your summer tomato harvest. Imagine the taste of sun-ripened tomatoes in a winter stew or a mid-autumn pasta sauce, all from your own pantry. Happy canning!


