


Safely canning surplus garden tomatoes without a pressure canner?
As summer draws to a close, many home gardeners find themselves with an overwhelming bounty of ripe, juicy tomatoes. While the thought of preserving this harvest for year-round enjoyment is appealing, the complexity of pressure canning can deter some. Fortunately, thanks to their natural acidity, tomatoes can be safely canned using the simpler water bath method, making them an ideal candidate for beginners and those without a pressure canner.
Understanding Tomato Acidity and Safety
The key to safe water bath canning is understanding acidity. High-acid foods (pH 4.6 or below) create an environment hostile to Clostridium botulinum, the bacterium responsible for botulism. Tomatoes naturally hover around this threshold, often with a pH between 4.3 and 4.9. To ensure safety, especially with modern low-acid tomato varieties or heirlooms, it’s crucial to add additional acid.
Common acidic additions include bottled lemon juice or citric acid. For pints, add 1 tablespoon of bottled lemon juice or 1/4 teaspoon of citric acid per jar. For quarts, use 2 tablespoons of bottled lemon juice or 1/2 teaspoon of citric acid. Do not use fresh lemon juice, as its acidity can vary. Vinegar (5% acidity) can also be used, but may alter the flavor more significantly.
Essential Equipment for Water Bath Canning
Before you begin, gather your supplies:
- Water Bath Canner: A large pot with a lid and a rack at the bottom to keep jars off the direct heat and allow water circulation. It must be deep enough to cover jars by at least 1-2 inches of water.
- Canning Jars: Mason jars with two-piece lids (new lids are essential for each canning session, bands can be reused). Ensure jars are free of chips or cracks.
- Jar Lifter: To safely place hot jars into and remove them from the canner.
- Canning Funnel: To minimize spills when filling jars.
- Ladle: For transferring tomatoes into jars.
- Bubble Remover/Headspace Tool: A non-metallic utensil to remove air bubbles and measure headspace.
- Clean Kitchen Towels: For wiping jar rims.

Step-by-Step Water Bath Canning Process
1. Prepare Jars and Lids
Wash jars, lids, and bands in hot, soapy water. Sterilize jars by boiling them for 10 minutes, especially if your processing time is less than 10 minutes (though most tomato recipes require longer processing). Keep jars hot until filling. Prepare lids according to manufacturer’s instructions, typically by simmering them in hot water.
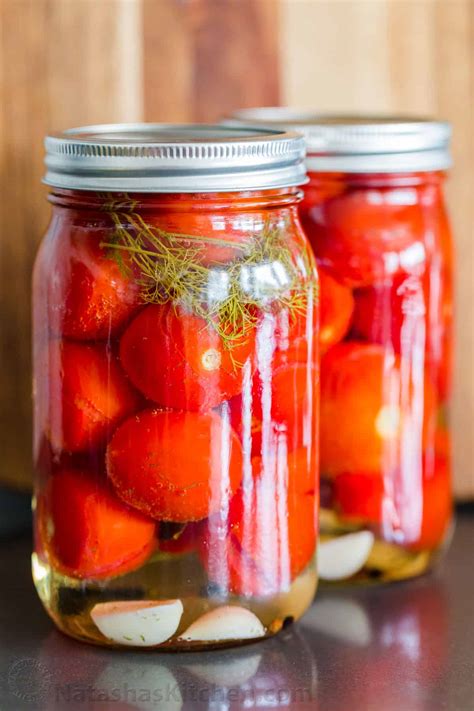
2. Prepare Your Tomatoes
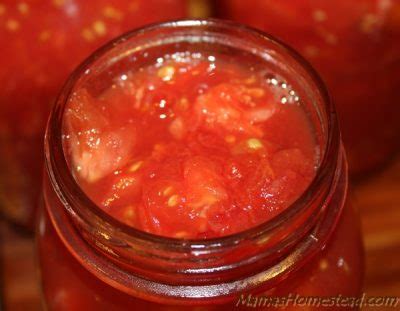
Wash tomatoes thoroughly. To peel them easily, blanch them in boiling water for 30-60 seconds, then immediately transfer to an ice bath. The skins should slip off. Core and quarter or chop the tomatoes. You can also crush them for sauce or juice. For whole or halved tomatoes, pack them raw into jars, or hot pack by simmering them first.
3. Fill Jars and Add Acid
Add the required amount of bottled lemon juice or citric acid to each hot jar. Using your canning funnel and ladle, fill the hot jars with your prepared tomatoes, leaving 1/2 inch of headspace (the space between the food and the rim of the jar). If hot packing, ensure tomatoes are simmering when added.
4. Remove Air Bubbles and Wipe Rims
Insert a non-metallic bubble remover tool or a plastic knife down the sides of the jar to release trapped air bubbles. Adjust headspace if necessary. Wipe jar rims thoroughly with a clean, damp cloth to remove any food residue that could prevent a proper seal. Center a hot lid on each jar and screw on the band fingertip-tight (just until resistance is met, no overtightening).
5. Process in the Water Bath Canner
Place filled jars into the canner using a jar lifter, ensuring they are not touching. Add enough hot water to cover the jars by at least 1-2 inches. Bring the water to a rolling boil. Once boiling vigorously, start your timer. Processing times vary based on altitude and recipe, but typically range from 35-45 minutes for pints and 45-85 minutes for quarts for plain crushed or whole tomatoes. Always consult a tested recipe for precise times and adjust for your altitude.
Cooling, Checking Seals, and Storage
Once the processing time is complete, turn off the heat and let the jars sit in the canner for 5 minutes before carefully removing them with the jar lifter. Place the hot jars on a clean towel on your countertop, ensuring they are not touching each other and are out of drafts. Let them cool undisturbed for 12-24 hours.
After cooling, check seals by pressing the center of each lid. If it doesn’t flex, the jar is sealed. Remove the bands, wipe jars clean, label with contents and date, and store in a cool, dark, dry place for up to 1 year. Any unsealed jars should be refrigerated and consumed within a week or reprocessed with a new lid (within 24 hours).
Important Safety Tips
- Always use tested recipes from reliable sources like the USDA, Ball Blue Book, or university extension offices.
- Never reduce processing times or ingredients, especially the added acid.
- Do not eat food from jars with bulging lids, leaks, or any signs of spoilage. When in doubt, throw it out!
- If you live at an altitude above 1,000 feet, you must increase processing times to ensure food safety. Refer to a reliable canning guide for specific adjustments.
With careful preparation and adherence to safe canning practices, you can confidently preserve your garden’s tomato bounty without a pressure canner, enjoying the taste of summer long after the season ends.


