Safest beginner canning methods for garden surplus?

Preserving Your Garden’s Bounty Safely
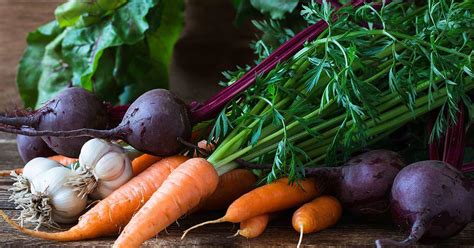
After all the hard work nurturing your garden, a surplus of fresh produce is a wonderful problem to have. Canning is an excellent way to extend the enjoyment of your harvest, but for beginners, understanding the safest methods is paramount. Improper canning can lead to spoiled food or, worse, dangerous bacterial growth. This guide will walk you through the safest and most recommended canning techniques for beginners, helping you stock your pantry with confidence.
Understanding High-Acid vs. Low-Acid Foods
The first step to safe canning is recognizing the difference between high-acid and low-acid foods. This distinction determines which canning method you must use:
- High-Acid Foods: These include most fruits (berries, peaches, apples), fruit juices, jams, jellies, pickles, and tomatoes (often acidified with lemon juice or citric acid). Their natural acidity helps inhibit bacterial growth, making them suitable for water bath canning.
- Low-Acid Foods: These are vegetables (green beans, corn, carrots, potatoes), meats, poultry, fish, and most mixed soups. They lack sufficient acidity to prevent the growth of harmful bacteria, including Clostridium botulinum, which produces a deadly toxin. Low-acid foods must always be processed using a pressure canner.

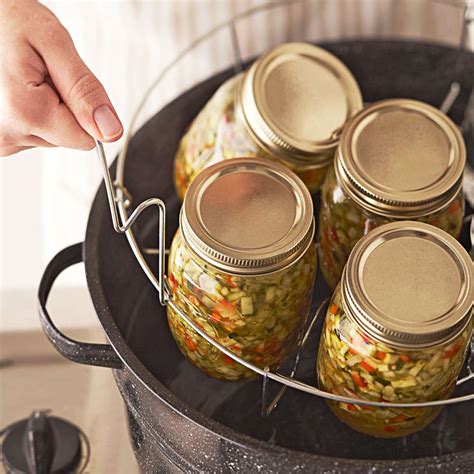
Water Bath Canning: The Beginner-Friendly Method
Water bath canning is often the starting point for aspiring canners due to its relative simplicity and less specialized equipment requirements. It’s ideal for high-acid foods.
How it Works:
Jars filled with food are submerged in boiling water and processed for a specific duration. The high temperature kills spoilage microorganisms and creates a vacuum seal as the jars cool.
Key Safety Tips for Water Bath Canning:
- Use Tested Recipes Only: Never improvise. Only use recipes from reputable sources like the National Center for Home Food Preservation (NCHFP), Cooperative Extension offices, or trusted canning cookbooks.
- Proper Equipment: A large canning pot with a rack, canning jars, two-piece lids (new flat lids, reusable rings), jar lifter, and headspace tool are essential.
- Sterilize Jars (if needed): For processing times less than 10 minutes, jars must be sterilized. Otherwise, wash them in hot, soapy water.
- Correct Headspace: Follow recipe instructions precisely for headspace (the space between the food and the lid). Too little can cause siphoning; too much can prevent a good seal.
- Venting and Processing: Bring water to a full boil before starting the timer. Ensure water covers jars by at least 1-2 inches throughout the entire processing time.
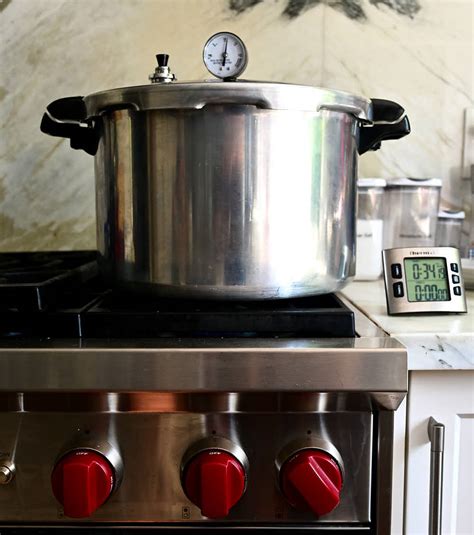
Pressure Canning: Essential for Low-Acid Foods
Pressure canning is non-negotiable for preserving low-acid foods. It reaches temperatures far beyond boiling water (240-250°F or 116-121°C), which is necessary to destroy Clostridium botulinum spores.
How it Works:
A specialized pressure canner creates a high-pressure, high-temperature steam environment that effectively processes low-acid foods safely.
Key Safety Tips for Pressure Canning:
- Invest in a Quality Pressure Canner: Choose between a weighted gauge or dial gauge canner. Dial gauges need annual calibration.
- Read the Manual: Thoroughly understand your canner’s specific operating instructions before beginning.
- Proper Venting: Allow the canner to vent steam for 10 minutes before applying the weight or closing the petcock. This purges air and ensures an accurate temperature.
- Maintain Pressure: Keep the pressure stable at the recommended PSI throughout the entire processing time. Fluctuations can compromise food safety.
- Cool Down Naturally: Let the canner cool down and depressurize on its own without forced cooling. Opening it too soon can be dangerous and cause jar seal failures.
Universal Safety Principles for Every Beginner
Regardless of the method you choose, a few overarching safety principles apply to all home canning endeavors:
- Always Use Tested Recipes: We cannot stress this enough. Never guess or rely on old family recipes unless they have been updated to current safety standards.
- Inspect Jars and Lids: Use only canning jars designed for home canning. Check jars for chips or cracks. Use new flat lids each time; rings can be reused.
- Cleanliness is Key: Wash hands, equipment, and produce thoroughly.
- Accurate Processing Times: Adjust processing times for altitude if you live above 1,000 feet. The NCHFP provides detailed altitude adjustments.
- Check Seals After 12-24 Hours: Remove rings. Press down on the center of the lid; if it doesn’t flex, the jar is sealed. Unsealed jars should be refrigerated and consumed within a few days or reprocessed immediately with a new lid.
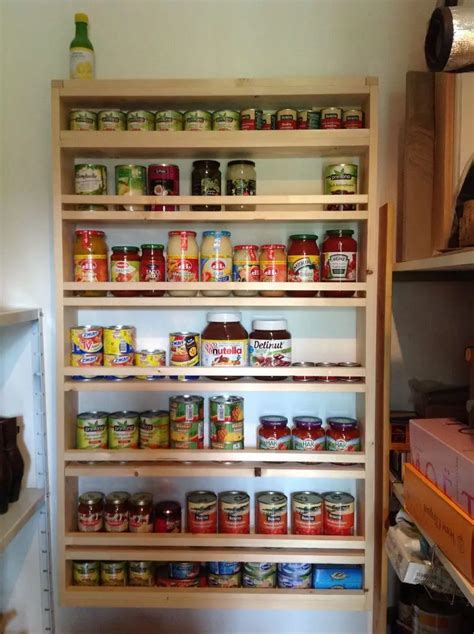
- Label and Store: Label jars with the contents and date. Store in a cool, dark, dry place without the rings.
Getting Started with Confidence
Canning can seem daunting at first, but by strictly adhering to tested methods and safety guidelines, you can safely preserve your garden’s bounty. Start with smaller batches and simpler recipes, like dilly beans or fruit jams, to build your confidence. As you gain experience, you’ll feel more comfortable tackling a wider variety of foods.
Remember, home canning is a rewarding skill that connects you more deeply with your food and the seasons. Enjoy the process and the delicious results of your labor!
Conclusion
For beginners, the safest canning methods involve a clear understanding of food acidity and the corresponding processing technique. Water bath canning is safe for high-acid foods, while pressure canning is imperative for low-acid foods. By prioritizing tested recipes, proper equipment, and meticulous adherence to safety protocols, you can transform your garden surplus into a pantry full of wholesome, home-canned goodness with complete peace of mind.