


Safest canning methods for high-acid tomatoes from our homestead harvest?
Preserving Your Bounty: Safe Canning for Homestead Tomatoes
The satisfaction of harvesting sun-ripened tomatoes from your homestead garden is unparalleled. Transforming that abundance into shelf-stable jars of deliciousness, ready for winter meals, is the ultimate goal. For high-acid tomatoes – which most common garden varieties are – boiling water bath canning is a safe and reliable method. However, understanding the proper techniques and adhering strictly to safety guidelines is paramount to prevent spoilage and foodborne illness.
Understanding High-Acid Tomatoes and pH
Tomatoes are generally considered high-acid foods, with a pH typically below 4.6. This acidity is what makes them suitable for boiling water bath canning, as the high temperature of the boiling water, combined with the low pH, is sufficient to destroy common spoilage organisms and bacterial toxins, including *Clostridium botulinum*. However, it’s important to note that some heirloom varieties or very ripe tomatoes can have a pH closer to the borderline. For this reason, adding a bit of acid is a recommended safety measure.

Essential Equipment for a Safe Canning Journey
Before you begin, gather all necessary equipment. Having everything ready streamlines the process and ensures safety.
- Boiling Water Canner: A large pot with a lid and a rack to keep jars off the bottom.
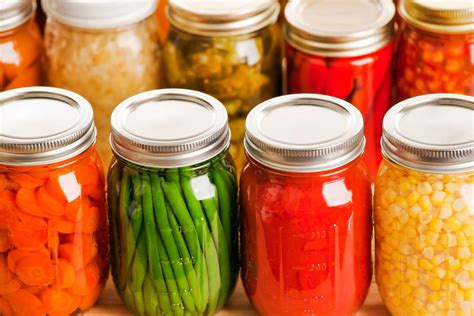
- Canning Jars: Mason-type jars specifically designed for canning (pint or quart). Ensure they are clean and free from chips or cracks.
- New Lids and Bands: Always use new lids for each canning session. Bands can be reused if they are in good condition.
- Jar Lifter: Essential for safely handling hot jars.
- Canning Funnel: Helps prevent spills when filling jars.
- Headspace Tool: To accurately measure the space between the food and the lid.
- Bubble Remover/Spatula: To release air bubbles from packed jars.
- Large Stockpot: For blanching tomatoes or making sauce.
- Ladle: For transferring hot liquids.
- Timer: Crucial for accurate processing times.
Preparing Your Tomatoes for Canning
The quality of your canned tomatoes starts with the quality of your fresh harvest. Choose firm, ripe tomatoes free from blemishes, rot, or soft spots. Wash them thoroughly under cool running water.
Processing Methods for Tomatoes:
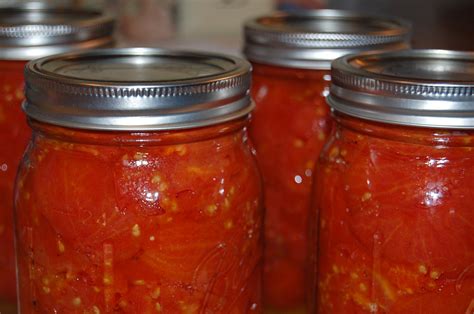
- Whole or Halved: Many prefer to can whole peeled tomatoes. To peel, blanch tomatoes in boiling water for 30-60 seconds, then immediately plunge into ice water. The skins will slip off easily.
- Diced or Crushed: These can be processed similarly after peeling and chopping.
- Tomato Sauce or Juice: Cook down tomatoes into your desired consistency before canning.
Regardless of the form, it is critical to add acid to each jar. Add 2 tablespoons of bottled lemon juice or ½ teaspoon of citric acid per quart jar, or 1 tablespoon of bottled lemon juice or ¼ teaspoon of citric acid per pint jar. Do not use fresh lemon juice, as its acidity can vary.

Step-by-Step Boiling Water Bath Canning Process
1. Prepare Jars and Lids
Wash jars thoroughly with hot soapy water and rinse. Keep them hot (in a dishwasher, hot water bath, or a warm oven) until ready to fill. New lids should be simmered in hot (not boiling) water to soften the sealing compound, and bands should be clean.
2. Pack the Jars
Fill hot jars with your prepared tomatoes, leaving the recommended headspace (usually ½ inch for whole or crushed tomatoes, ¼ inch for juice). For whole or crushed tomatoes, you can either raw pack (pack raw tomatoes and add hot juice/water) or hot pack (heat tomatoes before packing). Hot packing is generally recommended as it yields better quality and minimizes floating.
3. Remove Air Bubbles and Adjust Headspace
Using a non-metallic spatula or bubble remover, slide it between the food and the jar to release trapped air bubbles. Recheck the headspace and add more liquid if necessary to maintain the correct level.
4. Clean Rims and Apply Lids
Wipe the jar rims clean with a damp cloth to ensure a proper seal. Place a hot lid centered on each jar and secure with a band until fingertip-tight (do not overtighten).
5. Process in Boiling Water Bath
Carefully place the filled jars onto the rack in your boiling water canner. Ensure jars are covered by at least 1-2 inches of water. Bring the water to a full, rolling boil. Once boiling, start your timer for the recommended processing time (which varies by altitude and tomato product – always consult a reliable, tested canning guide like those from USDA or university extensions). Do not reduce processing time.
6. Cool and Check Seals
Once processing is complete, turn off the heat and let the jars sit in the canner for 5 minutes before carefully removing them with a jar lifter. Place them on a towel-lined surface in a draft-free area, allowing space between jars, and let them cool undisturbed for 12-24 hours. Do not tighten bands during this period.
After cooling, check seals. The center of the lid should be concave and not flex when pressed. Remove bands, wipe jars clean, label with contents and date, and store in a cool, dark place. Any unsealed jars should be reprocessed immediately with a new lid or refrigerated and consumed within a few days.
Safety First: Always Follow Tested Recipes
Never rely on old family recipes that haven’t been updated or tested against modern safety standards. Always use current, scientifically tested recipes and guidelines from reputable sources like the National Center for Home Food Preservation (NCHFP), university extension services, or USDA publications. These resources provide precise processing times, acid recommendations, and preparation methods tailored to different tomato products and altitudes, ensuring the safety of your delicious homestead harvest.

