


Safest home canning for low-acid garden veggies?

Preserving Your Harvest: The Critical Role of Pressure Canning
There’s immense satisfaction in harvesting fresh vegetables from your garden and wanting to enjoy their goodness year-round. Home canning is a time-honored tradition that allows us to do just that. However, when it comes to low-acid garden vegetables, safety is not just a recommendation; it’s an absolute necessity. Understanding the science behind safe canning methods is crucial to protect your family from foodborne illnesses, particularly botulism.
What Makes a Vegetable ‘Low-Acid’?
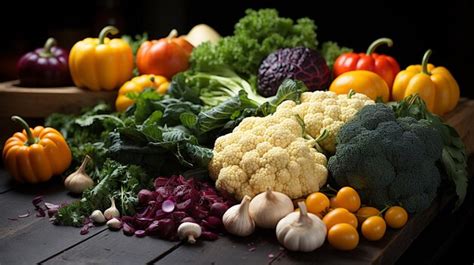
Low-acid foods are those with a pH value higher than 4.6. This category includes most common garden vegetables such as green beans, corn, peas, potatoes, carrots, beets, asparagus, and squash (winter varieties). Meats, poultry, and seafood also fall into this category. The concern with low-acid foods is that they provide an ideal environment for the spores of Clostridium botulinum, the bacteria responsible for botulism, to thrive and produce a deadly toxin if not processed correctly.
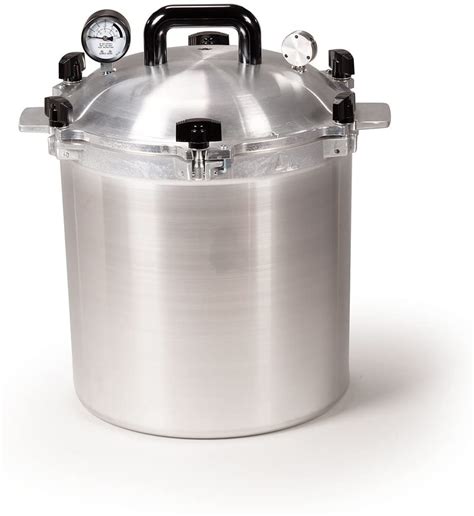
The Only Safe Method: Pressure Canning
Unlike high-acid foods (like most fruits, pickles, or tomatoes with added acid) which can be safely processed in a boiling water bath, low-acid foods require much higher temperatures to destroy botulism spores. A boiling water bath reaches a maximum temperature of 212°F (100°C) at sea level, which is insufficient. Pressure canning, however, allows temperatures to reach 240°F (116°C) or higher. These elevated temperatures, maintained for specific durations, are what neutralize the botulism spores, making your canned goods safe for consumption.
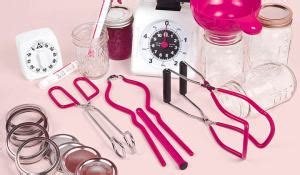
Essential Equipment and Preparation
Investing in the right equipment and preparing it properly is your first step towards safe pressure canning. You’ll need a reliable pressure canner – either a weighted-gauge or dial-gauge model. Ensure your dial gauge is tested annually for accuracy by your local extension office. You’ll also need standard canning jars, new lids, and bands. Always start with clean, hot jars and ensure all equipment is in good working order.
- Pressure Canner: Choose a reputable brand and understand how to operate it safely.
- Jars: Use only canning-specific glass jars; inspect for chips or cracks.
- Lids and Bands: New lids for each use, bands can be reused.
- Tools: Jar lifter, canning funnel, headspace tool, bubble remover.
Step-by-Step Pressure Canning Process
Following a tested recipe precisely is non-negotiable. Here’s a general overview of the steps involved in pressure canning low-acid vegetables:
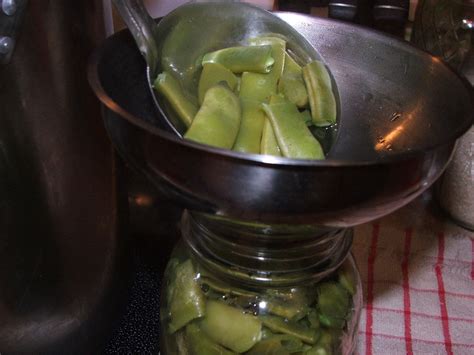
- Prepare Your Produce: Wash, peel, chop, or blanch vegetables as per your chosen recipe.
- Pack Jars: Fill hot jars with hot food (hot pack) or raw food (raw pack), leaving the precise headspace specified in your recipe (usually 1 inch). Remove air bubbles.
- Clean Rims and Apply Lids: Wipe jar rims thoroughly to ensure a good seal. Place new, hot lids on jars and screw on bands finger-tight.
- Load Canner: Place jars on the rack in the pressure canner, ensuring there’s enough water (usually 2-3 inches, check your canner manual).
- Vent Canner: Close the canner lid, but do not apply the weight or tighten the screws on some models until steam has vented steadily for 10 minutes. This purges air from the canner, ensuring accurate pressure and temperature.
- Process: Apply the weight or close vent according to your canner type. Bring the canner up to the specified pressure (e.g., 10 or 11 pounds for weighted gauge, adjusted for altitude). Start your processing timer ONLY when the correct pressure is reached and maintained.
- Cool Down: Once processing is complete, turn off the heat and let the canner cool naturally until the pressure gauge returns to zero. DO NOT force cool.
- Remove Jars: Open the canner, wait 5-10 minutes, then carefully remove jars with a jar lifter and place them on a towel-lined surface, ensuring they are not touching.
- Check Seals: After 12-24 hours, check jar seals. Lids should be concave and not flex when pressed. Remove bands, wash jars, label, and store.
Crucial Safety Tips for Pressure Canning
- Always Use Tested Recipes: Rely exclusively on current, research-based recipes from reputable sources like the USDA Complete Guide to Home Canning, the National Center for Home Food Preservation (NCHFP), or university extension services. Never use old cookbooks or unverified internet recipes.
- Do Not Alter Recipes: Never change the type or quantity of ingredients in a tested recipe, especially for low-acid foods. This can change the pH and safety.
- Altitude Adjustments: If you live above 1,000 feet, you must increase the processing pressure to compensate for lower atmospheric pressure. Consult your chosen recipe guide for specific adjustments.
- Check for Spoilage: Before opening a jar, inspect for bulging lids, leaks, or unusual odors. If in doubt, when in doubt, throw it out!
- Storage: Store properly sealed jars in a cool, dark, dry place.
Enjoy Your Preserves Safely
While the steps for safe pressure canning might seem daunting at first, they become second nature with practice. The effort is well worth it, allowing you to enjoy your garden’s bounty all year long with confidence in the safety and quality of your preserved foods. Prioritize education, precision, and adherence to tested guidelines, and you’ll be canning like a pro in no time.