


Secret to flaky, scratch-made pie crust every time for country baking?

The Quest for the Perfect Flaky Crust
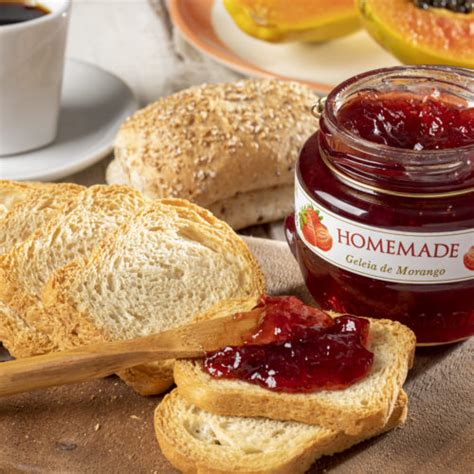
For generations, the aroma of a freshly baked pie has been synonymous with country kitchens, but the dream of a consistently flaky, tender, and truly scratch-made crust can often feel elusive. Many home bakers struggle with crusts that are tough, crumbly, or simply not as ethereal as they envision. The good news? The ‘secret’ isn’t magic, but rather a combination of simple, time-honored techniques that, once understood, will transform your pie-making.
Forget the fear of pastry; with a little patience and the right approach, you can create a pie crust that’s not just good, but truly unforgettable, every single time. It all boils down to understanding the science and art behind fat, flour, and water.
The Golden Rule: Keep Everything Cold
This is perhaps the most critical secret to a flaky pie crust. When fat (butter, shortening, or a combination) is kept very cold, it doesn’t fully incorporate into the flour. Instead, it creates tiny pockets and layers within the dough. As the pie bakes, these cold fat pieces melt, releasing steam and pushing apart the layers of flour, resulting in those glorious, distinct flakes we all crave.
Warm fat, on the other hand, will blend too easily with the flour, forming a dense, cookie-like texture rather than a flaky one. Ensure your butter or shortening is chilled, your water is ice cold, and if your kitchen is warm, you might even chill your flour or mixing bowl.

Essential Ingredients and Their Roles
- Flour: All-purpose flour is typically best. Avoid high-protein flours like bread flour, which can lead to a tough crust.
- Fat: High-quality unsalted butter offers the best flavor and flakiness. Shortening provides tenderness and is easier to work with, especially for beginners. A 50/50 blend often yields the best of both worlds.
- Ice Water: Crucial for hydration without overworking the gluten. Use only as much as needed for the dough to come together.
- Salt: Essential for flavor balance, don’t skip it!
Mastering the Mixing Technique
Once your ingredients are cold, the next step is how you combine them. Cut your cold fat into small pieces (about 1/2-inch cubes) and work them into the flour mixture quickly. You want to flatten the fat pieces, leaving some pea-sized and some lentil-sized pieces, ensuring a range of flakiness. A pastry blender, your fingertips, or even a food processor (pulsed carefully) can achieve this.
Next, gradually add the ice water, a tablespoon at a time, mixing just until the dough comes together. The key is to add enough water so the dough holds its shape but not so much that it becomes sticky or overly hydrated. Overworking the dough develops gluten, leading to a tough crust.
The Chill Factor and Gentle Handling
After mixing, gather the dough into a disk, wrap it tightly in plastic, and refrigerate it for at least 30 minutes, or up to two days. This chilling period allows the gluten to relax, makes the fat re-solidify, and hydrates the flour evenly, making the dough much easier to roll without tearing. When it’s time to roll, work quickly on a lightly floured surface, turning the dough frequently to prevent sticking.
Roll from the center outwards, using even pressure, aiming for a consistent thickness. Avoid excessive re-rolling of scraps, as this develops gluten and makes the dough tough. If the dough starts to warm up or stick, pop it back in the fridge for a few minutes.

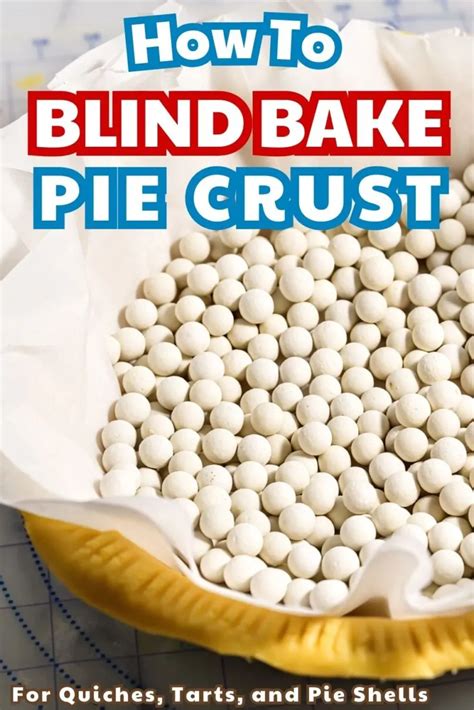
Blind Baking and Troubleshooting
For pies with wet fillings (like quiches or fruit pies), blind baking (pre-baking) your crust is often essential to prevent a soggy bottom. Line the crust with parchment paper, fill with pie weights or dried beans, and bake until the edges are set. Remove the weights and paper, then continue baking until lightly golden.
If your crust crumbles, you likely didn’t add enough water. If it’s tough, you added too much water or overmixed it. Practice makes perfect, and soon you’ll intuitively know the right feel of the dough.
Bringing it All Together for Country Goodness
With these secrets in hand – cold ingredients, proper fat distribution, minimal water, gentle handling, and adequate chilling – you’re well on your way to crafting a truly spectacular flaky pie crust. This isn’t just about baking; it’s about connecting with a culinary tradition, bringing warmth and comfort to your home, just like grandma used to. Don’t be afraid to experiment with different fats or even a touch of vinegar (which can tenderize dough). Each pie you make will be a step closer to your signature, flaky, country-style crust.