Secret to flaky, tender pie crust from scratch every time?
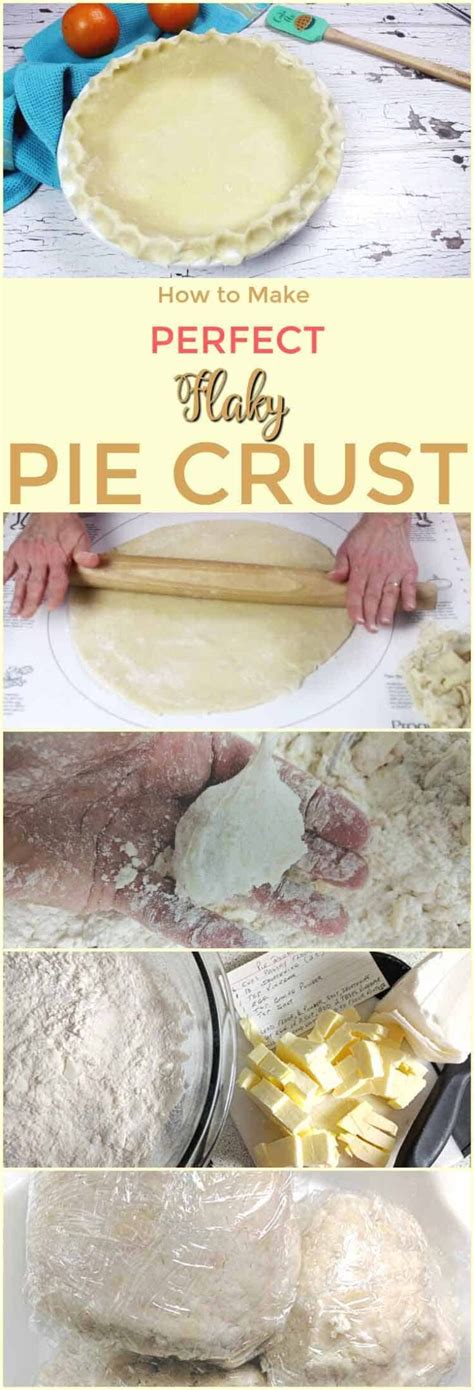
The Quest for the Perfect Pie Crust
A truly spectacular pie begins and ends with its crust. Forget the fillings for a moment; a flaky, tender, and buttery crust is the hallmark of a master baker. Yet, for many, achieving this elusive perfection from scratch can feel like a culinary challenge. Fear not, aspiring bakers! The secret lies not in magic, but in understanding a few fundamental principles and techniques. Let’s demystify the art of the perfect pie crust.
The Essential Ingredients: Cold is Key
While the ingredient list for pie crust is deceptively simple – flour, fat, salt, and water – their quality and temperature are paramount. All-purpose flour is standard, but ensure it’s fresh. Salt is crucial for flavor, balancing the richness of the fat. As for fat, a combination of unsalted butter and a little shortening often yields the best results: butter for flavor and flakiness, shortening for tenderness and easier handling. Crucially, both the butter (and/or shortening) and the water must be ice cold.
Why cold? Cold fat helps create those desirable pockets of steam during baking, separating the layers of dough to form a flaky texture. Warm fat melts too quickly and incorporates too fully into the flour, resulting in a tough, crumbly, or greasy crust. Likewise, ice water prevents the butter from melting and keeps the gluten development in check, ensuring tenderness.

Mastering the Cut-In Technique
This is perhaps the most critical step. The goal is to incorporate the cold fat into the flour mixture, but not completely. You want distinct pieces of fat, ranging from pea-sized to small bean-sized, distributed throughout the flour. These pockets of fat are what create the steam that puffs up into flaky layers.
- Chop Your Fat: Cut your cold butter and/or shortening into small cubes (about 1/2 inch) before you start. You can even pop them back into the freezer for 10-15 minutes.
- Tools of the Trade: A pastry blender is ideal for this. You can also use two knives, your fingertips, or even a food processor. If using your hands, work quickly to avoid warming the fat.
- The Texture: Mix until the flour mixture resembles coarse meal with visible pieces of fat remaining. Resist the urge to overmix; uniform mixing will develop too much gluten and result in a tough crust.
Hydration and Handling: Less is More
Once your fat is cut into the flour, it’s time to add the ice water. This step is delicate because too much water leads to a tough, sticky dough, while too little results in a crumbly, dry dough. The exact amount of water can vary based on flour type and humidity, so add it gradually, a tablespoon at a time.
- Ice Water Only: Fill a measuring cup with water and add a few ice cubes. Only use the water, not the ice, and drain any remaining ice before measuring.
- Add Gradually: Drizzle a portion of the ice water over the flour mixture and gently toss with a fork or your hands. Continue adding water until the dough just barely comes together. It should look shaggy but hold when squeezed.
- Minimal Handling: As soon as the dough forms, stop mixing. Overworking the dough develops gluten, leading to a tough crust.
The Indispensable Chill
Chilling your pie dough is non-negotiable. After forming the dough into a disc, wrap it tightly in plastic wrap and refrigerate for at least 30 minutes, or preferably an hour or two (even overnight). This resting period serves several vital purposes:
- Relaxes Gluten: It allows the gluten you’ve inevitably developed during mixing to relax, making the dough easier to roll and more tender.
- Solidifies Fat: It chills the fat again, ensuring it’s firm and ready to create those flaky layers.
- Hydrates Flour: It gives the flour time to fully hydrate, preventing a crumbly dough.
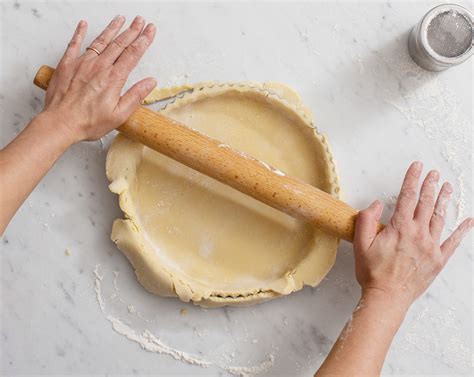
Rolling with Precision, Not Power
When it’s time to roll, remember precision over power. A properly chilled and rested dough will be much easier to handle.
- Flour Lightly: Lightly flour your work surface and rolling pin. Too much flour will dry out your dough.
- Roll from the Center: Roll from the center outwards, rotating the dough frequently to prevent sticking and ensure an even circle.
- Even Thickness: Aim for an even 1/8 to 1/4 inch thickness. Inconsistent thickness will lead to uneven baking.
- Handle Gently: Use your rolling pin to carefully lift and transfer the dough to your pie plate. Don’t stretch the dough into the plate, as it will shrink back during baking.

The Final Touches: Baking for Flakiness
Whether you’re blind-baking for a custard pie or filling it immediately, a few baking tips help achieve that golden, flaky finish:
- Cold Dough into Hot Oven: Ensure your pie dough is still cold when it hits a preheated, hot oven. The sudden temperature change helps the fat create steam rapidly.
- High Initial Heat: Many recipes call for a higher initial temperature (e.g., 425°F/220°C) for the first 15-20 minutes to set the crust and promote flaking, before reducing the temperature for the remainder of the bake.
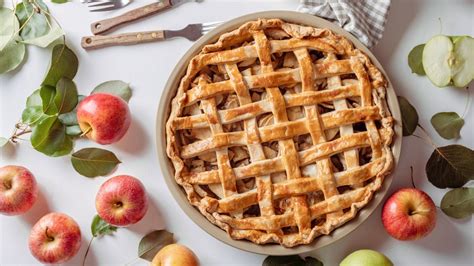
- Ventilation: For a double-crust pie, cut vents in the top crust to allow steam to escape.
- Don’t Skimp on Bake Time: An underbaked crust is a sad crust. Bake until golden brown, even on the bottom.
Common Pitfalls to Avoid
- Warm Ingredients: Always start with very cold butter and ice water.
- Overworking the Dough: Too much handling develops gluten, leading to a tough crust. Mix just until combined.
- Too Much Water: Add water sparingly. A slightly shaggy dough is better than a sticky one.
- Skipping the Chill: Don’t rush this step. It’s crucial for texture and ease of handling.
- Not Enough Salt: Salt enhances flavor significantly.
Conclusion: Practice Makes Perfect
Crafting a consistently flaky and tender pie crust from scratch is a culinary triumph that’s well within your reach. By understanding the roles of cold ingredients, mastering the cut-in technique, exercising gentle handling, and embracing the power of chilling, you’ll soon be turning out perfect pies every time. Like any skill, practice refines technique and builds confidence. So grab your ingredients, chill that butter, and get ready to impress with your next homemade pie!