Secret to perfectly flaky pie crust from scratch, every time?
Unlock the Mystery of Flaky Pie Crust
For many home bakers, the thought of making pie crust from scratch can be daunting, often leading to tough, crumbly, or soggy results. Yet, a truly flaky, buttery crust is the hallmark of an exceptional pie. The good news? Achieving that coveted texture isn’t as mysterious as it seems. It boils down to understanding a few key principles and executing them with precision and patience.
The Essential Ingredients: Simplicity and Quality
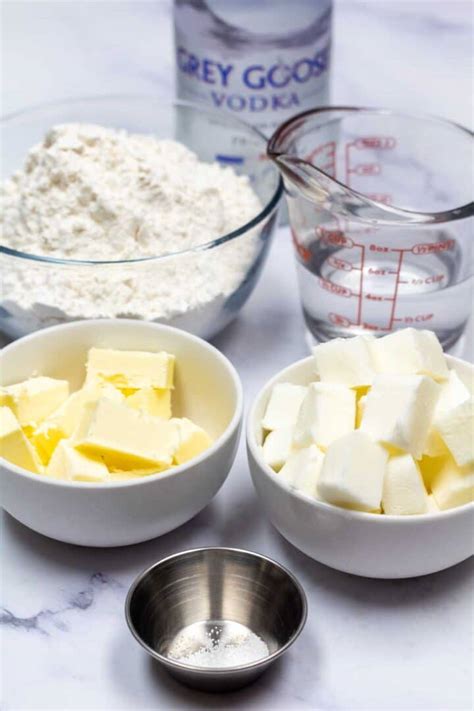
A perfect pie crust relies on a minimalist ingredient list: flour, fat (butter is king for flavor and flakiness), ice water, and salt. The quality of these ingredients matters, especially the butter. Opt for unsalted butter with a higher fat content for the best flavor and texture. All-purpose flour is standard, but some bakers swear by a low-protein pastry flour for a more tender crust.

The Golden Rule: Keep Everything Cold
This is arguably the most crucial secret. Cold butter, cold water, and even a cold bowl and hands (if possible) are vital. When small pieces of cold butter melt in the oven, they release steam, creating pockets of air that result in flakiness. If the butter gets too warm and incorporates fully into the flour, you’ll end up with a tough, cookie-like crust rather than a flaky one.
Cutting in the Butter: Peas and Lentils
- By Hand: Use a pastry blender, two knives, or even your fingertips. Work quickly to cut the cold butter into the flour until the pieces range from the size of peas to small lentils.
- Food Processor: For speed and efficiency, a food processor can do the job in pulses, but be careful not to over-process and create a paste.
The Magic of Ice Water
Gradually add ice-cold water, a tablespoon at a time, mixing just until the dough comes together. Use only enough water to form a cohesive dough; too much will develop the gluten excessively, leading to toughness. You’re looking for a shaggy dough that just holds together when pressed.
Minimal Handling and Resting Time
Once the water is added, avoid overworking the dough. Excessive kneading develops gluten, making the crust tough. Gently gather the dough, form it into a disc, wrap it tightly in plastic, and refrigerate for at least 30 minutes, or preferably an hour or two. This resting period allows the gluten to relax and the butter to firm up, making the dough easier to roll and contributing to tenderness.
Rolling with Confidence
When ready to roll, lightly flour your work surface and rolling pin. Roll from the center outwards, rotating the dough frequently to prevent sticking and ensure an even thickness. Aim for about 1/8 to 1/4 inch thickness. If the dough starts to stick, add a tiny bit more flour. If it becomes too warm or difficult to handle, pop it back into the fridge for 10-15 minutes.
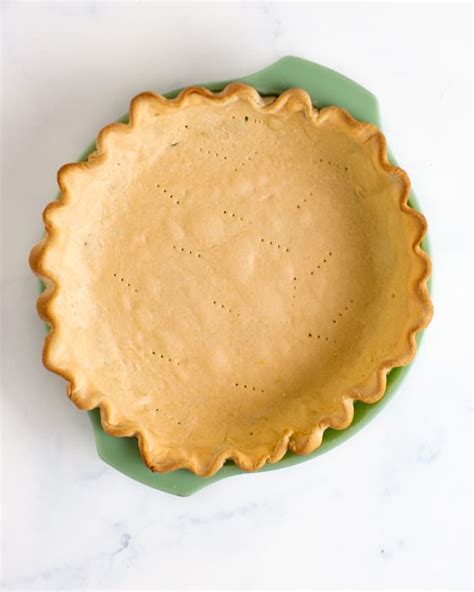
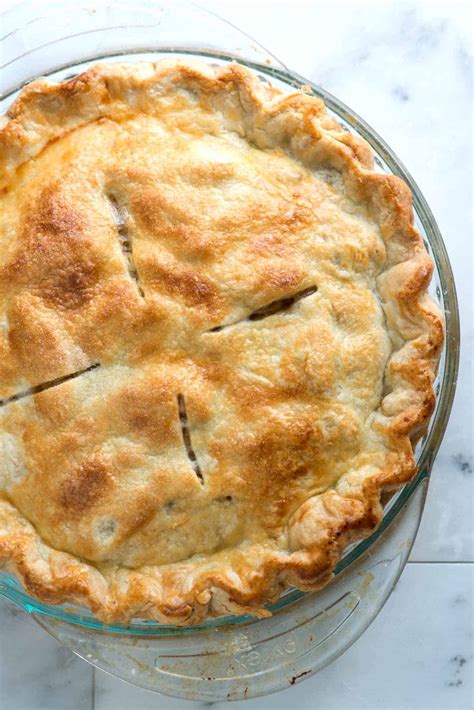
Blind Baking for a Crisp Bottom
For pies with very wet fillings (like quiche or fruit pies), blind baking (pre-baking) the crust can prevent a soggy bottom. Line the chilled crust with parchment paper, fill with pie weights or dried beans, and bake until the edges are set. Remove the weights and parchment, then continue baking until lightly golden. This creates a barrier against moisture.

Troubleshooting Common Pitfalls
- Tough Crust: Too much water, overworking the dough, or not enough chilling time.
- Crumbly Dough: Not enough water, or butter pieces too large.
- Shrinking Crust: Not chilling the dough long enough before baking, or overworking it.
- Soggy Bottom: Not blind baking for wet fillings, or not baking long enough.
Embrace the Process
Mastering pie crust takes practice, but by focusing on cold ingredients, minimal handling, and proper chilling, you’ll soon be turning out perfectly flaky, golden-brown crusts that are the envy of every baker. Don’t be afraid to experiment and find what works best in your kitchen. The reward of a homemade pie with a truly exceptional crust is well worth the effort.