Secrets to a flaky, tender pie crust using lard from scratch?

Unlock the Magic of Lard for Superior Pie Crust
For generations, experienced bakers have known a secret ingredient that elevates pie crust from good to utterly sublime: lard. While butter has its place, properly rendered lard offers an unparalleled flakiness and tenderness that’s truly hard to beat. If you’ve struggled with tough, brittle, or bland pie crusts, it’s time to embrace the traditional method and discover the genuine difference lard makes. This guide will walk you through the essential steps, tips, and tricks to master the art of lard-based pie crust.
The Essential Ingredients: Simplicity is Key
Crafting a perfect lard pie crust requires surprisingly few ingredients, each playing a crucial role. Quality is paramount, especially when it comes to your fat source.
- All-Purpose Flour: Use unbleached all-purpose flour for best results. Avoid self-rising flour.
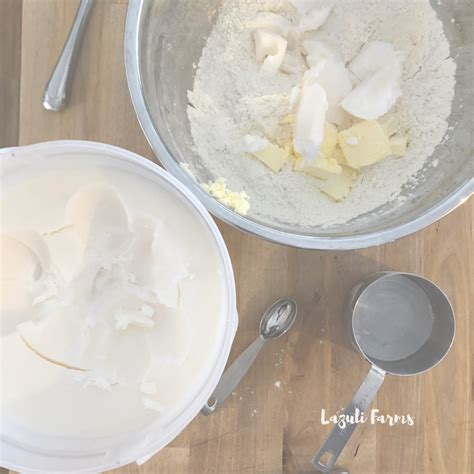
- Cold Lard: This is the star. Opt for high-quality, preferably rendered leaf lard, which has a neutral flavor and superior texture. Ensure it is very cold, straight from the refrigerator.
- Ice Water: Temperature matters! Water that is as cold as possible prevents the lard from melting prematurely and helps create steam pockets during baking, leading to flakiness.
- Salt: A pinch of salt enhances the flavor of the crust and balances the richness of the lard.
The Art of Incorporating Lard: Keeping it Cold and Chunky
The secret to flakiness lies in keeping distinct pieces of cold lard within the dough. These pieces create steam as they melt in the oven, puffing up the layers of dough to form those coveted flaky pockets. Your goal is to work quickly and avoid overworking the dough.
Start by cutting your very cold lard into 1/2-inch to 1-inch cubes. In a large bowl, whisk together your flour and salt. Add the cold lard cubes to the flour mixture. Using a pastry blender, your fingertips, or a food processor (pulsing sparingly), cut the lard into the flour until it resembles coarse crumbs with some pea-sized pieces of lard still visible. Resist the urge to blend until completely smooth; those visible chunks are your friends!
Hydration and Gentle Handling: The Path to Tenderness
Once the lard is incorporated, it’s time to add the ice water. This is a delicate balance: too little water and the dough will be crumbly; too much and it will be sticky and tough. Add the ice water a tablespoon at a time, gently tossing the mixture with a fork or your hands until the dough just begins to come together. Avoid kneading. The goal is a shaggy, somewhat crumbly dough that can be pressed into a cohesive ball.
Once formed, divide the dough into two disks (for a double-crust pie) or one larger disk (for a single-crust pie), wrap tightly in plastic wrap, and refrigerate for at least 30 minutes, or preferably an hour or more. This chilling period allows the gluten to relax, making the dough easier to roll, and re-solidifies the lard.
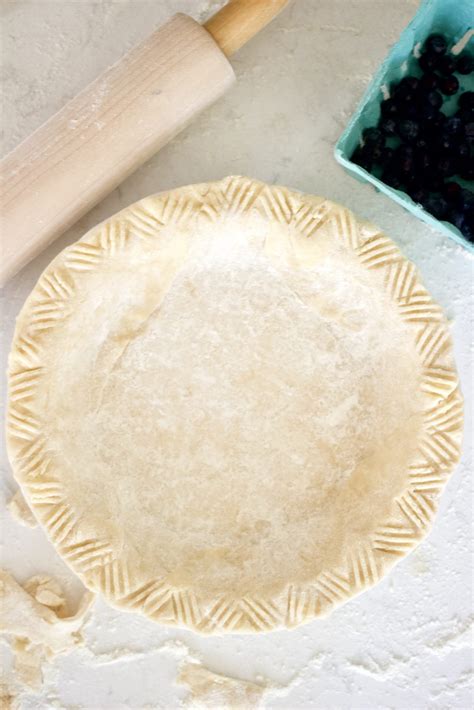
Rolling Out with Care: Avoiding a Tough Crust
When you’re ready to roll, remove one disk of dough from the refrigerator. If it’s too hard, let it sit at room temperature for just a few minutes until it’s slightly pliable but still very cold. Lightly flour your work surface and rolling pin. Roll the dough from the center outwards, rotating it frequently and adding minimal flour as needed to prevent sticking. Aim for an even thickness, usually about 1/8-inch.
Handle the dough as little as possible. Overworking develops gluten, which leads to a tough crust. If the dough starts to crack excessively, it might be too cold or you might be trying to roll it out too thin too fast. Gently patch cracks if necessary. Once rolled, carefully transfer the dough to your pie plate.
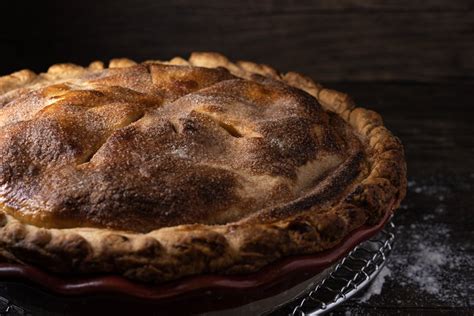
Baking for Golden Flakiness: Key Temperatures and Techniques
The baking process is where the magic of lard truly shines. For a beautifully flaky crust, consider these points:
- Blind Baking (for certain pies): Many custard or fresh fruit pies benefit from blind baking (pre-baking) the crust to prevent a soggy bottom. Prick the bottom and sides with a fork, line with parchment paper, and fill with pie weights or dried beans. Bake at 400°F (200°C) for 15-20 minutes, then remove weights and parchment and bake for another 5-10 minutes until lightly golden.
- High Initial Temperature: For full pies, starting at a higher temperature (e.g., 425°F / 220°C for the first 15-20 minutes) helps to quickly set the crust and promote flakiness before reducing the temperature to finish baking.
- Even Browning: If the edges of your crust are browning too quickly, loosely tent them with aluminum foil.

Troubleshooting Common Pitfalls
- Tough Crust: Likely caused by overworking the dough, adding too much water, or not keeping ingredients cold enough. Remember, gentle handling is key.
- Soggy Bottom: Often a result of not blind baking a wet filling pie, or not baking the crust long enough.
- Crumbly Dough: Not enough water, or ingredients were too warm. Gradually add more ice water, a teaspoon at a time, until it just comes together.
- Shrinking Crust: Not chilling the dough adequately before rolling and baking. The cold helps the lard solidify and the gluten relax, preventing excessive shrinkage.
The Final Word: Embrace the Lard Revolution
Making a pie crust from scratch using lard might seem intimidating at first, but with a little practice and adherence to these simple principles, you’ll soon be turning out incredibly flaky, tender, and flavorful crusts that will be the envy of every baker. The texture and richness that lard imparts are truly unique, providing a delicious foundation for any sweet or savory pie. So, roll up your sleeves, chill your lard, and get ready to experience pie perfection.