


Secrets to fluffy, homemade biscuits every time for a country breakfast?

The Quest for the Perfect Fluffy Biscuit
There’s nothing quite like a warm, flaky, and impossibly fluffy biscuit to complete a hearty country breakfast. Golden on the outside, tender on the inside, and begging to be slathered with butter and jam or drenched in sausage gravy. While many home bakers find the pursuit of the perfect biscuit challenging, achieving that cloud-like texture is entirely within reach with a few tried-and-true secrets. Forget dense, hockey-puck biscuits – we’re about to unlock the magic.

It All Starts with the Right Ingredients
The foundation of a great biscuit lies in its components, and coldness is paramount.
- Flour: Opt for a low-protein all-purpose flour or, even better, a soft winter wheat flour (like White Lily). Lower protein means less gluten development, leading to a more tender crumb.
- Fat: Ice-cold unsalted butter or a combination of butter and shortening are your best friends. The fat needs to be cut into small, pea-sized pieces. As these pockets of fat melt in the hot oven, they release steam, creating those signature flaky layers.
- Liquid: Buttermilk is traditional for a reason. Its acidity reacts with baking soda to boost leavening and tenderness. Ensure it’s cold!
- Leavening: A combination of baking powder and baking soda is often used. Baking powder provides the initial lift, while baking soda reacts with the buttermilk for additional rise.

Mastering the Technique: Hands-On Secrets
Ingredients are crucial, but technique makes all the difference between good and extraordinary.
Keep Everything Cold: This cannot be stressed enough. Cold fat means distinct pockets that create steam. You can even chill your flour and mixing bowl. Work quickly to prevent the fat from warming up.
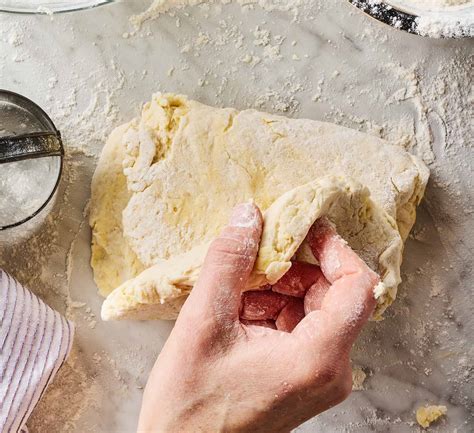
Don’t Overmix: As soon as the dry and wet ingredients come together, stop mixing. Overworking the dough develops gluten, resulting in tough biscuits. A shaggy, somewhat sticky dough is perfect.
Fold and Laminate: For extra layers, lightly pat the dough into a rectangle, fold it into thirds (like a letter), rotate, and repeat 2-3 times. This simple lamination technique creates dozens of thin layers, making your biscuits incredibly flaky.
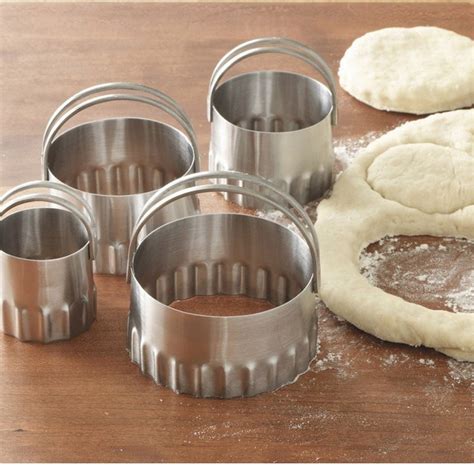
The Cut: Use a sharp biscuit cutter and press straight down – do not twist! Twisting seals the edges, preventing the biscuit from rising fully. For softer sides, place biscuits close together on the baking sheet. For crispier sides, space them apart.
The Heat is On: Baking to Perfection
Once your biscuits are formed, the oven is the final stage of their transformation.
- High Heat: Biscuits need a hot oven, typically 425-450°F (220-230°C). The high heat creates an immediate burst of steam from the cold fat and quick activation of leaveners, leading to a rapid, dramatic rise.
- Preheat Thoroughly: Ensure your oven is fully preheated to the correct temperature. Even better, place your baking sheet in the oven while it preheats to get it scorching hot before adding the biscuits.
- Brush with Buttermilk or Butter: For a golden-brown top, brush the biscuits with a little extra buttermilk before baking, or with melted butter halfway through baking.

Enjoying Your Fluffy Creation
The moment they emerge from the oven, golden and fragrant, is pure bliss. Serve your fluffy, homemade biscuits warm with softened butter, homemade jam, honey, or a generous ladle of creamy sausage gravy for the ultimate country breakfast experience. With these secrets in hand, you’ll be baking perfect biscuits every time, much to the delight of your family and guests.


