Secrets to rich, flavorful bone broth from scratch?

Making bone broth from scratch might seem like a daunting task, but with a few key techniques and a bit of patience, you can consistently produce a deeply flavorful, gelatinous, and incredibly nourishing elixir. Forget the bland, store-bought versions; homemade bone broth is a game-changer for your cooking and your health. Here’s how to master it.
Why Make Your Own Bone Broth?
Homemade bone broth offers a depth of flavor that is unmatched, forming an excellent base for soups, stews, sauces, and gravies. Beyond its culinary uses, it’s packed with collagen, amino acids, and minerals known to support gut health, joint function, and skin elasticity. It’s an economical way to utilize often-discarded parts of animals, turning them into liquid gold.
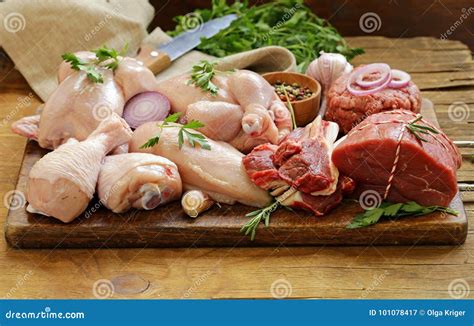
The Foundation: Choosing Your Bones
The quality and type of bones are paramount to a great broth. For the best gelatinous texture and flavor, a mix is ideal:
- Marrow bones: From femurs or knuckles, these contribute richness and flavor.
- Joints: Knuckles, oxtail, chicken feet, or pig trotters are rich in collagen, which yields that desirable gelatinous texture.
- Meaty bones: Short ribs or soup bones with some meat still attached add significant savory depth.
- Poultry carcasses: Chicken or turkey carcasses (especially roasted ones) are excellent for a lighter, yet flavorful broth.
Aim for bones from grass-fed, pasture-raised animals if possible, as these often contain more nutrients and better flavor.
Roasting for Depth of Flavor
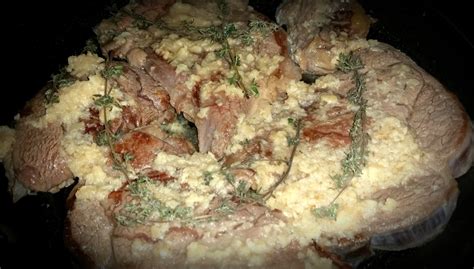
This is a non-negotiable step for beef, lamb, or pork bones. Roasting them before simmering caramelizes their surface, creating a richer, deeper color and a more profound umami flavor in your broth. Spread the bones in a single layer on a baking sheet and roast at 400°F (200°C) for 30-45 minutes, or until deeply browned. For poultry bones, especially if already from a roasted chicken, this step can be skipped, or they can be briefly roasted to enhance flavor.

The Essential Add-ins: Aromatics and Acid
While the bones do most of the heavy lifting, aromatics round out the flavor profile. Typically, these include:
- Vegetables: Onions (halved or quartered, skin on for color), carrots (roughly chopped), and celery (roughly chopped).
- Herbs: Bay leaves, peppercorns, and sprigs of parsley or thyme.
- Apple Cider Vinegar (ACV): A crucial ingredient! A tablespoon or two of ACV helps to draw minerals out of the bones and into the broth. Add it at the beginning, letting it sit with the bones in water for 20-30 minutes before heating.
Add these aromatics during the last few hours of simmering to prevent them from breaking down too much and creating a cloudy or bitter broth.
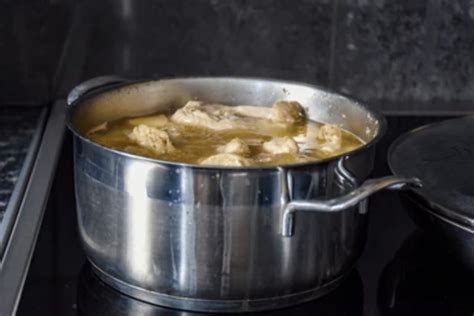
The Simmer: Low and Slow is the Key
Once your bones (and optional aromatics) are in a large stockpot or slow cooker, cover them with cold water by about 1-2 inches. The cold water helps to slowly bring up the temperature, allowing impurities to rise to the surface for easy skimming. Bring it to a boil, then immediately reduce the heat to the lowest possible setting so it maintains a gentle simmer.
- Skimming: For the first hour or two, skim off any foam or scum that rises to the surface. This prevents your broth from becoming cloudy.
- Duration: This is where patience comes in. Aim for a minimum of 12-24 hours for beef, pork, or lamb bones, and 6-12 hours for poultry. The longer it simmers at a gentle heat, the more flavor and nutrients are extracted.
- Maintaining water level: If simmering for a very long time, you may need to add more water to ensure the bones remain submerged.
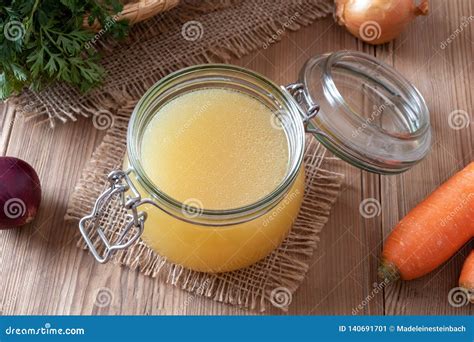
Straining, Cooling, and Storage
Once your broth has simmered to perfection, carefully remove the bones and large aromatics with tongs or a slotted spoon. Then, strain the liquid through a fine-mesh sieve (or a sieve lined with cheesecloth) into a large heat-proof bowl or containers. This removes any small bone fragments or vegetable bits.
Allow the broth to cool at room temperature for an hour or two, then transfer it to the refrigerator. As it chills, a layer of fat will solidify on top. You can easily scrape this off and discard it (or save it for cooking) if you prefer a leaner broth. Below the fat, you should see a jiggly, gelatinous broth – a sure sign of a well-made, collagen-rich broth!
Tips for Next-Level Broth
- Don’t boil: A rolling boil emulsifies fat and impurities, leading to a cloudy broth. Always maintain a gentle simmer.
- Season at the end: Add salt and other seasonings after the broth is made and reduced, as prolonged simmering can concentrate flavors too much.
- Save scraps: Keep a freezer bag for vegetable scraps (onion peels, carrot tops, celery ends) to add to your broth for extra flavor.
- Pressure cooker option: For a faster broth, a pressure cooker can significantly reduce cooking time, often achieving similar results in 3-4 hours.
With these secrets, you’re well on your way to crafting rich, flavorful, and incredibly nourishing bone broth from scratch. Enjoy the process and the delicious, healthy rewards!