


Simple DIY compost methods for improving homestead garden soil?

Transforming your homestead garden soil from mediocre to magnificent doesn’t require expensive amendments or complicated processes. The secret lies in something many consider waste: organic matter. Composting is an age-old practice that turns kitchen scraps and yard waste into nutrient-rich “black gold,” a natural conditioner that dramatically improves soil structure, water retention, and nutrient availability.
Why Compost is Your Garden’s Best Friend
Compost isn’t just fertilizer; it’s a soil builder. It introduces beneficial microorganisms, loosens heavy clay soils, helps sandy soils retain moisture and nutrients, and provides a slow-release source of essential plant nutrients. For the self-sufficient homestead gardener, mastering simple DIY composting methods is a cornerstone of sustainable, productive gardening.
The Basics of Composting: Greens, Browns, Water, Air
Before diving into methods, understand the fundamental ingredients:
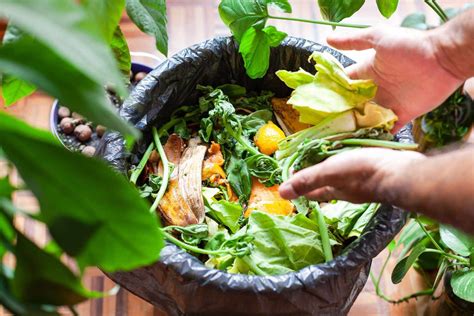
- Greens (Nitrogen-rich): Kitchen scraps (fruit and vegetable peels, coffee grounds, tea bags), fresh grass clippings, green plant trimmings.
- Browns (Carbon-rich): Dried leaves, straw, wood chips, shredded newspaper, cardboard.
- Water: Essential for microbial activity; your pile should feel like a damp sponge.
- Air: Microbes need oxygen; turning the pile introduces air.
A good rule of thumb is to aim for a 2:1 or 3:1 ratio of browns to greens by volume.
Simple DIY Compost Methods
1. Cold Composting (The “Set It and Forget It” Method)
This is the easiest method for beginners. Simply pile up your organic materials—kitchen scraps, yard waste, leaves—in a designated area or a simple bin. Layer greens and browns, wet them down, and let nature take its course. Cold composting takes longer (several months to a year or more) because it doesn’t generate high heat, but it requires minimal effort. It’s perfect for those with less time or smaller volumes of waste.

2. Hot Composting (Faster Results)
If you’re looking for finished compost in a matter of weeks, hot composting is your method. This requires more attention to detail but yields quicker results.
- Build the Pile: Create a pile at least 3x3x3 feet (1 cubic yard) to ensure it can retain heat. Layer greens and browns, ensuring proper moisture.
- Monitor Temperature: The pile should heat up to 130-160°F (55-70°C). Use a compost thermometer if you have one. This heat kills most weed seeds and pathogens.
- Turn Regularly: Turn the pile every few days to introduce air and redistribute materials. This is crucial for maintaining aerobic conditions and even decomposition.
- Maintain Moisture: Keep the pile consistently damp.
With regular turning and proper ratios, hot compost can be ready in 4-8 weeks.
3. Trench Composting (Direct Soil Enrichment)
This “no-dig” method involves burying kitchen scraps directly into your garden beds. Dig a trench or individual holes between rows or in unused sections of your garden, dump in kitchen scraps (no meat or dairy), cover with soil, and let them decompose directly in the earth. The nutrients are released exactly where your plants can access them, and it avoids the need for a separate compost pile. This is excellent for enriching soil in specific areas and is virtually effort-free once the hole is dug.

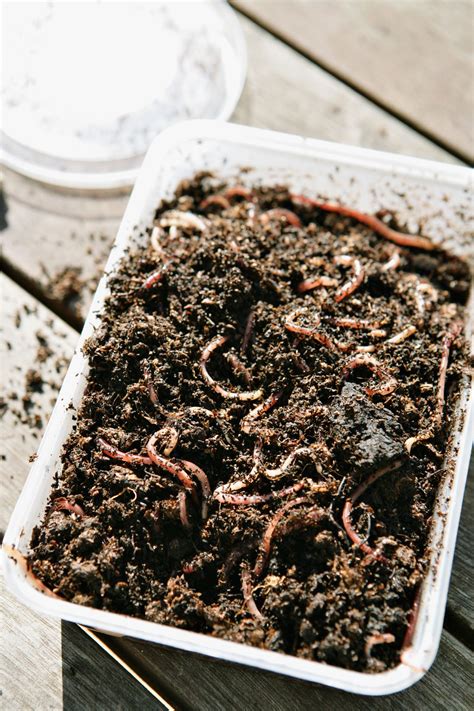
4. Vermicomposting (Worm Composting)
For smaller spaces or year-round indoor composting, vermicomposting uses red wiggler worms to break down food scraps into nutrient-rich worm castings (vermicompost). You’ll need a special worm bin (easily DIYed from plastic totes) and a starter culture of worms. Feed them vegetable and fruit scraps, coffee grounds, and shredded paper. Worm castings are an incredibly potent soil amendment, perfect for seedlings and container plants.
Tips for Composting Success
- What to Compost: Fruit and vegetable scraps, coffee grounds, tea bags, eggshells, shredded newspaper, cardboard, leaves, grass clippings, straw, hay, wood chips.
- What NOT to Compost: Meat, dairy products, oily foods (attract pests), diseased plants (spreads disease), pet waste (contains pathogens), chemically treated wood.
- Chop Materials: Smaller pieces break down faster.
- Keep it Moist: A pile that’s too dry won’t decompose; too wet will become anaerobic and stinky.
- Be Patient: Decomposition takes time, especially with cold composting.
Conclusion
Embracing simple DIY composting methods is one of the most impactful steps you can take to improve your homestead garden soil. Whether you choose the effortless cold pile, the speedy hot heap, the direct trench, or the productive worm bin, each method transforms organic waste into a valuable resource. Start small, experiment with what works best for your homestead, and watch your garden thrive with healthy, nutrient-rich soil year after year.


