


Simple DIY food dehydrator for garden herbs & fruit, no electricity?
Harnessing the Sun: The Charm of Off-Grid Food Preservation
In an age where electricity powers most of our appliances, the thought of preserving food without it can seem like a forgotten art. Yet, for centuries, people have relied on the sun and air to dry and store their harvests. Building a simple DIY food dehydrator that requires no electricity is not only an eco-friendly choice but also a rewarding project that reconnects you with traditional methods of food preservation. This guide will walk you through creating an effective solar dehydrator, ideal for capturing the essence of your garden herbs and fruits.
Whether you’re looking to save energy, prepare for off-grid living, or simply enjoy the unique flavors of sun-dried produce, a DIY solar dehydrator offers a practical and sustainable solution. Imagine transforming your abundance of basil, oregano, apples, or berries into long-lasting provisions, all thanks to the power of the sun.
Why Go Electric-Free for Dehydration?
- Energy Independence: No reliance on grid power means lower electricity bills and less environmental impact.
- Portability: Many designs are lightweight and can be moved to optimal sunlit spots.
- Cost-Effective: Often built from recycled or inexpensive materials, making it a budget-friendly project.
- Flavor Enhancement: Some argue that slow, natural drying methods can retain or even enhance the flavor of dried goods.
- Sustainability: A green approach to food preservation that aligns with eco-conscious living.
Materials You’ll Need
The beauty of a DIY project is its flexibility. You can often use repurposed materials. Here’s a list of common components:
- Wooden Crates or Pallets: For the basic frame.
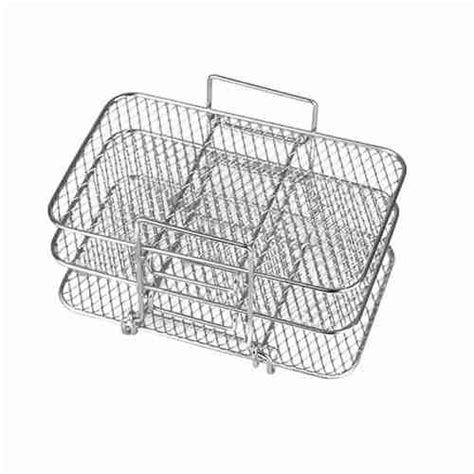
- Window Screens or Fine Mesh: For drying racks (food-safe, no galvanized mesh).
- Plexiglass or Old Window Pane: For the top transparent cover (to trap heat).
- Black Paint (non-toxic): To paint interior surfaces for maximum heat absorption.
- Hinges and Latches: For doors or access points.
- Staple Gun or Small Nails/Screws: For assembly.
- Drill and Saw: Basic tools for construction.
Building Your Simple Solar Dehydrator: Step-by-Step
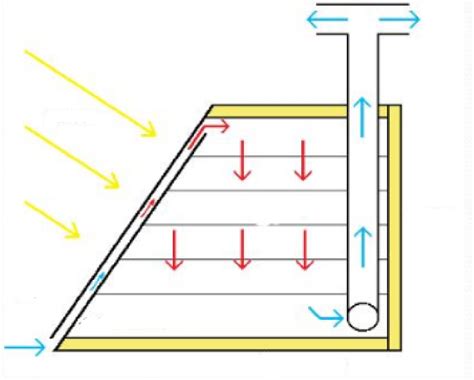
This design focuses on a basic ‘box-type’ dehydrator, often referred to as a solar food dryer, which uses a transparent top to create a greenhouse effect, heating the air inside.
Step 1: Construct the Basic Frame
Using wooden crates or creating a simple box frame from pallet wood, build an enclosure. The size will depend on how much produce you plan to dry. Ensure it has an opening at the bottom for cool air intake and another at the top for warm, moist air to escape. These vents are crucial for airflow.
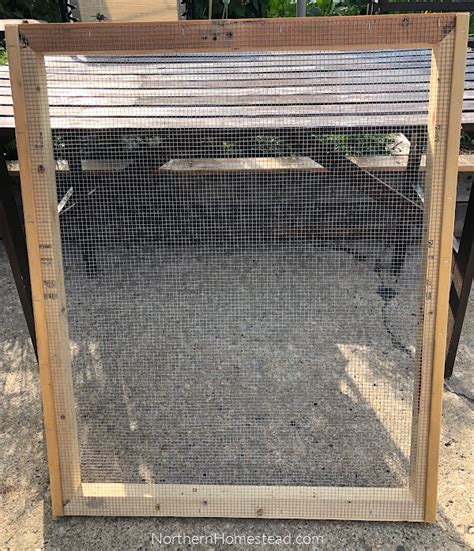
Step 2: Install Drying Racks
Cut your window screens or mesh to fit inside the frame, creating shelves. You’ll want multiple levels, spaced about 4-6 inches apart, to maximize drying surface area. Ensure the mesh is taut and secured to small wooden ledges or dowels within the frame. Avoid using metal that can corrode or impart flavors.
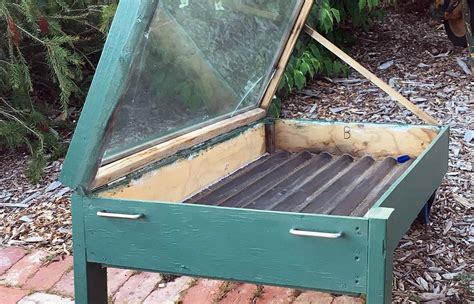
Step 3: Add the Heat-Trapping Cover
Secure the plexiglass or window pane to the top of your dehydrator. This acts as the ‘oven’ door, allowing sunlight to enter and heat the interior. You can hinge it for easy access to your produce. Ensure it creates a relatively sealed environment to trap heat.
Step 4: Paint for Efficiency (Optional but Recommended)
Paint the interior surfaces of your dehydrator, except the transparent top and the mesh racks, with non-toxic black paint. Black absorbs more solar radiation, significantly increasing the internal temperature and speeding up the drying process.
Step 5: Ensure Proper Ventilation
The success of a dehydrator lies in good airflow. The bottom intake vent allows cooler, drier air to enter, while the top exhaust vent lets out warm, moisture-laden air. These vents should ideally be screened to prevent insects from entering. Consider adding adjustable flaps to control airflow if needed.
Using Your DIY Dehydrator for Herbs & Fruits
Preparing Your Produce
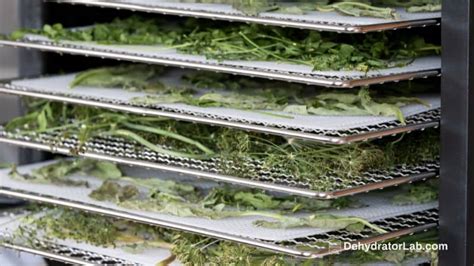
- Herbs: Wash gently, pat dry, and remove any damaged leaves. You can dry whole sprigs or separate leaves.
- Fruits: Wash thoroughly. For larger fruits like apples or peaches, slice them evenly (1/4 to 1/2 inch thick). Smaller fruits like berries can be dried whole or halved. Consider a quick blanch or citric acid dip for some fruits to prevent browning.
Placement and Drying Time
Place your dehydrator in a sunny, well-ventilated spot. The drying time will vary greatly depending on the ambient temperature, humidity, sunlight intensity, and the type/thickness of your produce. Herbs typically dry faster (1-3 days) than fruits (3-7 days or more). Rotate trays periodically for even drying.

Harvesting Your Sun-Dried Goodness
Once dried, herbs should be crumbly, and fruits should be leathery but pliable, with no visible moisture. Store your dried produce in airtight containers in a cool, dark place. Properly dried and stored herbs and fruits can last for months, sometimes even a year or more, providing you with delicious, homegrown flavors long after the harvest season has ended. Enjoy the satisfaction of preserving your garden’s bounty with your own hands and the sun’s natural energy!
