


Simple DIY methods for preserving summer’s berry harvest?

Capturing Summer’s Sweetness: DIY Berry Preservation
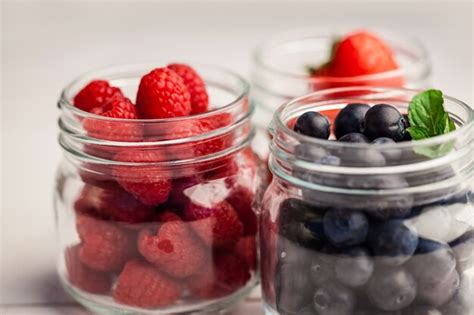
Summer brings an unparalleled bounty of fresh, juicy berries – strawberries, blueberries, raspberries, and blackberries galore. While nothing beats eating them fresh off the bush, the season is fleeting. Thankfully, preserving these delightful fruits is easier than you might think, allowing you to savor the taste of summer long after the days grow shorter. Here are several simple DIY methods to ensure your berry harvest doesn’t go to waste.

1. Freezing Berries: The Easiest Method
Freezing is by far the simplest way to preserve berries, retaining much of their flavor and nutritional value. It’s perfect for smoothies, baking, or adding to oatmeal.
- Preparation: Gently wash berries and pat them completely dry. Remove any stems or leaves.
- Flash Freezing: Spread berries in a single layer on a baking sheet lined with parchment paper. Place the sheet in the freezer for 2-4 hours, or until the berries are solid. This prevents them from clumping together.
- Storage: Transfer the frozen berries to freezer-safe bags or containers, removing as much air as possible. Label with the date. Frozen berries can last for 6-12 months.

2. Homemade Jams and Jellies: A Classic Treat
Transforming berries into jams or jellies is a timeless way to preserve their essence. While jams include fruit pulp, jellies are made from strained fruit juice for a clear, smooth spread.
- Ingredients: Typically, you’ll need berries, sugar, and sometimes pectin and lemon juice. The ratio varies by recipe and berry type.
- Process: Crush berries (for jam) or extract juice (for jelly). Combine with sugar and other ingredients in a large pot. Cook, stirring frequently, until the mixture reaches the gelling point.
- Canning: Ladle hot jam/jelly into sterilized canning jars, leaving headspace. Process in a boiling water bath canner according to recipe instructions to create a vacuum seal. Properly canned jams can last for a year or more in a cool, dark pantry.

3. Dehydrating Berries: Healthy Snacks and Additions
Dehydrating concentrates the berries’ flavor and sweetness, making them ideal for trail mix, granola, or rehydrating for baking. A food dehydrator is best, but a low-temperature oven can also work.
- Preparation: Wash and thoroughly dry berries. Smaller berries like blueberries can be dried whole; larger ones like strawberries should be sliced.
- Dehydration: Arrange berries in a single layer on dehydrator trays or oven racks. Dry at a low temperature (around 125-135°F or 52-57°C) for several hours, or until pliable and leathery with no residual moisture.
- Storage: Once completely cooled, store dehydrated berries in airtight containers in a cool, dark place. They can last for several months.

4. Water Bath Canning Whole Berries (in Syrup or Juice)
For a truly long-lasting preservation method, canning whole berries in a light syrup or their own juice allows you to enjoy them as a dessert topping, pie filling, or side dish.
- Preparation: Wash and sort berries, discarding any bruised ones. Prepare a light syrup (sugar and water) or use berry juice.
- Packing: You can either raw-pack (fill jars with raw berries and hot syrup/juice) or hot-pack (simmer berries in syrup/juice briefly before packing).
- Canning: Process filled jars in a boiling water bath canner for the specified time, ensuring a proper seal. This method is crucial for shelf-stability. Always follow a tested canning recipe for safety.
Enjoying Your Harvest All Year Long
Preserving your summer berry harvest is a rewarding DIY project that pays dividends in deliciousness. Whether you choose the simplicity of freezing, the classic appeal of jam, the convenience of dehydrating, or the longevity of canning, each method allows you to extend the joy of fresh berries far beyond their season. Experiment with these techniques and find your favorite way to capture summer’s sweet essence for year-round enjoyment!


