


Simple DIY raised garden bed design using reclaimed wood?

Why Choose Reclaimed Wood for Your Raised Bed?
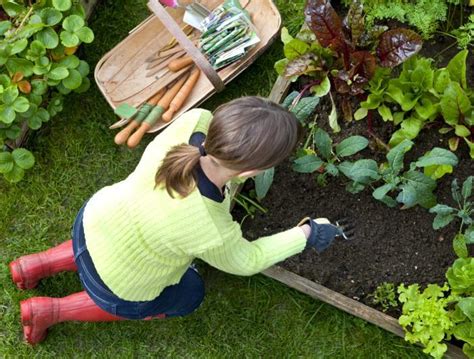
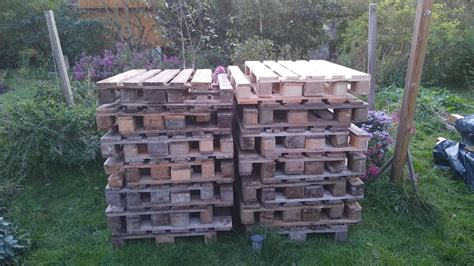
Building a raised garden bed is an excellent way to improve soil quality, reduce back strain, and extend your growing season. Opting for reclaimed wood takes these benefits a step further by offering an eco-friendly and cost-effective solution. Using materials like old fence panels, pallets, barn wood, or even discarded lumber not only diverts waste from landfills but also infuses your garden with unique character and a charming, rustic aesthetic. It’s a sustainable choice that often comes with stories and a weathered look that new lumber can’t replicate.
Beyond its environmental advantages, reclaimed wood can significantly cut down on project costs. While new lumber can be expensive, salvaged wood is often available for free or at a very low price from local construction sites, businesses, or online marketplaces. Just be sure to check that the wood hasn’t been treated with harmful chemicals like CCA (chromated copper arsenate), which was common in pressure-treated wood before 2003 and isn’t safe for growing edibles.

Planning Your Simple Raised Garden Bed
Before you start cutting, a little planning goes a long way. Decide on the size and location of your raised bed. A common and manageable size is 4×8 feet, allowing you to reach the center from either side without stepping into the bed. Consider the amount of sunlight your chosen spot receives—most vegetables and herbs require at least 6-8 hours of direct sun per day. Also, think about the height; a bed between 10-12 inches is usually sufficient for most plants, though deeper roots crops may benefit from 18-24 inches.
Essential Tools and Materials:
- Reclaimed wood (sufficient quantity for your desired dimensions and height)
- Measuring tape
- Pencil or marker
- Saw (circular, miter, or hand saw)
- Drill and drill bits
- Exterior wood screws (3-inch minimum, rust-resistant)
- Level
- Square (optional, for precise corners)
- Shovel or spade
- Staple gun and landscape fabric/cardboard (optional, for lining)
Step-by-Step Construction Guide
Step 1: Prepare Your Reclaimed Wood
Once you’ve gathered your wood, clean off any dirt, nails, or staples. If necessary, give it a light sanding to remove splinters or rough edges. Measure and cut your planks according to your chosen dimensions. For a 4×8 foot bed, you’ll need two 8-foot pieces and two 4-foot pieces for each layer of height. If your wood isn’t consistently wide, try to use pieces of similar width for each layer to maintain a level top edge.
Step 2: Assemble the First Layer of the Frame
Lay out your cut pieces on a flat surface to form a rectangle. Using your drill, pre-drill pilot holes at the corners to prevent the wood from splitting. Then, secure the corners together with two or three exterior wood screws, making sure the frame is square and level. Repeat this process for each subsequent layer if you’re building a taller bed, stacking and screwing each layer to the one below it.
Step 3: Add Corner Supports (Optional but Recommended)
For added stability, especially with softer reclaimed wood or taller beds, consider adding interior corner posts. You can use extra pieces of reclaimed wood (e.g., 2x4s or 4x4s) cut to the height of your bed. Place these posts vertically inside each corner and screw them into the adjacent side planks. This will significantly strengthen your structure.
Step 4: Line the Bed (Optional but Recommended)
While not strictly necessary, lining the bottom and/or sides of your raised bed can offer several benefits. A layer of cardboard at the bottom can help suppress weeds and decompose over time, adding organic matter. Landscape fabric along the sides can prevent soil from escaping through gaps in the wood and deter pests like voles. Simply staple the fabric to the inside of the frame.
Step 5: Fill with Soil
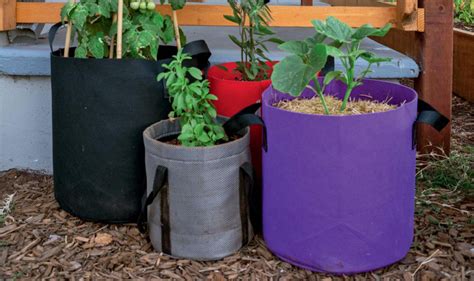
Now comes the satisfying part! Fill your newly constructed raised bed with a high-quality soil mix. A good general-purpose mix often includes a combination of topsoil, compost, and an aeration amendment like perlite or vermiculite. Avoid using only garden soil, which can compact too much. Once filled, you’re ready to plant your favorite vegetables, herbs, or flowers.

Tips for Success and Maintenance
To ensure your reclaimed wood raised garden bed thrives for years:
- Drainage: Ensure good drainage. If placing on concrete, consider drilling small drainage holes in the bottom if you add a solid base, or simply skip a solid bottom.
- Pest Control: If rodents are an issue in your area, consider laying down hardware cloth at the bottom of the bed before adding soil.
- Longevity: While reclaimed wood is often naturally durable, you can extend its life by applying an non-toxic, food-safe wood sealant to the exterior. Avoid treating the interior where it will be in direct contact with soil and plants.
- Watering: Raised beds tend to dry out faster than in-ground gardens, so monitor moisture levels frequently, especially during hot, dry spells.
Building a raised garden bed from reclaimed wood is a rewarding project that combines sustainability, cost-effectiveness, and aesthetic appeal. With a bit of planning and effort, you’ll create a beautiful and productive growing space that reflects your commitment to DIY and eco-conscious living.


