


Simple DIY raised garden bed plans for maximizing homestead food production?

The Homestead Advantage of Raised Beds
For homesteaders focused on self-sufficiency, maximizing food production is paramount. Raised garden beds offer a powerful, yet simple, solution. They allow for superior soil control, better drainage, extended growing seasons, and easier access, all contributing to significantly higher yields from a smaller footprint. Building them yourself not only saves money but also ensures they meet the specific needs and aesthetic of your homestead.
This guide will walk you through simple, cost-effective DIY plans to construct robust raised beds, transforming your gardening efforts and boosting your family’s food supply.

Why Raised Beds Are a Homestead Game-Changer
Raised beds tackle many common gardening challenges head-on. Their elevated structure means less bending and kneeling, making gardening more accessible and enjoyable. More importantly, they provide an ideal environment for plant growth:
- Improved Soil Quality: You control the soil mix, creating a nutrient-rich, well-draining medium perfect for vegetables, herbs, and fruits.
- Better Drainage: Raised beds prevent waterlogging, which is crucial for root health, especially in areas with heavy clay soil or high rainfall.
- Extended Growing Season: The soil in raised beds warms up faster in spring and stays warmer longer in fall, allowing you to plant earlier and harvest later.
- Weed and Pest Control: The defined boundaries make it easier to manage weeds, and the height can deter some ground-dwelling pests.
- Intensive Planting: With optimal soil and drainage, you can plant crops closer together, maximizing output per square foot.
Simple DIY Plans: Choose Your Material
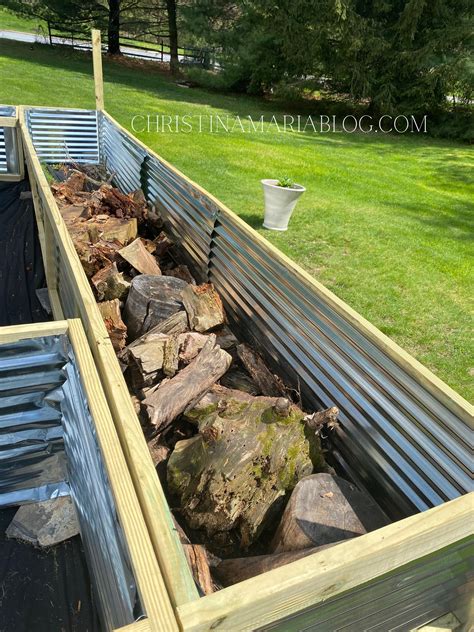
The beauty of DIY raised beds lies in their adaptability. You can construct them from a variety of readily available materials, often prioritizing what’s affordable, durable, and safe for food contact. Common choices include:
- Untreated Wood: Cedar, redwood, and cypress are naturally rot-resistant and long-lasting. Pine or fir are more economical but may have a shorter lifespan without treatment (ensure it’s food-safe if you choose treated wood, or better yet, opt for untreated).
- Corrugated Metal: A modern, durable, and often cost-effective option. It’s lightweight, easy to assemble, and heats up quickly.
- Stone, Brick, or Concrete Blocks: Extremely durable and long-lasting, these materials create a very stable and permanent structure. However, they can be more labor-intensive and expensive.
- Recycled Materials: Repurposed tires, old plastic barrels, or even hay bales can serve as temporary or low-cost raised beds.
For most homesteaders seeking simplicity and effectiveness, untreated wood (like standard pine or fir lumber) or corrugated metal panels offer the best balance of cost, ease of construction, and durability.
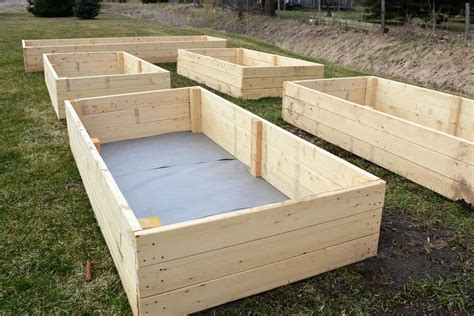
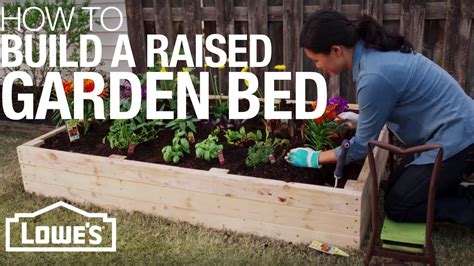
Basic Construction Steps for a Standard Wooden Bed
Let’s focus on a simple 4ft x 8ft x 12in wooden raised bed, a popular and manageable size.
Materials Needed:
- Two 2x6x8-foot untreated lumber boards (for the long sides)
- Two 2x6x4-foot untreated lumber boards (for the short sides)
- Four 2x2x12-inch untreated lumber stakes (for corner bracing)
- 3-inch exterior wood screws
- Optional: Weed barrier fabric or hardware cloth (to line the bottom)
Tools Needed:
- Measuring tape
- Pencil
- Circular saw or hand saw (if cutting your own lumber)
- Drill/driver with appropriate bit
- Level
Steps:
- Prepare Your Site: Choose a sunny, level spot. Clear any weeds or grass. If using a weed barrier, lay it down now.
- Cut and Layout Lumber: If your lumber isn’t pre-cut, cut your two 8-foot boards and two 4-foot boards. Layout the four boards to form a rectangle on your chosen site.
- Assemble the Frame: Position the 4-foot boards between the 8-foot boards (forming butt joints). Use your drill to pre-drill pilot holes to prevent splitting, then secure the corners with at least two 3-inch screws per joint.
- Add Corner Bracing: Place a 12-inch 2×2 stake vertically inside each corner of the assembled frame. Secure each stake to both adjoining boards with two screws. This significantly strengthens the bed.
- Level and Square: Use a level to ensure your bed is level. Make any minor adjustments to the ground beneath. Check that the corners are square by measuring diagonally from corner to corner – the measurements should be equal.
Filling and Preparing Your Bed for Maximum Yield
The soil you put into your raised bed is key to its success. Don’t just dump in garden soil; create a rich, living medium. Many homesteaders use a layering method, often called ‘lasagna gardening’ or ‘hugelkultur’ (if using logs/branches as a base).
Ideal Soil Mix:
A good general mix for a raised bed is approximately:
- 50% High-Quality Compost: This is the backbone of your soil, providing essential nutrients and beneficial microbes.
- 30% Topsoil or Garden Soil: Provides bulk and mineral content.
- 20% Organic Matter/Amendments: Peat moss or coco coir (for moisture retention), perlite or vermiculite (for aeration), and some aged manure if available.
Layering can also involve a base of cardboard (to suppress weeds), followed by small branches, leaves, grass clippings, kitchen scraps, and then topped with your rich soil mix. This mimics natural decomposition and creates a nutrient-dense, long-lasting growing medium.
Planting Strategies for Abundant Harvests
With your raised bed built and filled, it’s time to optimize for production.
- Intensive Planting: Plant crops closer than traditional row gardening. Square foot gardening is a popular method that maximizes space efficiently.
- Companion Planting: Pair plants that benefit each other (e.g., tomatoes with basil, carrots with rosemary) to deter pests and improve growth.
- Vertical Gardening: Utilize trellises, stakes, or cages for climbing plants like cucumbers, beans, peas, and some squash to save valuable horizontal space.
- Succession Planting: As one crop finishes, immediately plant another in its place to keep the bed continuously productive throughout the growing season.
- Crop Rotation: Even within a single bed, try to rotate where you plant different plant families each season to prevent nutrient depletion and disease buildup.
Ongoing Care and Maintenance
To keep your raised beds producing bountiful harvests year after year, consistent care is essential:
- Watering: Raised beds drain more efficiently, so they may require more frequent watering than in-ground gardens. Use mulch to conserve moisture.
- Mulching: Apply a layer of organic mulch (straw, wood chips, shredded leaves) to suppress weeds, retain soil moisture, and regulate soil temperature.
- Feeding: Replenish nutrients annually by adding a fresh layer of compost (1-2 inches) to the top of the bed each spring or fall. You can also use organic liquid fertilizers during the growing season.
- Pest and Disease Management: Regularly inspect your plants for signs of trouble. Practice good sanitation, companion planting, and hand-picking pests when necessary.
Conclusion
Building simple DIY raised garden beds is an incredibly rewarding and effective way to elevate your homestead’s food production. With minimal effort and readily available materials, you can create an optimal growing environment that yields healthier, more abundant harvests with less backache. Start small, learn as you go, and soon your homestead will be flourishing with fresh, homegrown food, contributing significantly to your journey toward self-sufficiency.


