


Simple DIY root cellar for year-round fresh food storage?

Unlock Year-Round Freshness with a Simple DIY Root Cellar
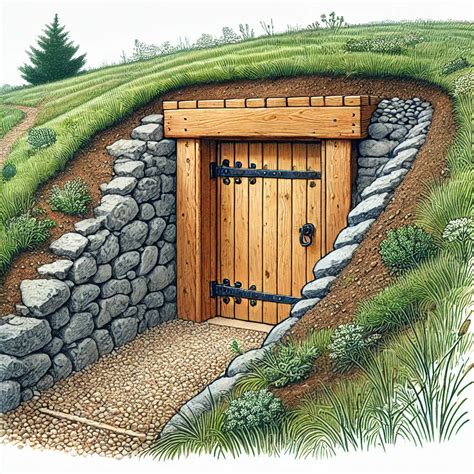
Imagine having access to crisp carrots, firm potatoes, and hardy apples months after harvest, all without relying on electricity. A root cellar is an age-old solution for preserving produce, leveraging the earth’s natural coolness and humidity. Far from being a complex underground bunker, a simple DIY root cellar can be created in various forms, making year-round fresh food storage an achievable dream for any home gardener or homesteader.
Why Invest in a DIY Root Cellar?
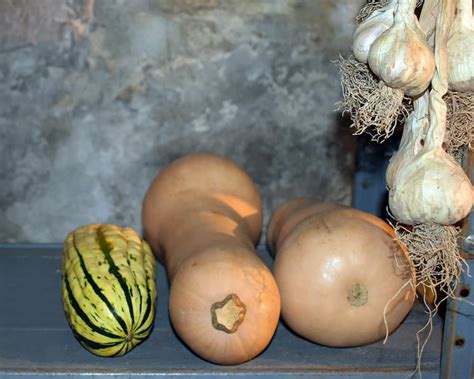
The benefits of a root cellar extend beyond just food preservation. It’s a sustainable practice that reduces reliance on refrigeration, saves money on grocery bills, and minimizes food waste. By storing your harvest in optimal conditions, you can enjoy peak-season flavors for longer, secure in the knowledge that your food supply is readily available. It’s an ideal solution for storing root vegetables, hard-skinned squash, fruits, and even some canned goods, providing a cool, dark, and moderately humid environment that extends shelf life naturally.

Choosing the Right Location and Design
The key to a successful root cellar lies in selecting the right location. Look for a spot that is naturally cool, shaded, and well-drained. Basements, unheated crawl spaces, or even a north-facing side of your house can be good starting points. For outdoor options, consider a shaded area under a tree, a small hill, or an unused corner of your garden. Simple DIY designs can range from burying a large plastic trash can or barrel to creating an insulated trench or a modified existing structure like a shed or unused closet.
Basic Design Principles:
- Cool Temperatures: Ideally between 35-50°F (2-10°C).
- High Humidity: 85-95% humidity is often desired for root vegetables.
- Darkness: Prevents sprouting and maintains quality.
- Ventilation: Essential for air circulation and preventing mold.
Simple DIY Root Cellar Options
1. Buried Trash Can or Barrel
This is perhaps the simplest and most cost-effective method. Dig a hole in a shaded, well-drained area large enough to accommodate a sturdy plastic trash can or barrel. Ensure the container has drainage holes at the bottom. Line the bottom with gravel for drainage, then add a layer of sand or straw. Place your vegetables, packed in sand, sawdust, or peat moss, inside the container. Add a lid with vent holes and cover it with a thick layer of straw or mulch for insulation. This method is excellent for carrots, potatoes, and beets.
2. Earth Mound or Clamp
For a temporary or very simple solution, an earth mound, or clamp, can be effective. Pile your hardy vegetables (like potatoes or cabbage) directly on the ground in a pyramid shape. Cover them first with a layer of straw, then with a generous layer of soil, ensuring good drainage around the base. Add a simple vent pipe (PVC pipe with holes) to allow for air exchange.

3. Modified Existing Space
If you have an unheated corner of a basement, a utility closet, or a small shed, you can modify it into a root cellar. Insulate the walls, floor, and ceiling with rigid foam insulation. Install a vent fan or a passive ventilation system (inlet and outlet pipes) to ensure airflow. Maintain humidity by placing a bucket of water or damp sand on the floor, or by misting occasionally. Shelving can be constructed from scrap wood or repurposed materials.
Key Steps for Building and Maintaining
Regardless of the design you choose, a few universal principles apply:
- Excavation & Drainage: For buried options, dig deep enough for the bulk of your storage to be below the frost line. Ensure good drainage to prevent water accumulation.
- Insulation: The earth itself provides natural insulation, but supplementing with straw, sawdust, wood chips, or rigid foam will help maintain stable temperatures.
- Ventilation: Proper airflow is crucial to prevent the buildup of ethylene gas (which can spoil produce) and to reduce condensation. A simple inlet pipe near the bottom and an outlet pipe near the top often suffice.
- Humidity Control: For most root crops, high humidity is key. This can be achieved through damp earth floors, buckets of water, or packing produce in moist sand or peat moss.
- Pest Control: Ensure your root cellar is sealed against rodents and insects. Use wire mesh over vents.
Stocking and Care
When stocking your root cellar, only store healthy, undamaged produce. Curing certain crops, like potatoes and squash, for a week or two before storage can improve their longevity. Store items like potatoes and apples separately if possible, as apples release ethylene gas that can encourage potatoes to sprout. Regularly check your stored goods for any signs of spoilage and remove affected items promptly to prevent contamination.
Conclusion
Building a simple DIY root cellar is an empowering project that reconnects you with traditional food preservation methods. It’s an investment in your food security, sustainability, and enjoyment of fresh, wholesome produce long after the harvest season has passed. With a little planning and effort, you can create a natural storage solution that provides year-round access to the bounty of your garden, making healthy eating easier and more affordable.
