


Simple DIY root cellar plans for storing garden harvest without electricity?
Embrace Off-Grid Storage: Your Guide to DIY Root Cellars
For centuries, root cellars have been a cornerstone of self-sufficiency, offering a natural, energy-free solution for preserving garden harvests. In an era of rising energy costs and a desire for sustainable living, relearning this ancient technique is more relevant than ever. This guide will walk you through simple, electricity-free DIY root cellar plans, enabling you to store your hard-earned produce long after the growing season ends.
Why a Root Cellar? The Benefits of Natural Storage
A root cellar is essentially a cool, dark, and humid storage space, often located underground, that mimics the ideal conditions for preserving many fruits and vegetables. Unlike refrigeration, which consumes electricity and can dry out produce, a root cellar relies on the earth’s stable temperature and natural humidity. The benefits are numerous:
- No Electricity Needed: Completely off-grid and eco-friendly.
- Extends Harvest: Keep root vegetables, apples, potatoes, and more fresh for months.
- Cost-Effective: Reduces food waste and trips to the grocery store.
- Preserves Nutrients: Slows down the ripening and spoilage process naturally.

Key Principles for a Successful Root Cellar
To ensure your root cellar works effectively, understanding its core requirements is crucial:
- Temperature: Ideally between 35-50°F (1.5-10°C). Consistency is key.
- Humidity: High humidity (85-95%) prevents produce from drying out.
- Darkness: Prevents sprouting and maintains quality.
- Ventilation: Fresh air circulation prevents mold and removes ethylene gas (which can accelerate ripening).
- Site Selection: Choose a spot that stays cool and is well-drained. Northern-facing slopes or shaded areas are often ideal.
Simple DIY Root Cellar Designs for Every Home
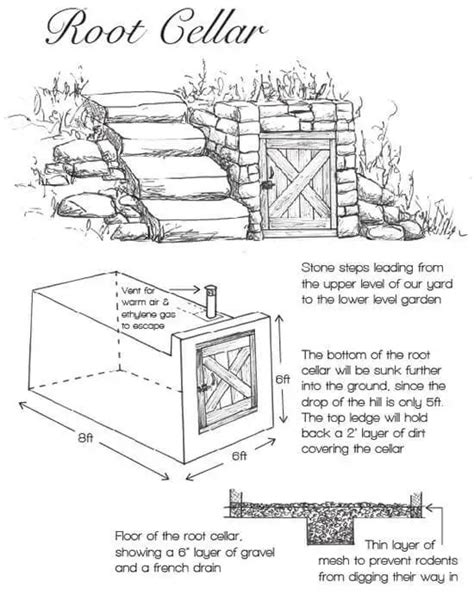
1. The Buried Container Cellar (Trash Can or Barrel)
This is one of the easiest and most common DIY methods. It involves burying a food-grade plastic trash can or a large wooden barrel in the ground. The earth provides natural insulation and temperature regulation.
Materials Needed:
- Food-grade plastic trash can with a lid, or a sturdy wooden barrel.
- PVC pipes for ventilation (one intake, one exhaust).
- Hardware cloth or fine mesh for vent covers.
- Shovel, gravel, straw, plywood, tarp.
Basic Steps:
- Dig a Hole: Dig a hole slightly larger and deeper than your container, ensuring good drainage. Add a layer of gravel at the bottom.
- Install Ventilation: Cut two holes near the top of the container (one low, one high for airflow). Insert PVC pipes, extending them above ground level and covering with mesh to deter pests.
- Bury the Container: Place the container in the hole. Backfill with soil, packing it firmly around the sides.
- Create a Lid: Secure the container’s lid. For extra insulation, you can create a removable insulated cover from plywood topped with straw or a tarp.
2. The In-Ground Pit Cellar
Even simpler, an in-ground pit cellar is ideal for small batches of produce. It’s essentially a lined trench or hole in the ground.
Materials Needed:
- Shovel, straw, sand, burlap or old blankets, wood planks or plywood.
Basic Steps:
- Dig a Trench: Dig a trench or pit about 2-3 feet deep, 2 feet wide, and as long as needed.
- Layering: Line the bottom with a thick layer of straw. Place your produce (e.g., carrots, potatoes) directly on the straw, perhaps layered with damp sand to maintain humidity.
- Cover and Insulate: Cover the produce with another thick layer of straw, then a layer of soil, and finally planks or plywood topped with more soil or a tarp to shed water.

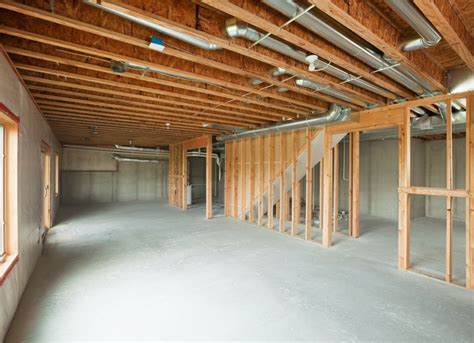
3. Utilizing an Existing Basement or Crawl Space
If you have a basement or an unused crawl space, you can often convert a section into a root cellar with minimal effort.
Modifications:
- Partitioning: Build a small insulated wall to separate a cool corner.
- Insulation: Insulate the walls, ceiling, and floor of your designated root cellar area.
- Ventilation: Ensure adequate air circulation. This might involve a small vent to the outside or a simple fan if truly necessary (though aiming for passive ventilation is best).
- Humidity Control: A bucket of water or damp sand can help maintain humidity.
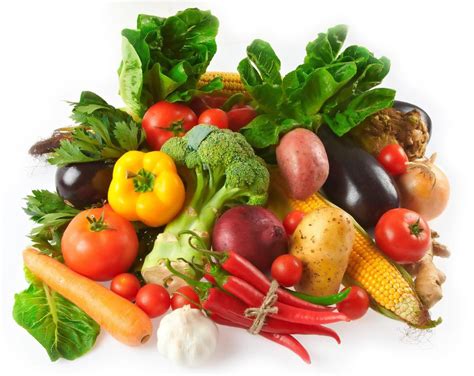
What to Store and How
Not all produce is suitable for root cellar storage, and preparation is key:
- Root Vegetables: Carrots, potatoes, beets, parsnips, turnips, rutabagas, and sweet potatoes do exceptionally well. Store them unwashed, brushed free of excess dirt, and trim off green tops.
- Apples & Pears: Store carefully, individually wrapped or separated, as one spoiled fruit can affect others. Keep away from root vegetables, as apples emit ethylene gas.
- Cabbages: Can be stored whole, sometimes hung by their roots.
- Onions & Garlic: Prefer cooler, drier conditions than most root vegetables. A separate, slightly less humid section is ideal.
Always inspect produce for blemishes or damage before storing; only perfect specimens will last.
Maintaining Your Root Cellar
Once built, your root cellar requires minimal but consistent attention:
- Monitor Conditions: Periodically check temperature and humidity with simple thermometers and hygrometers. Adjust ventilation as needed.
- Inspect Produce: Regularly check your stored goods and remove any that show signs of spoilage to prevent it from spreading.
- Pest Control: Ensure your vents are securely screened. Mice and other critters can be attracted to stored food.
- Cleanliness: Clean out your root cellar thoroughly once a year, typically before bringing in the new harvest.
Conclusion: A Step Towards Self-Sufficiency
Building a DIY root cellar is a rewarding project that reconnects you with time-honored methods of food preservation. It empowers you to maximize your garden’s bounty, reduce waste, and enjoy fresh, homegrown produce long into the winter months, all without relying on a single watt of electricity. With a little planning and effort, you can create a functional, sustainable storage solution that serves your family for years to come.


