Simple steps for creating nutrient-rich compost from kitchen and garden waste?

Creating your own nutrient-rich compost is one of the most rewarding and sustainable practices for any gardener. Not only does it divert waste from landfills, but it also provides your plants with a powerhouse of essential nutrients, improving soil structure, water retention, and overall plant health. Forget expensive fertilizers; homemade compost is the secret to a thriving garden. Let’s dig into the simple steps to turn your kitchen and garden waste into gardening gold.
Understanding the Basics: What You’ll Need
Before you start piling up your waste, it’s good to understand the fundamental components of successful composting and what tools will make the process easier. You’ll need a compost bin or pile, a pitchfork or aerator, and a water source.
Choosing Your Compost System
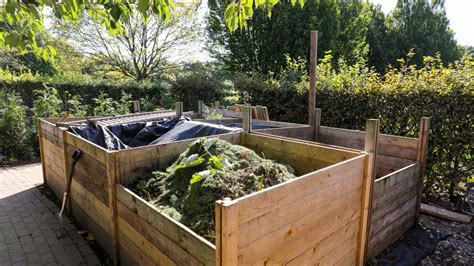
- Compost Bins: Available in various styles, from enclosed tumblers (great for small spaces and faster composting) to open-sided bins (ideal for larger volumes).
- Compost Piles: A simple, cost-effective option for larger gardens. Just designate a corner of your yard.
- Worm Composting (Vermicomposting): An excellent indoor option for kitchen scraps, utilizing red wiggler worms.
The Golden Rule: Balancing “Greens” and “Browns”
Successful composting hinges on achieving the right carbon-to-nitrogen ratio. This is typically done by balancing “greens” (nitrogen-rich materials) and “browns” (carbon-rich materials).
“Green” Materials (Nitrogen):
- Fruit and vegetable scraps
- Coffee grounds and tea bags
- Grass clippings
- Fresh garden trimmings
- Manure (from herbivores)
“Brown” Materials (Carbon):
- Dry leaves
- Shredded newspaper and cardboard
- Sawdust and wood chips (in moderation)
- Straw and hay
- Dried plant stalks
Aim for a ratio of approximately 2-3 parts brown to 1 part green. Too many greens can lead to a smelly, slimy pile, while too many browns will slow down decomposition.
Building Your Compost Pile: Layer by Layer
Once you have your materials, it’s time to assemble your compost pile. A good layering technique helps promote aeration and proper decomposition.
- Start with a Base: Begin with a layer of coarse, woody “brown” materials like small branches or straw. This allows for airflow from the bottom.
- Alternate Layers: Add a layer of “browns,” followed by a layer of “greens.” Continue alternating these layers.
- Add a Soil Activator (Optional): A thin layer of finished compost or garden soil every few layers can introduce beneficial microbes to kickstart the process.
- Moisten: Lightly water each layer as you add it. The pile should be consistently damp, like a wrung-out sponge, but not waterlogged.

Maintaining Your Compost: The Keys to Success
Composting isn’t just about piling things up; it requires a little ongoing care to thrive.
Moisture Control
Keep your compost pile consistently moist. If it gets too dry, decomposition will slow down. If it’s too wet, it can become anaerobic and smelly. Cover your pile during heavy rains to prevent waterlogging, and add water during dry spells.
Aeration (Turning Your Pile)
Turning your compost pile with a pitchfork or aerator introduces oxygen, which is crucial for the beneficial aerobic bacteria that break down organic matter. Aim to turn your pile every 1-2 weeks, especially when it’s actively heating up. This also helps mix the materials and prevent compaction.

Troubleshooting Common Composting Issues
- Foul Odor: Usually a sign of too much nitrogen (greens) or lack of oxygen. Add more browns and turn the pile.
- Slow Decomposition: Can be due to too many browns, not enough moisture, or lack of aeration. Adjust ratio, add water, and turn.
- Pests (Rodents, Flies): Avoid adding meat, dairy, oily foods, or pet waste. Ensure kitchen scraps are buried deep within the pile. An enclosed bin can help.
When Is Your Compost Ready?
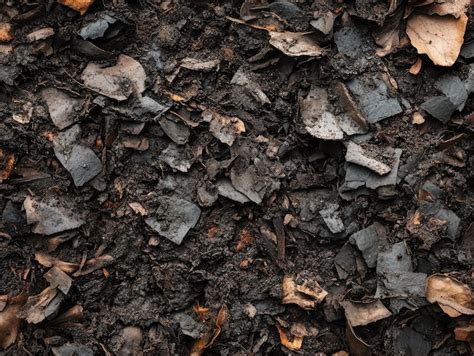
Finished compost will be dark brown, crumbly, and have an earthy smell. You shouldn’t be able to recognize the original materials. The decomposition process typically takes anywhere from two months to a year, depending on the materials, climate, and how frequently you turn the pile.
Harnessing the Power of Your Homemade Compost
Once your compost is ready, it’s time to enrich your garden! You can:
- Mix it into garden beds before planting.
- Use it as a top-dressing around existing plants.
- Incorporate it into potting mixes for containers.
- Spread it on your lawn as a natural fertilizer.
By following these simple steps, you’ll be well on your way to creating a continuous supply of nutrient-rich compost, transforming your waste into a valuable resource for a healthier, more vibrant garden. Happy composting!