Simple steps to create nutrient-rich compost from kitchen scraps for your garden?

Composting kitchen scraps is one of the most rewarding practices for any home gardener. Not only does it divert valuable organic material from landfills, but it also creates a free, nutrient-dense soil amendment that will make your plants thrive. Forget expensive fertilizers; your kitchen holds the secret to a healthier, more vibrant garden. Follow these simple steps to turn your everyday waste into black gold.
The Power of Compost: Why Every Garden Needs It
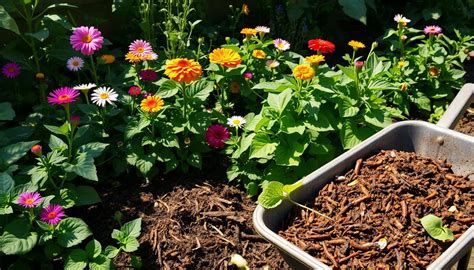
Compost isn’t just decaying matter; it’s a living ecosystem teeming with beneficial microorganisms that enrich your soil. When added to your garden beds, compost improves soil structure, enhances water retention, provides essential nutrients, and helps suppress plant diseases. It creates a fertile environment where roots can flourish, leading to stronger plants and more abundant harvests. Plus, it’s an incredibly satisfying way to practice sustainability at home.
What to Compost and What to Avoid
Understanding what goes into your compost pile is crucial for success. A good compost pile needs a balance of ‘greens’ (nitrogen-rich materials) and ‘browns’ (carbon-rich materials).
Greens (Nitrogen-Rich)
- Fruit and vegetable scraps (peels, cores, wilted produce)
- Coffee grounds and filters, tea bags
- Grass clippings and green leaves
- Plant trimmings (non-diseased)
Browns (Carbon-Rich)
- Dried leaves
- Shredded newspaper and cardboard (non-glossy, non-colored ink)
- Sawdust and wood chips (untreated)
- Straw or hay
What to Avoid
Certain items should never go into your compost pile as they can attract pests, cause odors, or introduce pathogens:
- Meat, bones, fish, and dairy products
- Oils and greasy foods
- Diseased plants
- Pet waste (dog or cat feces)
- Weeds that have gone to seed
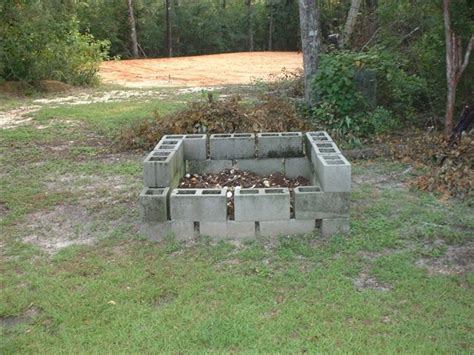
Setting Up Your Composting System
Before you start, choose a suitable location and method. A shaded spot in your garden is ideal, as direct sun can dry out your pile. You can use a simple open pile, a store-bought compost bin, or even a DIY container. Ensure it’s accessible for adding materials and turning.
Step-by-Step Guide to Composting Kitchen Scraps
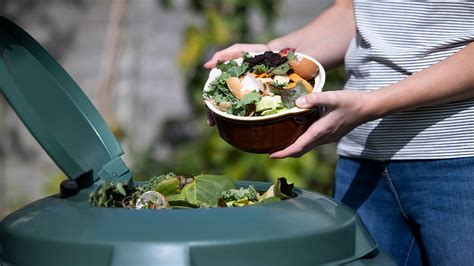
1. Collect Your Scraps
Keep a small, sealed container on your kitchen counter or under the sink for daily scraps. This makes it convenient to collect food waste without frequent trips to the main compost bin. Empty it into your larger outdoor compost system regularly.
2. Layering is Key: Greens and Browns
The secret to fast and efficient composting is layering. Aim for a ratio of roughly two parts brown material to one part green material. Start with a layer of browns at the bottom, then add a layer of greens, and cover with more browns. This balance prevents odors and ensures proper decomposition.
3. Maintain Moisture Levels
Your compost pile needs moisture, but not too much. It should feel like a wrung-out sponge – damp, but not soggy. If it’s too dry, decomposition slows down. If it’s too wet, it can become anaerobic and smelly. Add water with a hose if dry, or more browns if too wet.
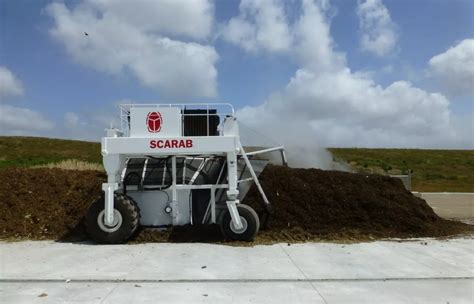
4. Aerate Regularly (Turn Your Pile)
Oxygen is vital for the microorganisms that break down your waste. Turn your compost pile with a pitchfork or aerating tool every week or two. This introduces air, mixes materials, and speeds up the decomposition process. A well-aerated pile will heat up, indicating active microbial life.
5. Be Patient and Harvest Your Black Gold
Composting takes time – anywhere from a few weeks to several months, depending on conditions and materials. You’ll know your compost is ready when it’s dark brown, crumbly, and smells like fresh earth, with no recognizable food scraps. Once ready, spread it around your plants, mix it into garden beds, or use it to top-dress your lawn. Your garden will thank you!

Troubleshooting Common Composting Issues
- Bad Odor: Usually indicates too much green material, not enough aeration, or too much moisture. Add more browns and turn the pile.
- Too Dry: Decomposition will slow or stop. Add water and turn.
- Not Breaking Down: Could be due to lack of moisture, aeration, or an imbalance of greens and browns. Adjust accordingly.
Conclusion
Creating nutrient-rich compost from kitchen scraps is a simple yet profoundly impactful practice for your garden and the environment. By following these steps, you’ll not only reduce waste but also cultivate a thriving garden that bursts with life and vitality. Start today, and watch your garden flourish with the power of homemade compost!