


Tips for freezing garden herbs to preserve flavor all winter?

As the gardening season winds down, many home gardeners find themselves with an abundance of fresh herbs. While drying is a traditional method, freezing offers an excellent way to capture the vibrant flavors and aromas of your herbs, keeping them tasting fresh all winter long. This guide will walk you through various techniques to preserve your homegrown bounty, ensuring your culinary creations benefit from that summery goodness even in the depths of winter.
Why Freeze Your Garden Herbs?
Freezing herbs is often preferred over drying for several reasons. Drying, especially for delicate herbs like basil, cilantro, and parsley, can diminish their vibrant color and some of their essential oils, leading to a less potent flavor. Freezing, on the other hand, locks in the freshness, color, and most of the flavor, making them a fantastic addition to soups, stews, sauces, and roasted dishes. It’s a quick and easy method that requires minimal effort and no special equipment beyond what you likely already have in your kitchen.
Essential Preparation Steps
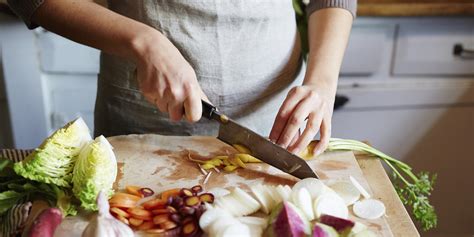
Before you begin any freezing method, proper preparation is key to ensuring your herbs retain their quality. First, thoroughly wash your herbs under cool running water to remove any dirt or insects. Next, and perhaps most importantly, dry them completely. Excess moisture can lead to freezer burn and diluted flavor. You can pat them dry with a clean kitchen towel or use a salad spinner for best results. For most freezing methods, you’ll want to remove the leaves from the stems, especially for woody herbs, and finely chop softer herbs like basil or cilantro.
Popular Freezing Methods for Every Herb
Method 1: Ice Cube Trays with Oil or Water (Best for Soft Herbs)
This method is fantastic for soft, leafy herbs like basil, parsley, cilantro, chives, mint, and oregano. Finely chop your cleaned and dried herbs. Pack them into ice cube trays, filling each compartment about two-thirds full. For a richer flavor and to prevent freezer burn, cover the herbs with a neutral oil (like olive oil or avocado oil) or water. If using oil, it’s best for herbs you plan to sauté or add to cooked dishes. Water is a good option for herbs you’ll add to soups or stews. Freeze until solid, typically a few hours. Once frozen, pop the herb cubes out of the trays and transfer them to freezer-safe bags or containers. This allows you to easily grab a pre-portioned amount for your cooking.
Method 2: Flash Freezing on a Baking Sheet (Ideal for Woody Herbs)
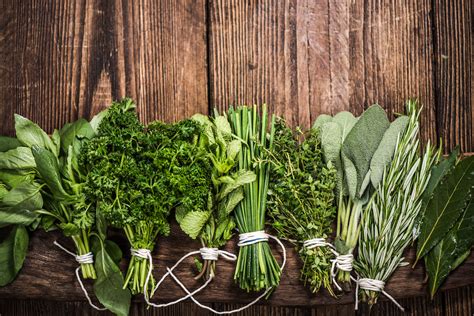
Woody herbs such as rosemary, thyme, sage, and bay leaves benefit greatly from flash freezing. After washing and thoroughly drying, remove the leaves from their stems (or keep bay leaves whole). Spread them in a single layer on a baking sheet lined with parchment paper. Place the baking sheet in the freezer for 1-2 hours, or until the herbs are completely frozen solid. This prevents them from clumping together. Once flash-frozen, transfer the loose herbs into freezer bags or rigid containers. This method allows you to easily grab individual sprigs or leaves as needed, without thawing a whole block.

Method 3: Freezing in Freezer Bags or Containers (Versatile and Simple)
For larger quantities of chopped herbs, or for a more direct approach, you can simply freeze them in freezer bags or airtight containers. Chop your herbs as desired. If you’re freezing softer herbs, you might want to slightly moisten them with a tiny bit of water or oil to help them stick together, forming a compact block. Pack the chopped herbs into freezer bags, pressing out as much air as possible to prevent freezer burn. Alternatively, use airtight freezer-safe containers. For bags, you can flatten them into thin sheets for easy breaking off portions later. This method works well for almost any herb, especially if you plan to use a larger quantity at once.

Labeling and Storage Tips
Regardless of the method you choose, proper labeling is crucial. Always label your bags or containers with the name of the herb and the date it was frozen. Herbs can lose potency over time, and knowing the date helps you use them within their prime. Most frozen herbs are best used within 6-12 months for optimal flavor. Store them in the coldest part of your freezer and ensure containers are tightly sealed to prevent freezer burn and absorption of other freezer odors.
Using Your Frozen Herbs
Once you’re ready to use your frozen herbs, there’s generally no need to thaw them first. Simply add the frozen cubes or loose herbs directly to your hot dishes, such as soups, stews, sauces, stir-fries, or roasted vegetables. The heat will quickly melt and release their flavor. For cold dishes like salads or dressings, you might want to thaw them briefly, though their texture might be slightly softer than fresh herbs. Remember, frozen herbs are best for cooked dishes where their texture isn’t the primary concern, but their flavor infusion is paramount.
Enjoy a Taste of Summer All Winter
Freezing your garden herbs is a simple, effective, and rewarding way to extend your harvest and infuse your winter cooking with the vibrant tastes of summer. By following these easy tips and choosing the best method for each type of herb, you’ll have a steady supply of fresh-tasting herbs at your fingertips, making every meal more delicious and reminding you of your thriving garden, even when it’s covered in snow.


