Tips for perfecting a traditional country pie crust from scratch for holiday guests?

The Heart of Homemade Holidays: Perfect Pie Crust
There’s something uniquely comforting and impressive about a homemade pie, especially during the holidays. And at the core of every truly great pie lies an impeccable crust – tender, flaky, and bursting with buttery flavor. While the idea of making pie crust from scratch can seem daunting, particularly with guests on the way, it’s an entirely achievable feat. With a few key techniques and a little patience, you can perfect a traditional country pie crust that will elevate your holiday desserts from delicious to unforgettable.
Understanding Your Ingredients: Cold is Key
The secret to a flaky crust begins with your ingredients, and specifically, their temperature. Cold is your best friend when it comes to pie dough.
- Flour: Use all-purpose flour. Some bakers swear by unbleached for better texture.
- Fat: A combination of unsalted butter and shortening (or lard for an authentic country taste) yields the best results. Butter provides incredible flavor and flakiness, while shortening contributes to tenderness and ease of handling. Ensure both are very cold, cut into small cubes.
- Liquid: Ice water is non-negotiable. The colder the water, the less gluten develops, resulting in a more tender crust. Some even add a splash of apple cider vinegar or vodka, which helps inhibit gluten formation, making the dough more pliable without adding extra moisture.
- Salt: Essential for flavor balance, don’t skip it!
Working quickly to keep ingredients cold throughout the process is crucial. The tiny pieces of cold fat melt in the oven, creating steam that separates the layers of dough, resulting in that coveted flakiness.
The Art of Assembly: Mixing and Chilling
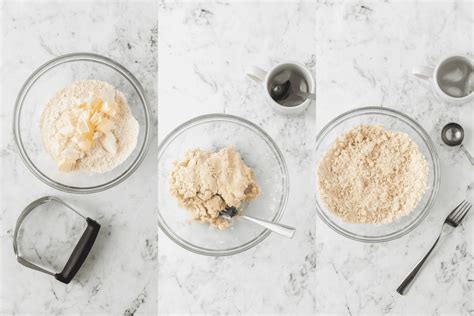
Once your ingredients are prepped, the mixing process requires a gentle touch. Combine flour and salt in a large bowl. Add your cold butter and shortening. Using a pastry blender, two knives, or your fingertips, cut the fat into the flour until the mixture resembles coarse meal with some pea-sized pieces of fat remaining. These larger pieces are what create the flaky pockets.
Next, gradually add the ice water, a tablespoon at a time, mixing lightly with a fork until the dough just comes together. Be careful not to overwork the dough, as this develops gluten and can lead to a tough crust. The dough should be moist enough to hold together but not sticky. Divide the dough into two discs (for a double-crust pie), wrap tightly in plastic, and refrigerate for at least 30 minutes, or up to 2 days. Chilling allows the gluten to relax and the fat to firm up, making the dough easier to roll and preventing shrinkage.
Rolling with Confidence: Achieving Even Perfection
When you’re ready to roll, remove one disc of dough from the fridge and let it sit at room temperature for just 5-10 minutes to make it slightly more pliable. On a lightly floured surface, begin rolling from the center outwards, rotating the dough frequently and lifting it occasionally to prevent sticking. Aim for an even thickness, about 1/8 inch, and a diameter roughly 2 inches larger than your pie plate.
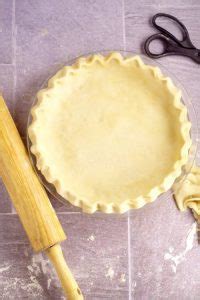
If cracks appear at the edges, simply pinch them together. Don’t be afraid to patch small tears with extra dough. Once rolled, carefully transfer the dough to your pie plate. Trim the edges, leaving about a 1/2-inch overhang, then crimp or flute as desired. For a double-crust pie, repeat the process for the top crust, remembering to cut vents for steam to escape.
Baking for Brilliance: Tips for a Golden Finish
For many pies, especially fruit pies, blind baking (pre-baking) the bottom crust isn’t strictly necessary, but it can prevent a soggy bottom, particularly for wetter fillings. If blind baking, line the dough with parchment paper, fill with pie weights or dried beans, and bake until the edges are set. Remove weights and paper, then continue baking until lightly golden.
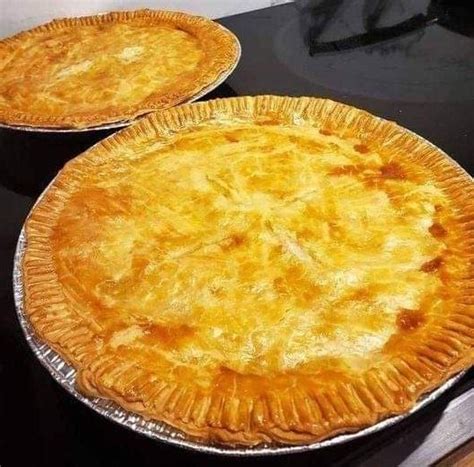
No matter what pie you’re making, ensure your oven is preheated to the correct temperature. Bake your pie on the lowest rack for even heat distribution. If the edges begin to brown too quickly, cover them loosely with aluminum foil. For a truly golden, professional-looking crust, brush the top with an egg wash (one egg beaten with a tablespoon of water) before baking. This also helps any sugar sprinkled on top adhere beautifully.
Conclusion: Your Holiday Pie Masterpiece Awaits
Perfecting a traditional country pie crust is a skill that comes with practice, but the rewards are immense. The aroma of a freshly baked pie, with its golden, flaky crust, is the essence of holiday warmth and hospitality. Your guests will undoubtedly appreciate the effort and love poured into a homemade crust, making your holiday desserts not just a treat for the taste buds, but a truly memorable experience. So embrace the process, trust in your ingredients, and get ready to impress with your perfect pie.