


Tips for safely canning garden tomatoes for winter use?

There’s nothing quite like the taste of homegrown tomatoes, and extending that fresh flavor into the colder months is a rewarding endeavor for any gardener. Canning tomatoes is a fantastic way to preserve your harvest, ensuring you have a stock of vibrant, nutritious tomatoes for sauces, soups, and stews all winter long. However, safe canning practices are paramount to prevent spoilage and foodborne illnesses. This guide will walk you through the essential steps and tips for successfully canning your garden tomatoes.
Why Can Your Garden Tomatoes?
Canning allows you to capture the peak freshness and flavor of your summer tomatoes, locking in nutrients and providing a convenient pantry staple. It’s an economical choice, reducing food waste and offering a healthy alternative to store-bought canned goods, which often contain added sugars, salts, or preservatives. Plus, the satisfaction of opening a jar of your own home-canned tomatoes on a snowy day is unparalleled.

Essential Equipment for Safe Canning
Having the right tools is crucial for a smooth and safe canning process. You’ll need:
- Canning Jars: Mason-type jars with two-piece lids (flat lid and screw band). Ensure they are clean and free from chips or cracks.
- Large Stockpot/Canner: A water bath canner with a rack for high-acid foods (like tomatoes with added acid) or a pressure canner for low-acid foods.
- Jar Lifter: For safely moving hot jars.
- Funnel: To minimize spills when filling jars.
- Ladle: For transferring tomatoes.
- Bubble Remover/Headspace Tool: A non-metallic tool to remove air bubbles and measure headspace.
- Clean Towels: For wiping jar rims.

Selecting and Preparing Your Tomatoes
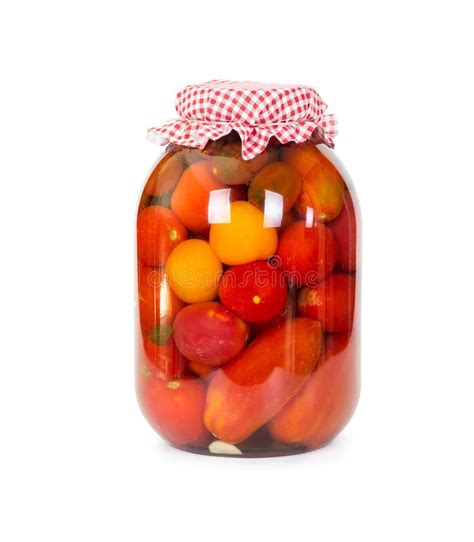
Start with the best quality tomatoes. Choose ripe, firm, disease-free tomatoes from your garden. Avoid any with soft spots, mold, or blemishes. Different varieties can be canned, but Roma or paste tomatoes are often preferred for their meaty texture and fewer seeds.
Preparation Steps:
- Wash Thoroughly: Rinse tomatoes under cool running water to remove any dirt or debris.
- Peel (Optional but Recommended): Blanch tomatoes in boiling water for 30-60 seconds, then immediately transfer to an ice bath. The skins should slip off easily.
- Core and Chop: Remove the core and chop tomatoes into desired pieces (halves, quarters, or crushed).

Understanding Acidity and Processing Methods
Tomatoes are borderline acidic, meaning their pH can vary. For safe water bath canning, you must add acid to ensure the pH is low enough to prevent the growth of Clostridium botulinum. Botulism is a serious foodborne illness, so this step is non-negotiable.
- Adding Acid: For each quart jar, add 2 tablespoons of bottled lemon juice or ½ teaspoon of citric acid. For pint jars, use 1 tablespoon of bottled lemon juice or ¼ teaspoon of citric acid. Do NOT use fresh lemon juice as its acidity can vary.
- Water Bath Canning: Suitable for crushed tomatoes, tomato juice, or whole/halved tomatoes with added acid. The jars are submerged in boiling water for a specific duration.
- Pressure Canning: The safest method for all tomato products, especially those without added acid or if you are making mixed vegetable sauces. Pressure canners reach higher temperatures, effectively destroying all harmful bacteria.

Step-by-Step Canning Process (Water Bath Example)
- Prepare Jars and Lids: Wash jars in hot soapy water and rinse well. Keep them hot (in a dishwasher or warm water) until ready to fill. Prepare new flat lids by simmering them in hot, but not boiling, water.
- Fill Jars: Pack prepared tomatoes (raw or hot pack) into hot jars. Add the required amount of bottled lemon juice or citric acid. Leave 1/2 inch headspace.
- Remove Air Bubbles: Use a non-metallic spatula or bubble remover to dislodge trapped air bubbles. Adjust headspace if necessary.
- Wipe Rims: Clean jar rims thoroughly with a damp, clean cloth to ensure a proper seal.
- Apply Lids and Bands: Place a hot, flat lid centered on the jar. Screw on the band fingertip-tight (just until resistance is met, no overtightening).
- Process Jars: Carefully lower jars onto the rack in your water bath canner, ensuring they are covered by at least 1-2 inches of boiling water. Bring to a rolling boil and process for the time specified by a tested recipe (adjusting for altitude).
- Cool and Check Seals: After processing, remove jars with a jar lifter and place them on a towel on the counter, leaving space between them. Do not disturb for 12-24 hours. Check seals: the lid should be concave and not flex when pressed.
Safe Storage and Enjoyment
Store properly sealed jars in a cool, dark, dry place. Remove screw bands after checking seals for long-term storage, as they can rust or hide false seals. Properly canned tomatoes can be stored for up to 1 year. Before using, always inspect the jar for any signs of spoilage like bulging lids, leaks, or off-odors. If in doubt, throw it out!
Canning your garden tomatoes is a wonderful way to extend the harvest and enjoy nutritious, homegrown goodness throughout the year. By following these safe canning practices, you can confidently preserve your bounty and savor the taste of summer even in the dead of winter.


